Search K
Appearance
Appearance
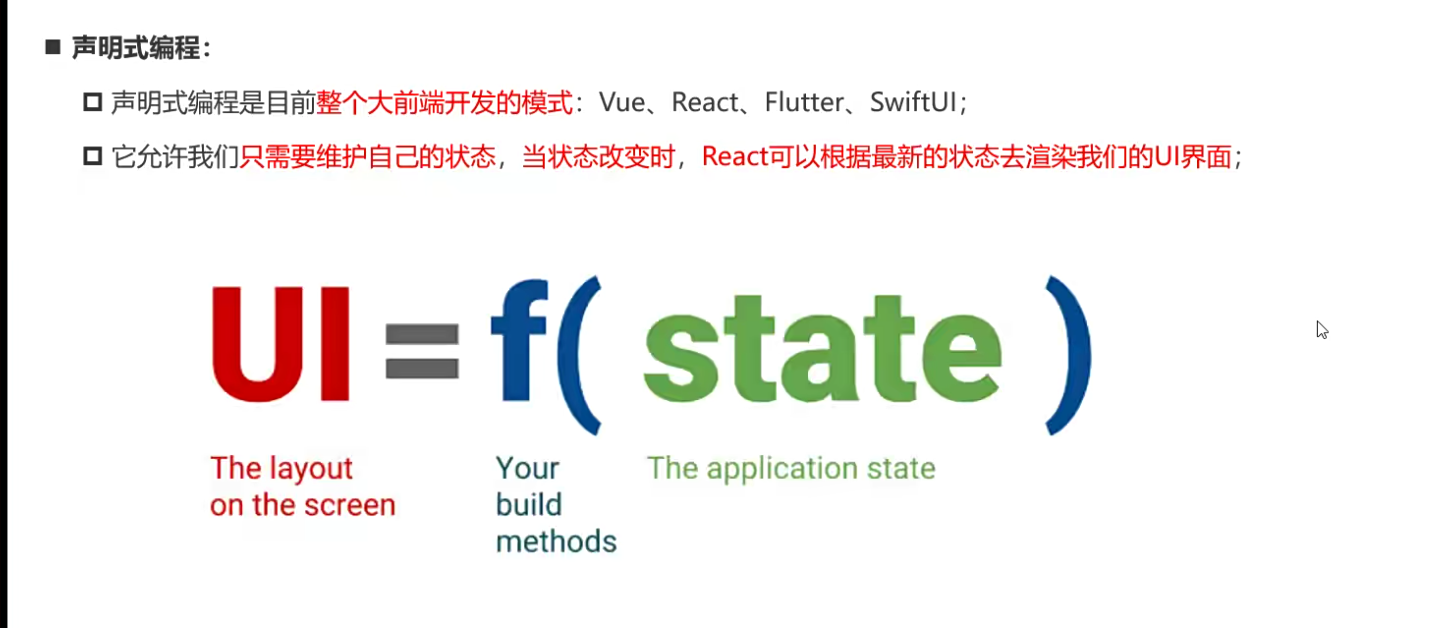
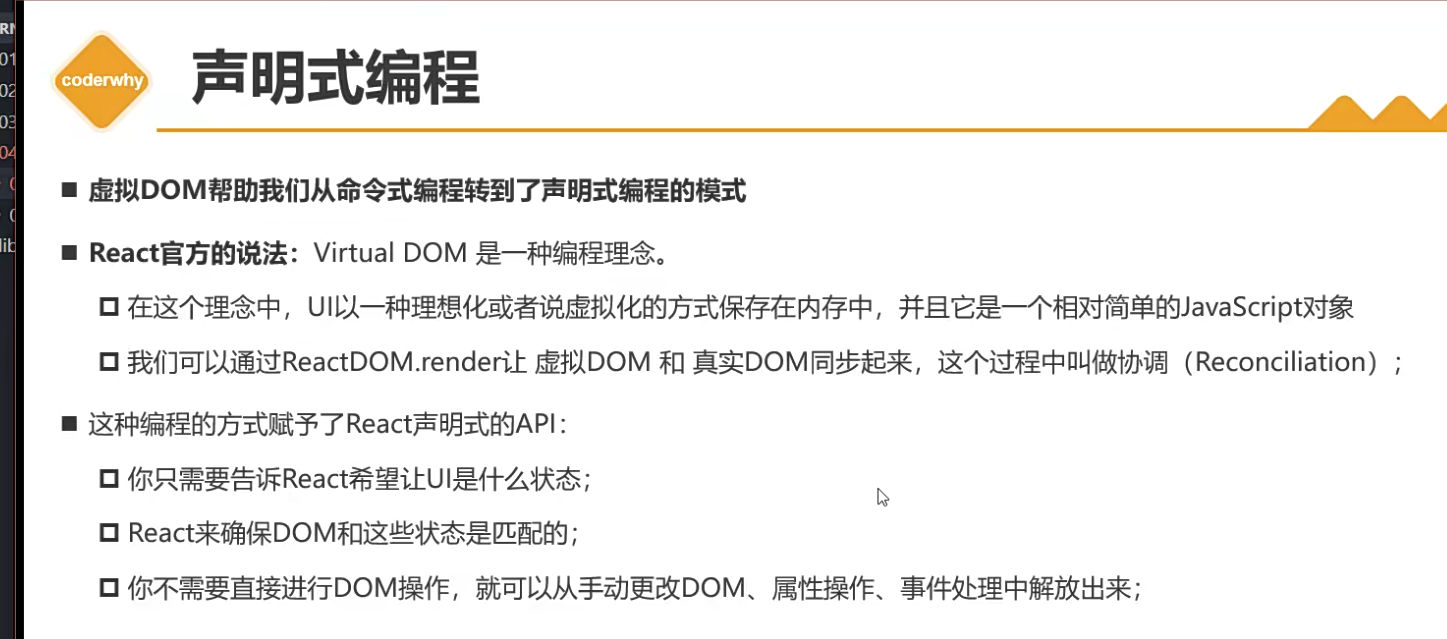
React采用的是声明式编程
转载地址:https://zhuanlan.zhihu.com/p/128125586
声明式和命令式是两种编程范式。react是声明式的,jquery那样直接操作dom是命令式.
一般来说,声明式编程关注于发生了啥,而命令式则同时关注于咋发生的。
也就是你只需要告诉“机器”你想要的是什么(what),让机器想出如何去做(how)
声明式编程的总结:
声明式编程让我们去描述我们想要的是什么,让底层的软件/计算机/等去解决如何去实现它们。
在很多情况中,就像我们看到的一样,声明式编程能给我们的编程带来真正的提升,通过站在更高层面写代码,我们可以更多的专注于what,而这正是我们开发软件真正的目标。
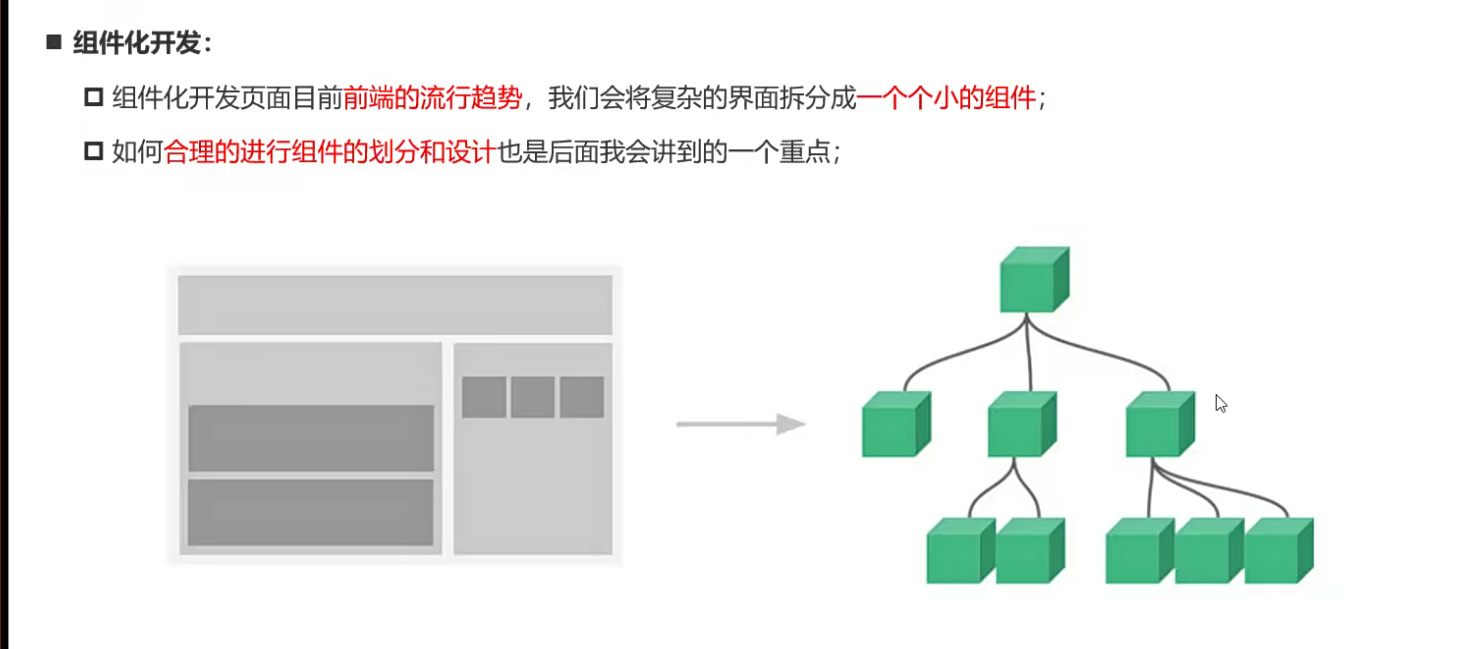
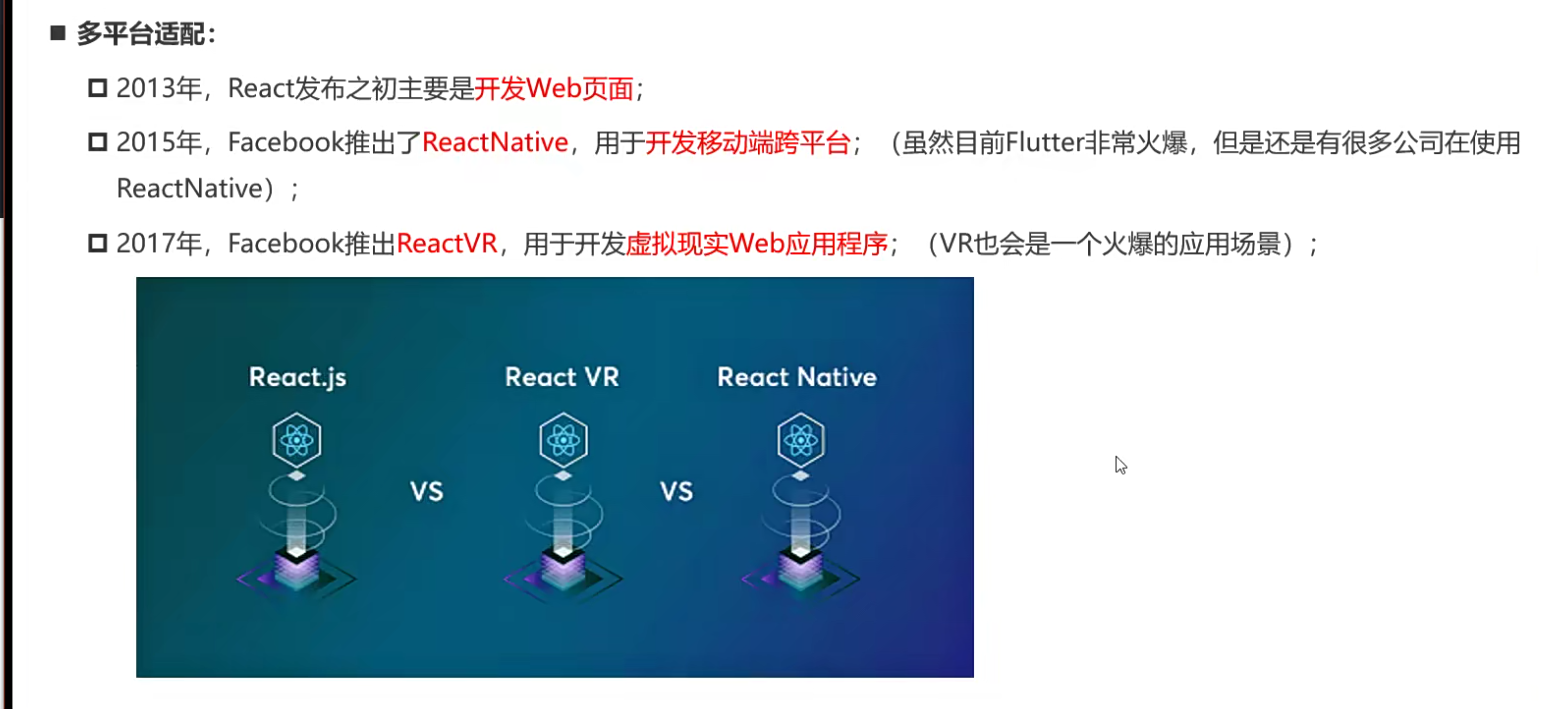
VR技术也是比较有前景的方向,学会React或许可能有VR的开发需求
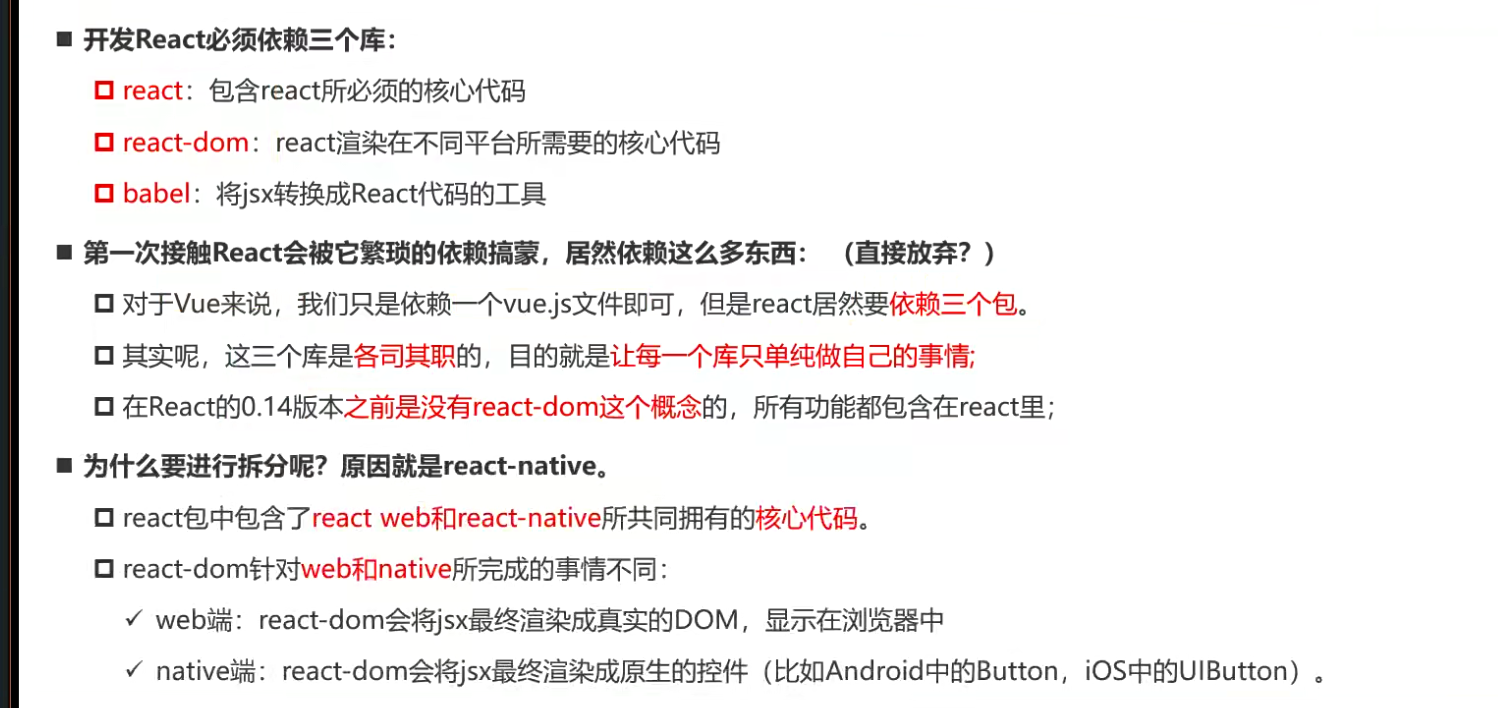
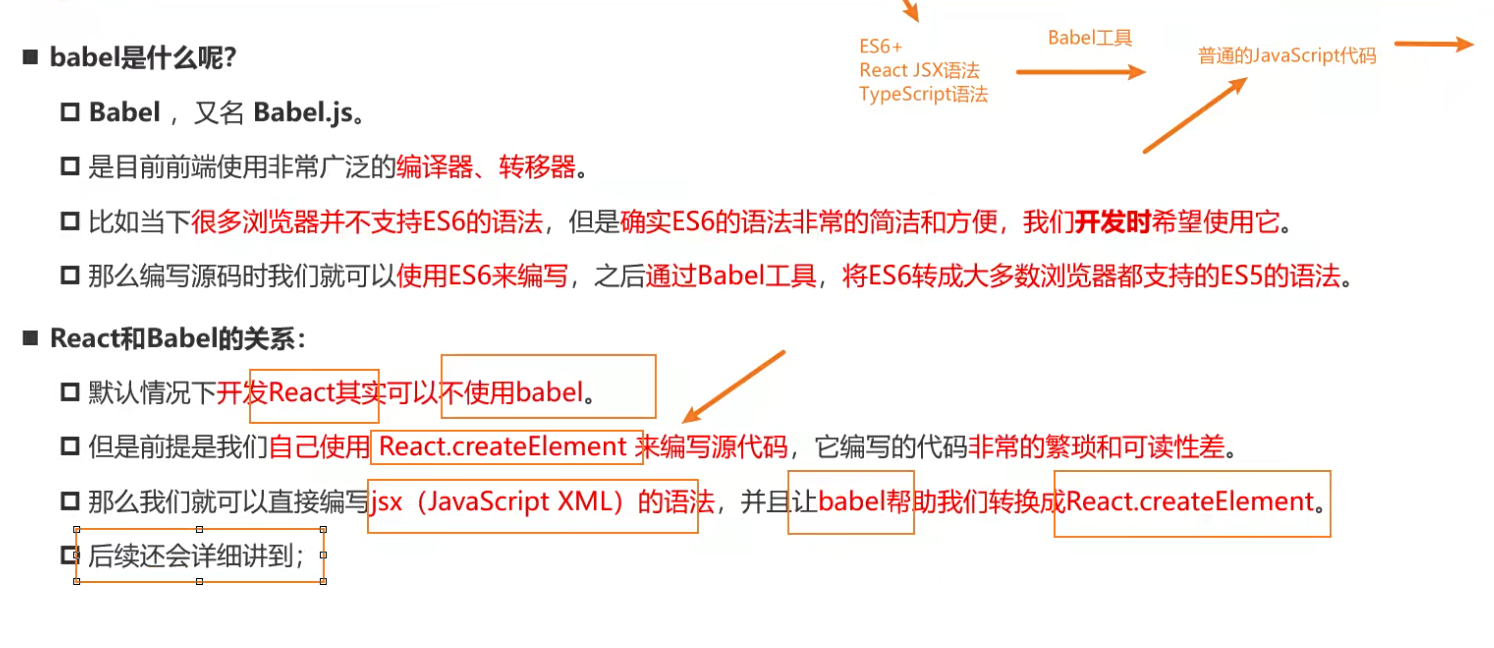
前期学习主要以html的方式,后面采用脚手架的方式
引入核心依赖
<script crossorigin src="https://unpkg.com/react@18/umd/react.production.min.js"></script>
<script crossorigin src="https://unpkg.com/react-dom@18/umd/react-dom.production.min.js"></script>
raact官网开始指引 引入babel
<script src="https://unpkg.com/babel-standalone@6/babel.min.js"></script>代码示例
<!DOCTYPE html>
<html lang="en">
<head>
    <meta charset="UTF-8">
    <title>Title</title>
</head>
<body>

<div id="root">

</div>

<div id="app">

</div>

<!--前期学习以html的方式-->
<!--添加依赖,依赖三个包react、react-dom、babel-->
<script crossorigin src="https://unpkg.com/react@18/umd/react.production.min.js"></script>
<script crossorigin src="https://unpkg.com/react-dom@18/umd/react-dom.production.min.js"></script>
<!--引入babel,编译jsx-->
<script src="https://unpkg.com/babel-standalone@6/babel.min.js"></script>


<!--只有加上type="text/babel" babel才认为需要转化-->
<script type="text/babel">
    // 渲染hello world
    // Reract18之前,ReactDOM.render(<h2>Hello World</h2>,document.querySelector('#root'))
    const root = ReactDOM.createRoot(document.querySelector('#root'))
    root.render(<h2>Hello world</h2>)

    const app = ReactDOM.createRoot(document.querySelector('#app'))
    app.render(<h2>你好世界</h2>)
</script>

</body>
</html>
总结:
Reract18之前采用的是ReactDOM.render函数直接渲染dom节点,之后采用的是createRoot先创建根节点再使用render函数进行渲染,Reract18支持同时渲染多个根节点babel进行转化需要加上type="text/babel"这里编写一个hello react得到案例理解变量函数绑定
代码示例
<!DOCTYPE html>
<html lang="en">
<head>
    <meta charset="UTF-8">
    <title>Title</title>
</head>
<body>
<div id="root"></div>

<script src="../libs/react.js"></script>
<script src="../libs/react-dom.js"></script>
<script src="../libs/babel.js"></script>

<script type="text/babel">
    let message = "hello world"
    function btnClick(){
        // 1、修改数据
        message = "hello react"

        // 2、渲染界面、当数据改变时并不会像Vue那样自动渲染界面,react中默认不会重新渲染界面, 有两种方式重新渲染界面

        // 第一种、再次调用render函数
        rootRender()

    }

    const root = ReactDOM.createRoot(document.querySelector('#root'))
    // 封装一个渲染函数
    function rootRender(){
        root.render((
            // jsx中任何绑定变量的方式都是{} 大括号来绑定
            <div>
                <h2>{message}</h2>
                <button onClick={btnClick}>修改文本</button>
            </div>
        ))
    }
    rootRender()
</script>
</body>
</html>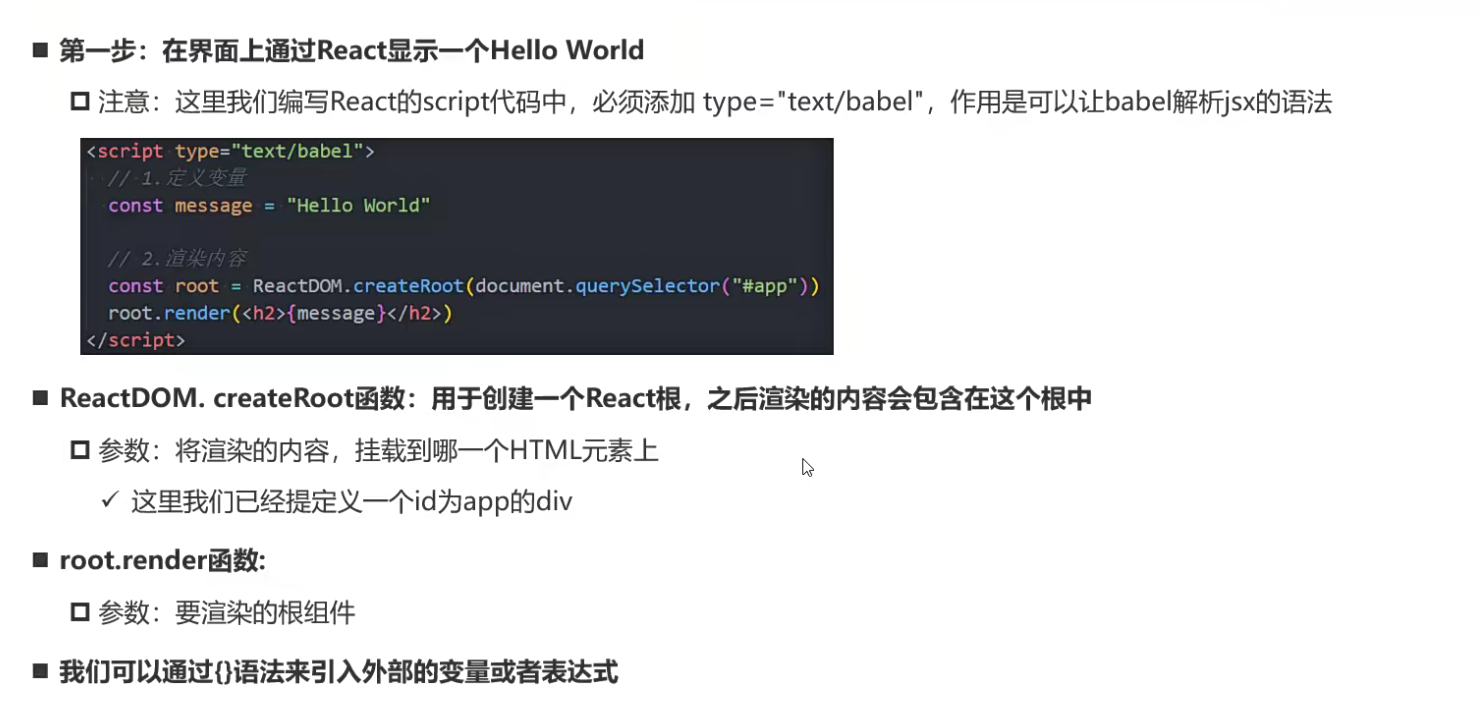
总结:
{}符号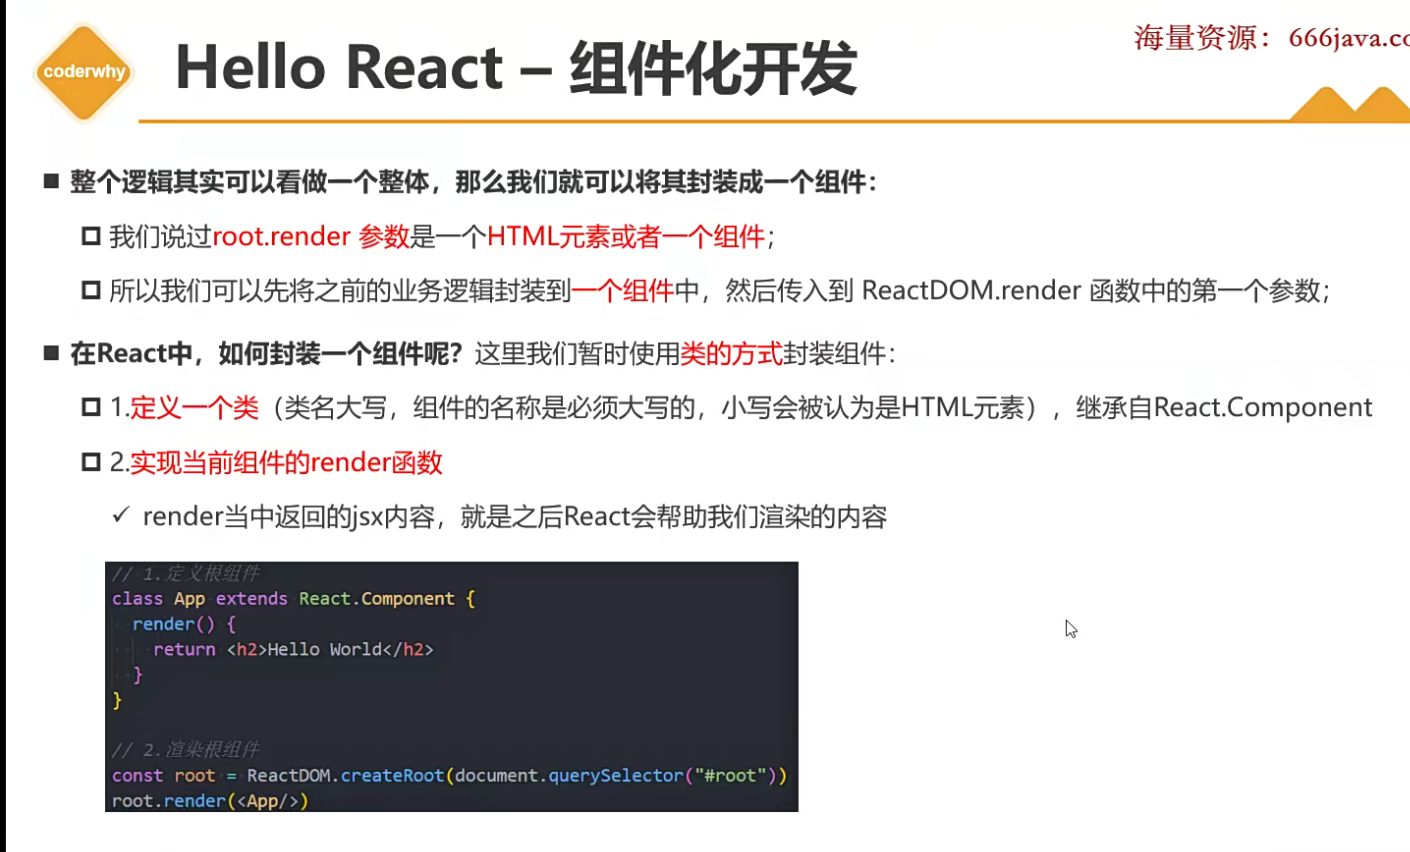
示例代码
<!DOCTYPE html>
<html lang="en">
<head>
    <meta charset="UTF-8">
    <title>Title</title>
</head>
<body>
<div id="root"></div>
<script src="../libs/react.js"></script>
<script src="../libs/react-dom.js"></script>
<script src="../libs/babel.js"></script>

<script type="text/babel">

    // 使用类组件来封装逻辑
    class App extends React.Component{
        // 组件数据
        constructor(props) {
            super(props);

            this.state = {
                message: "hello world"
            }
        }
        // 组件方法

        // 渲染内容
        render(){
            return (
                <div>
                    <h2>{this.state.message}</h2>
                    <button>修改文本</button>
                </div>
            )
        }
    }

    // 将组件渲染到界面中
    const root = ReactDOM.createRoot(document.querySelector('#root'))

    root.render(<App/>)
</script>
</body>
</html>
总结:
React中可以使用类组件将逻辑进行封装,类组件中的render函数表示组件渲染的内容state中React中在编写Jsx语法的时候用到了babel,babel在处理this指向问题的时候可能做了如下处理
const app = new App()
const foo = app.btnClick
foo()也就是说在赋值函数的时候可能丢失了this的指向,当然这是js的经典问题了,在react中就需要处理这个this指向问题
示例代码
<!DOCTYPE html>
<html lang="en">
<head>
    <meta charset="UTF-8">
    <title>Title</title>
</head>
<body>
<div id="root"></div>
<script src="../libs/react.js"></script>
<script src="../libs/react-dom.js"></script>
<script src="../libs/babel.js"></script>

<script type="text/babel">

    // 使用类组件来封装逻辑
    class App extends React.Component{
        // 组件数据
        constructor(props) {
            super(props);

            this.state = {
                message: "hello world"
            }

            // 3、对需要绑定的方法在初始化的时候提前绑定好this
            this.btnClick = this.btnClick.bind(this)
        }
        btnClick(){
            // 内部完成了两件事: 1、修改message的值 2、自动执行render的值
            this.setState({
                message: "hello react"
            })
        }
        // 组件方法

        // 渲染内容
        render(){
            console.log("this",this)
            // 这里不使用箭头函数会导致这里的this指向undefined,babel将其转化为了严格模式,并且会将这里的this传递给了其他地方,导致this指向丢失了

            // 解决办法如下:
            // 1、使用箭头函数可以保留this指向到当前实例
            // 2、使用bind函数改变this指向
            return (
                <div>
                    <h2>{this.state.message}</h2>
                    <button onClick={this.btnClick}>修改文本</button>
                    <button onClick={() => { this.btnClick() }}>箭头函数绑定this指向</button>
                    <button onClick={ this.btnClick.bind(this) }>bind绑定this指向</button>
                </div>
            )
        }
    }

    // 将组件渲染到界面中
    const root = ReactDOM.createRoot(document.querySelector('#root'))

    root.render(<App/>)
</script>
</body>
</html>
总结:
this指向,ES6中的特性,这种方法比较简洁this指向,这也是React官方推荐的方式bind函数改变this指向示例代码
<!DOCTYPE html>
<html lang="en">
<head>
    <meta charset="UTF-8">
    <title>Title</title>
</head>
<body>
<div id="root"></div>
<script src="../libs/react.js"></script>
<script src="../libs/react-dom.js"></script>
<script src="../libs/babel.js"></script>

<script type="text/babel">
    const root = ReactDOM.createRoot(document.querySelector("#root"))
    class App extends React.Component{
        constructor() {
            super();
            this.state = {
                movies: ["美人鱼","流浪地球","星际穿越","火星救援","红楼梦"]
            }
        }

        render(){
            let liEls = this.state.movies.map((item,index) => {
                if(item!="红楼梦"){
                    return <li>{item}</li>
                }
            })

            return (
                <div>
                    <h2>电影列表</h2>
                    <h3>方法一</h3>
                    <ul>
                        {this.state.movies.map((item, index) => <li>{item}</li>)}
                    </ul>

                    <h3>方法二</h3>
                    <ul>
                        {liEls}
                    </ul>
                </div>
            )
        }
    }
    root.render(<App/>)
</script>
</body>
</html>vscode可以配置代码段以简化开发

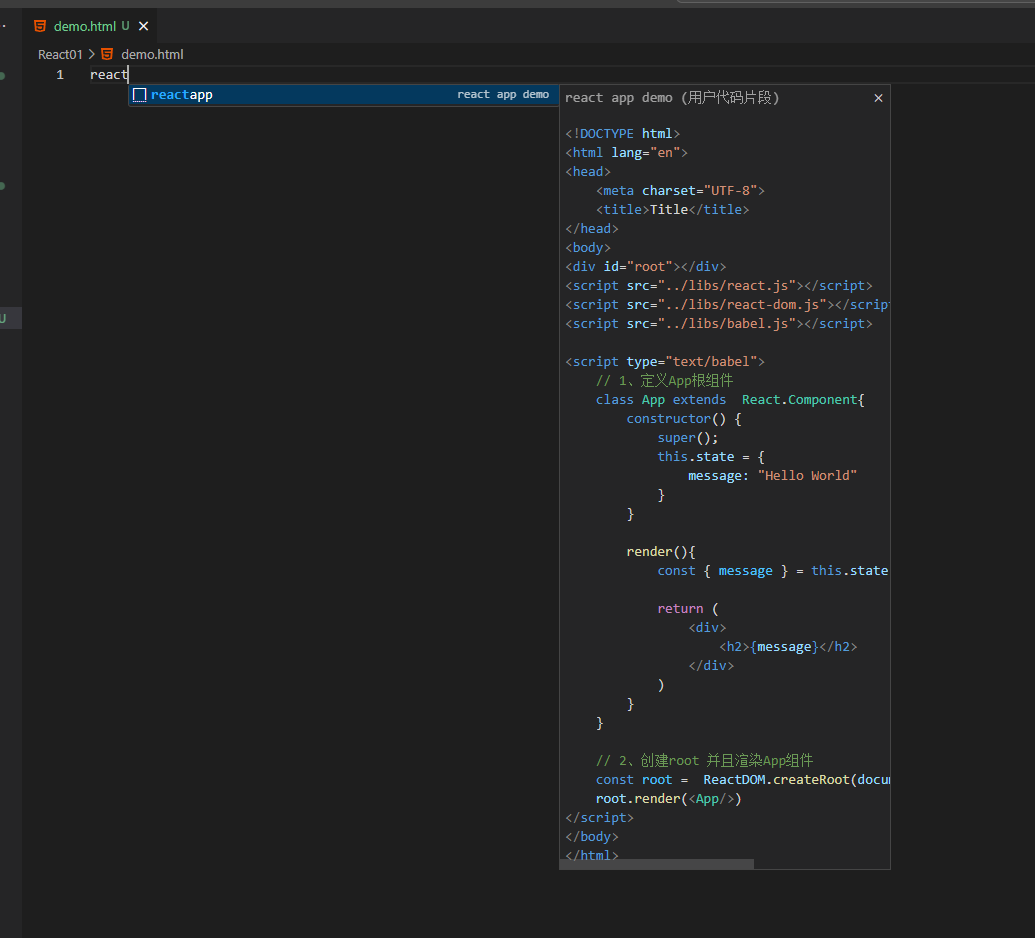
配置步骤:
文件/首选项/配置用户代码片段/html.json
配置模板
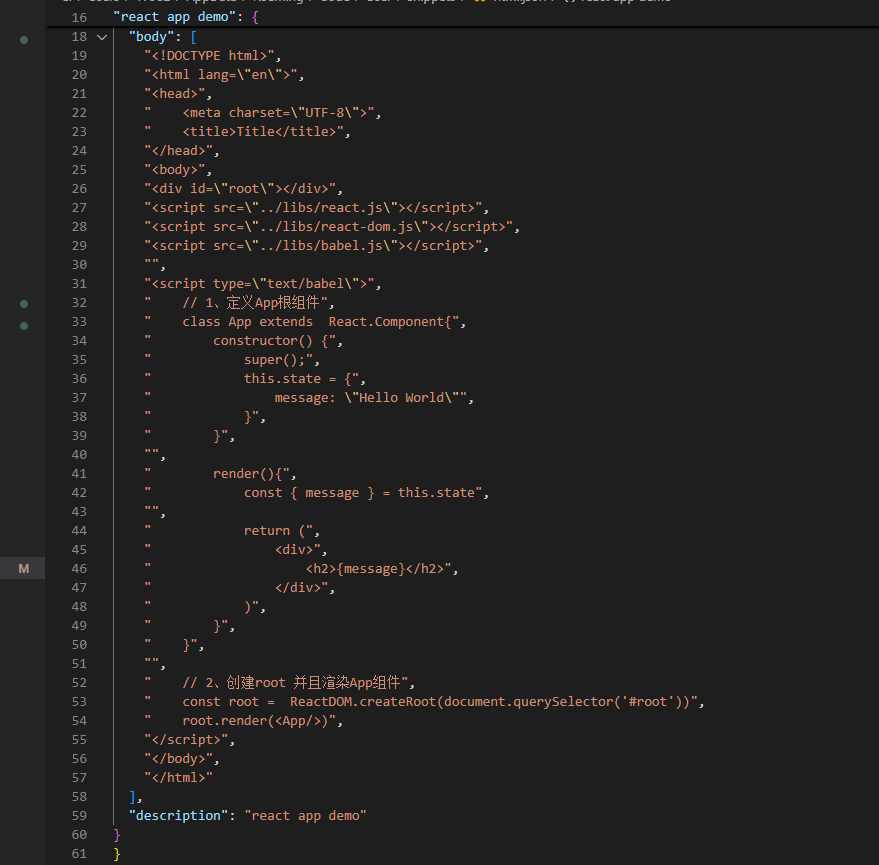
配置模板后,输入reactapp后即可展示模板
<!DOCTYPE html>
<html lang="en">
<head>
    <meta charset="UTF-8">
    <title>Title</title>
    <style>
        .active{
            width: 100px;
            height: 100px;
            background-color: pink;
        }
    </style>
</head>
<body>
<div id="root"></div>
<script src="../libs/react.js"></script>
<script src="../libs/react-dom.js"></script>
<script src="../libs/babel.js"></script>

<script type="text/babel">
    // 1、定义App根组件
    class App extends  React.Component{
        constructor() {
            super();
            this.state = {
                message: "red",
                isActive: true,

                objStyle : { color: 'red', fontSize: "30px" }
            }
        }

        render(){
            const { message,isActive } = this.state

            // 动态绑定class
            // 1、第一种方式
            const className = `abc ${ isActive ? 'active' : '' }`

            // 2、第二种方式
            const classList = ['abc','cba']
            if(isActive) classList.push('active')

            // 3、第三种方式
            // classsname 第三方库实现

            return (
                <div>
                    <div className={className}>div1</div>
                    <div className={classList.join(" ")} style={this.state.objStyle}>div2</div>
                    <button onClick={() => { this.setState({ isActive: !this.state.isActive }) }}>切换</button>
                </div>
            )
        }
    }

    // 2、创建root 并且渲染App组件
    const root =  ReactDOM.createRoot(document.querySelector('#root'))
    root.render(<App/>)
</script>
</body>
</html><!DOCTYPE html>
<html lang="en">
<head>
<meta charset="UTF-8">
<title>Title</title>
</head>
<body>
<div id="root"></div>
<script src="../libs/react.js"></script>
<script src="../libs/react-dom.js"></script>
<script src="../libs/babel.js"></script>
<script type="text/babel">
// 1、定义App根组件
class App extends React.Component{
constructor() {
super();
this.state = {
message: "Hello World"
}
}
btnClick(event,name,age){
console.log("event",event);
console.log("name",name);
console.log("age",age);
}
render(){
const { message } = this.state
return (
<div>
{/* 1、event参数传递 */}
<button onClick={this.btnClick.bind(this)}>按钮1</button>
<button onClick={(event) => { this.btnClick(event) }}>按钮2</button>
{/* 2、额外的参数传递 */}
{/* 需要注意的是,此种方式传递,event会作为最后一个参数 */}
<button onClick={this.btnClick.bind(this,"zhangsan",30)}>按钮3</button>
<button onClick={(event) => { this.btnClick(event,"zhangsan",20) }}>按钮4</button>
</div>
)
}
}
// 2、创建root 并且渲染App组件
const root = ReactDOM.createRoot(document.querySelector('#root'))
root.render(<App/>)
</script>
</body>
</html><!DOCTYPE html>
<html lang="en">
<head>
<meta charset="UTF-8">
<title>Title</title>
</head>
<body>
<div id="root"></div>
<script src="../libs/react.js"></script>
<script src="../libs/react-dom.js"></script>
<script src="../libs/babel.js"></script>
<script type="text/babel">
// 1、定义App根组件
class App extends React.Component {
constructor() {
super();
this.state = {
message: "准备开始比赛",
isReady: false,
friend: {
name: "张三",
desc: "中锋"
}
// friend: undefined
}
}
render() {
const { message, isReady , friend } = this.state
// 方式1:提前用if进行判断
let element = null
if (isReady) {
element = <h2>开始比赛!</h2>
} else {
element = <h2>继续准备!</h2>
}
return (
<div>
<h2>{message}</h2>
{/*方式1*/}
<div>{element}</div>
{/*方式2:三元运算符判断*/}
<div>{isReady ? <h2>开始比赛</h2> : <h2>继续准备</h2>}</div>
{/*方式3:逻辑与运算*/}
{/*friend为null或者undefined的时候就不会渲染*/}
<div>{friend && <div>{friend.name + " " + friend.desc}</div>}</div>
</div>
)
}
}
// 2、创建root 并且渲染App组件
const root = ReactDOM.createRoot(document.querySelector('#root'))
root.render(<App />)
</script>
</body>
</html><!DOCTYPE html>
<html lang="en">
<head>
<meta charset="UTF-8">
<title>Title</title>
</head>
<body>
<div id="root"></div>
<script src="../libs/react.js"></script>
<script src="../libs/react-dom.js"></script>
<script src="../libs/babel.js"></script>
<script type="text/babel">
// 1、定义App根组件
class App extends React.Component {
constructor() {
super();
this.state = {
message: "Hello World",
students: [
{
name: "张三",
id: 1,
score: 99
},
{
name: "李四",
id: 2,
score: 60
},
{
name: "王五",
id: 3,
score: 70
}
]
}
}
render() {
const { message, students } = this.state
return (
<div>
{/* 需求:展示students中分数大于50分的前两条数据 */}
<div>
{
students.filter(item => item.score > 50).slice(0, 2).map(item => {
return (
// 绑定key提高diff算法效率,消除警告
<div key={item.id}>
<h2>学生信息</h2>
<div>学号:{item.id}</div>
<div>姓名:{item.name}</div>
<div>分数:{item.score}</div>
</div>
)
})
}
</div>
</div>
)
}
}
// 2、创建root 并且渲染App组件
const root = ReactDOM.createRoot(document.querySelector('#root'))
root.render(<App />)
</script>
</body>
</html>jsx的本质是babel进行转化,将其转化为React.createElement的语法糖
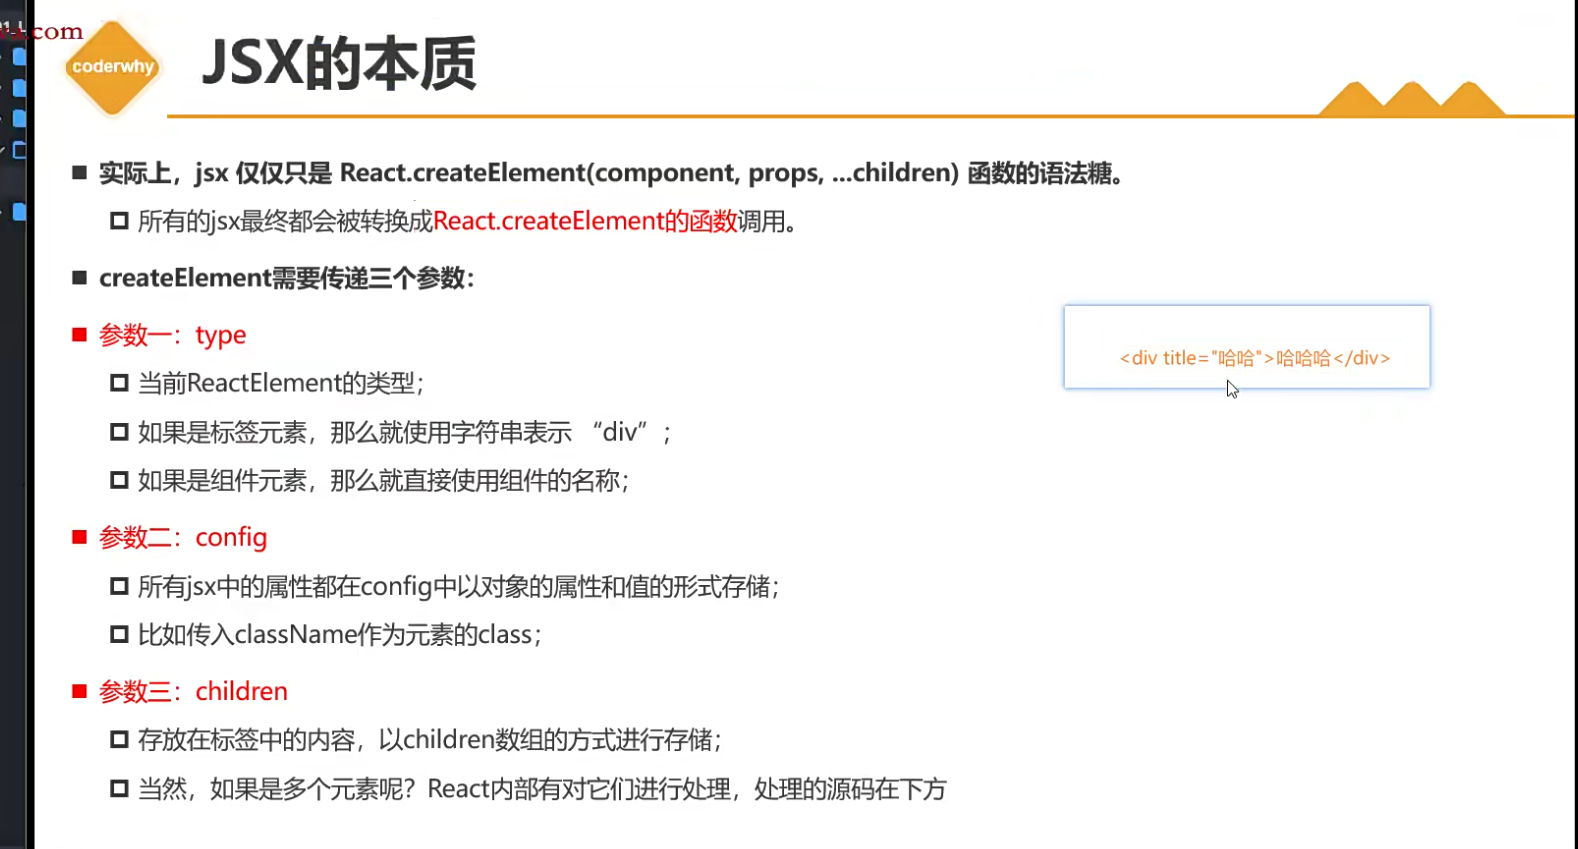
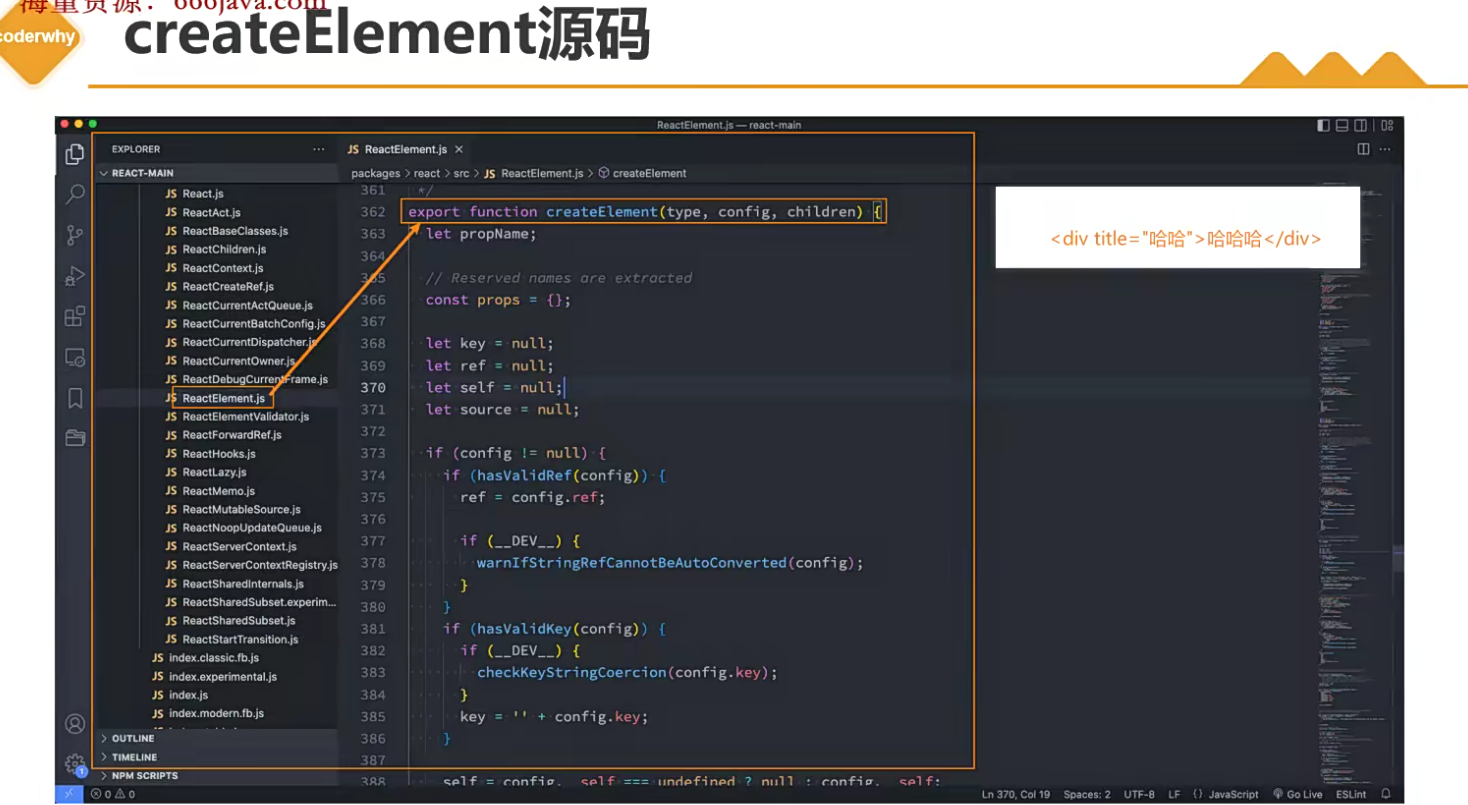
可以通过过babel官网验证转化规则
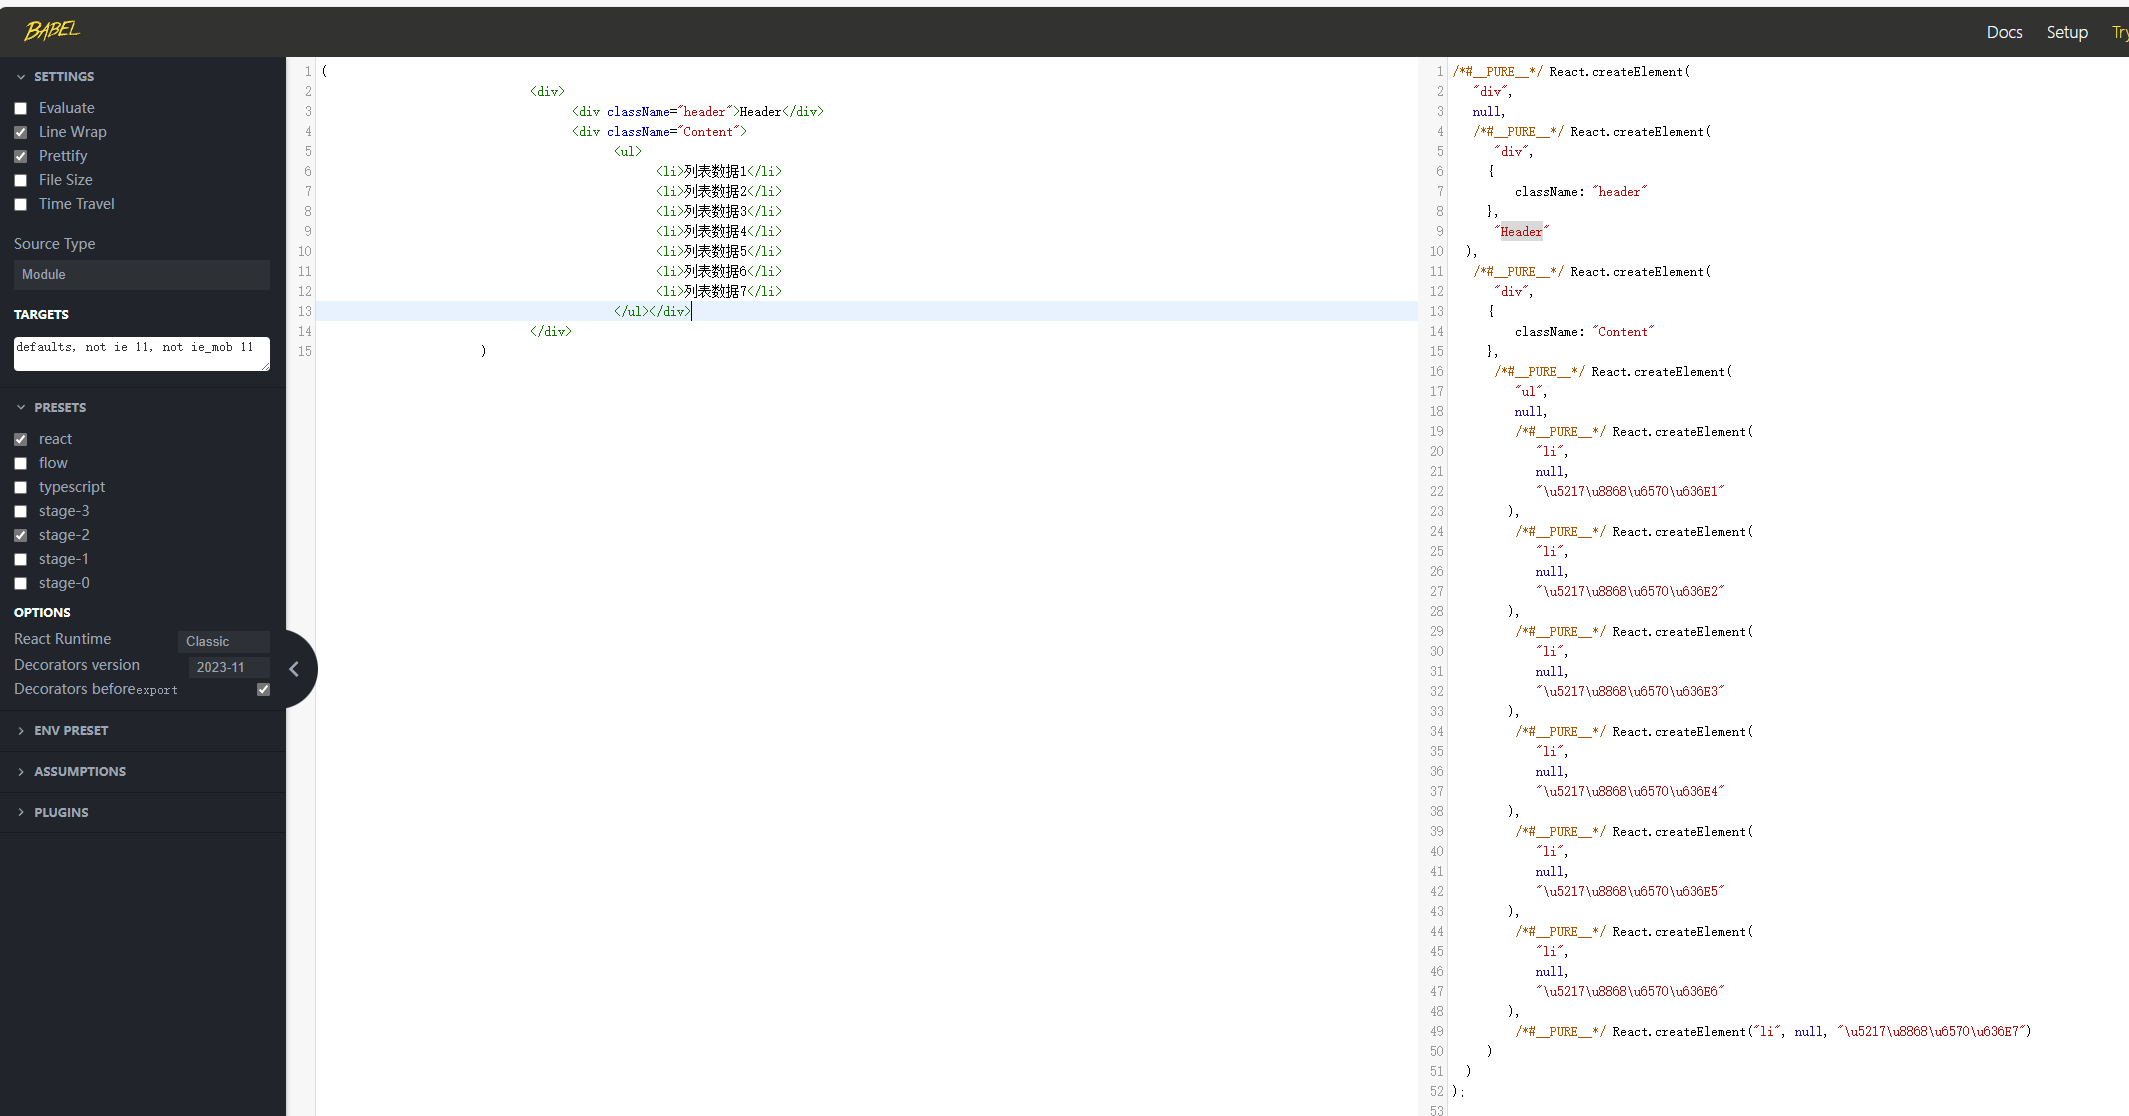
将jsx代码替换为createElement语法糖代码依然可以正常运行,不过这样的开发方式效率很低
<!DOCTYPE html>
<html lang="en">

<head>
    <meta charset="UTF-8">
    <title>Title</title>
</head>

<body>
    <div id="root"></div>
    <script src="../libs/react.js"></script>
    <script src="../libs/react-dom.js"></script>
    <script src="../libs/babel.js"></script>

    <script type="text/babel">
        // 1、定义App根组件
        // class App extends React.Component {
        //     constructor() {
        //         super();
        //         this.state = {
        //             message: "Hello World"
        //         }
        //     }

        //     render() {
        //         const { message } = this.state

        //         return (
        //             <div>
        //                 <div className="header">Header</div>
        //                 <div className="Content">
        //                     <ul>
        //                         <li>列表数据1</li>
        //                         <li>列表数据2</li>
        //                     </ul></div>
        //             </div>
        //         )
        //     }
        // }

        const element = /*#__PURE__*/ React.createElement(
            "div",
            null,
  /*#__PURE__*/ React.createElement(
                "div",
                {
                    className: "header"
                },
                "Header"
            ),
  /*#__PURE__*/ React.createElement(
                "div",
                {
                    className: "Content"
                },
    /*#__PURE__*/ React.createElement(
                    "ul",
                    null,
      /*#__PURE__*/ React.createElement(
                        "li",
                        null,
                        "\u5217\u8868\u6570\u636E1"
                    ),
      /*#__PURE__*/ React.createElement("li", null, "\u5217\u8868\u6570\u636E2")
                )
            )
        );

        console.log("react visual DOM",element);
        // 2、创建root 并且渲染App组件
        const root = ReactDOM.createRoot(document.querySelector('#root'))
        root.render(element,null)
    </script>
</body>

</html>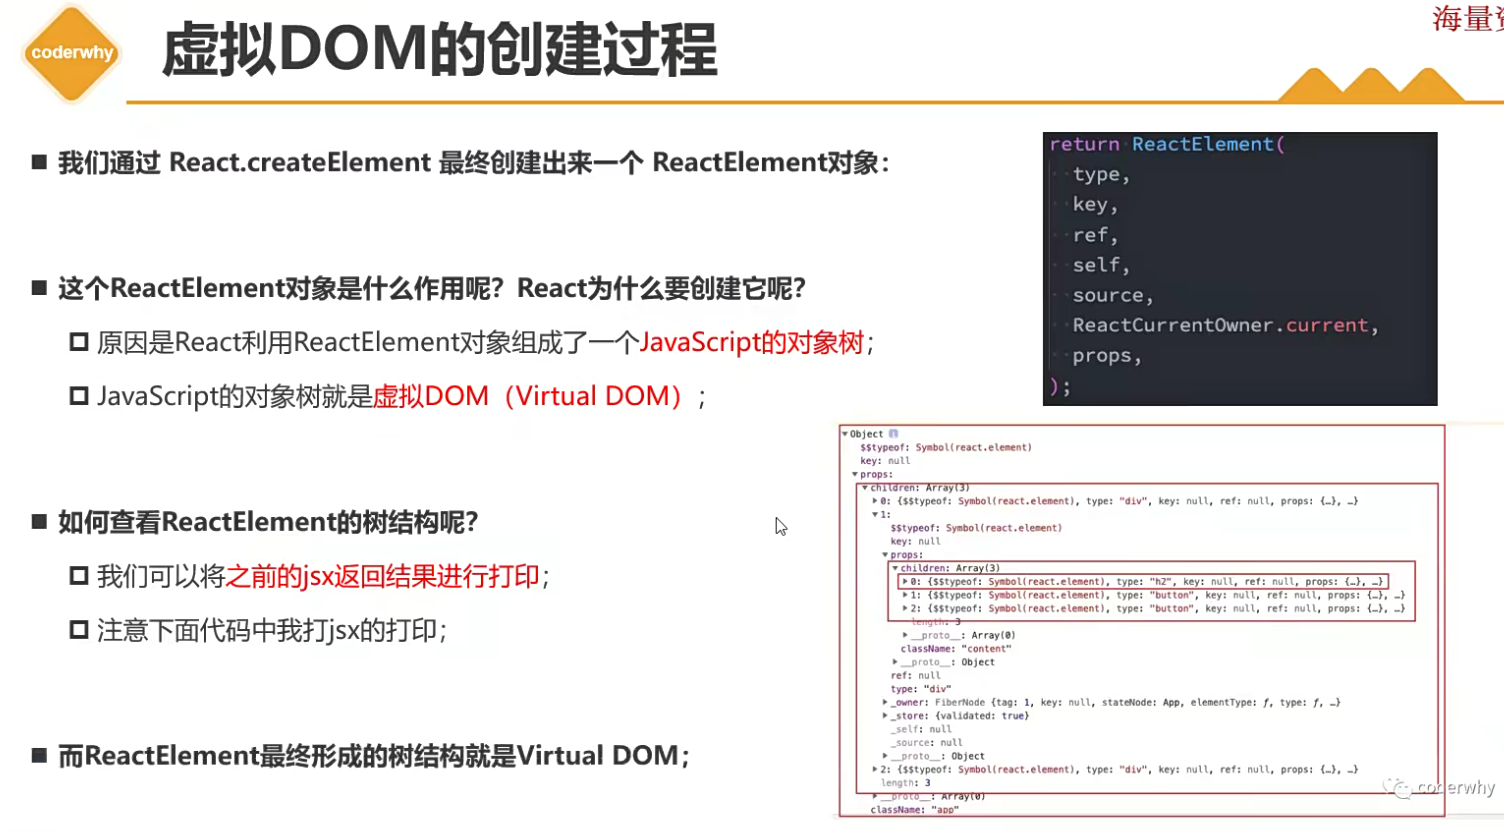
我们可以在代码中打印虚拟DOM的结构
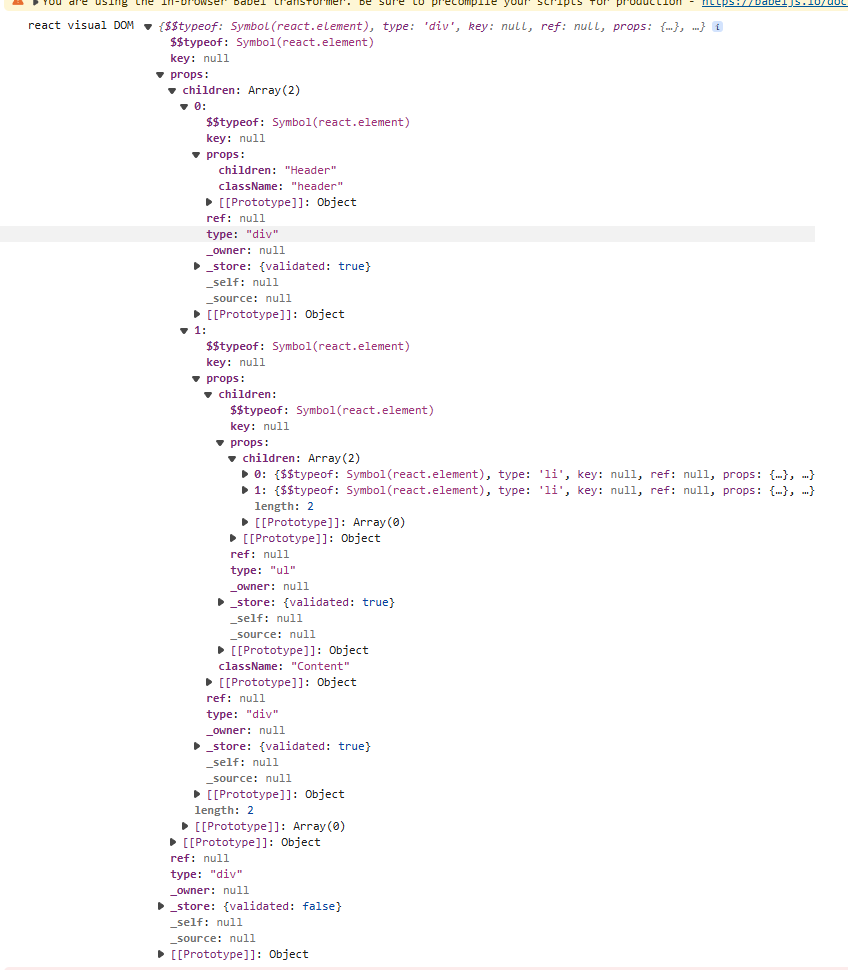
前面学习使用的是html单文件的方式来学习,在企业中更多的是采用脚手架工程化的方式来开发,所以后续我们采用的是脚手架的方式来开发
脚手架的概念
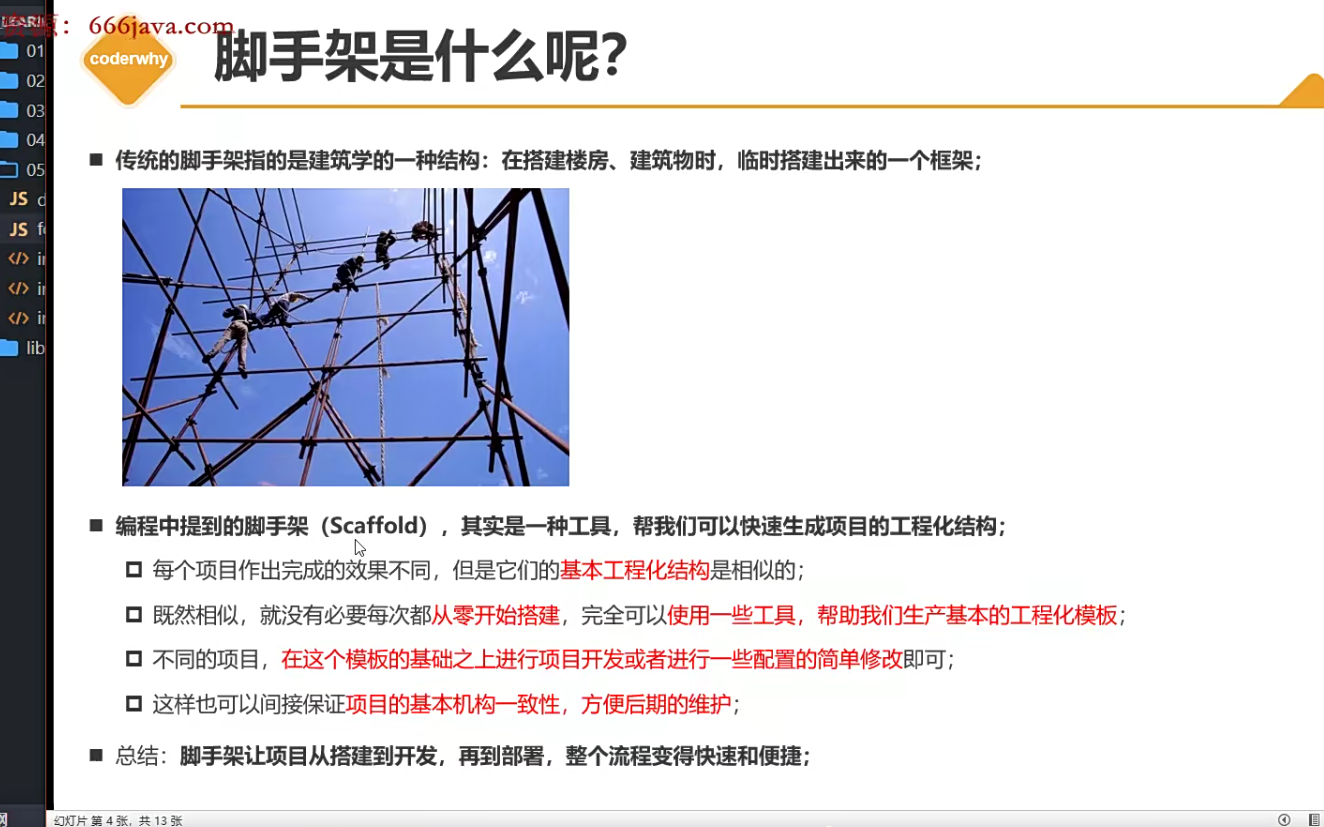
npm install create-react-app -g // 安装
create-react-app react-cli-study // 创建项目
目录结构分析
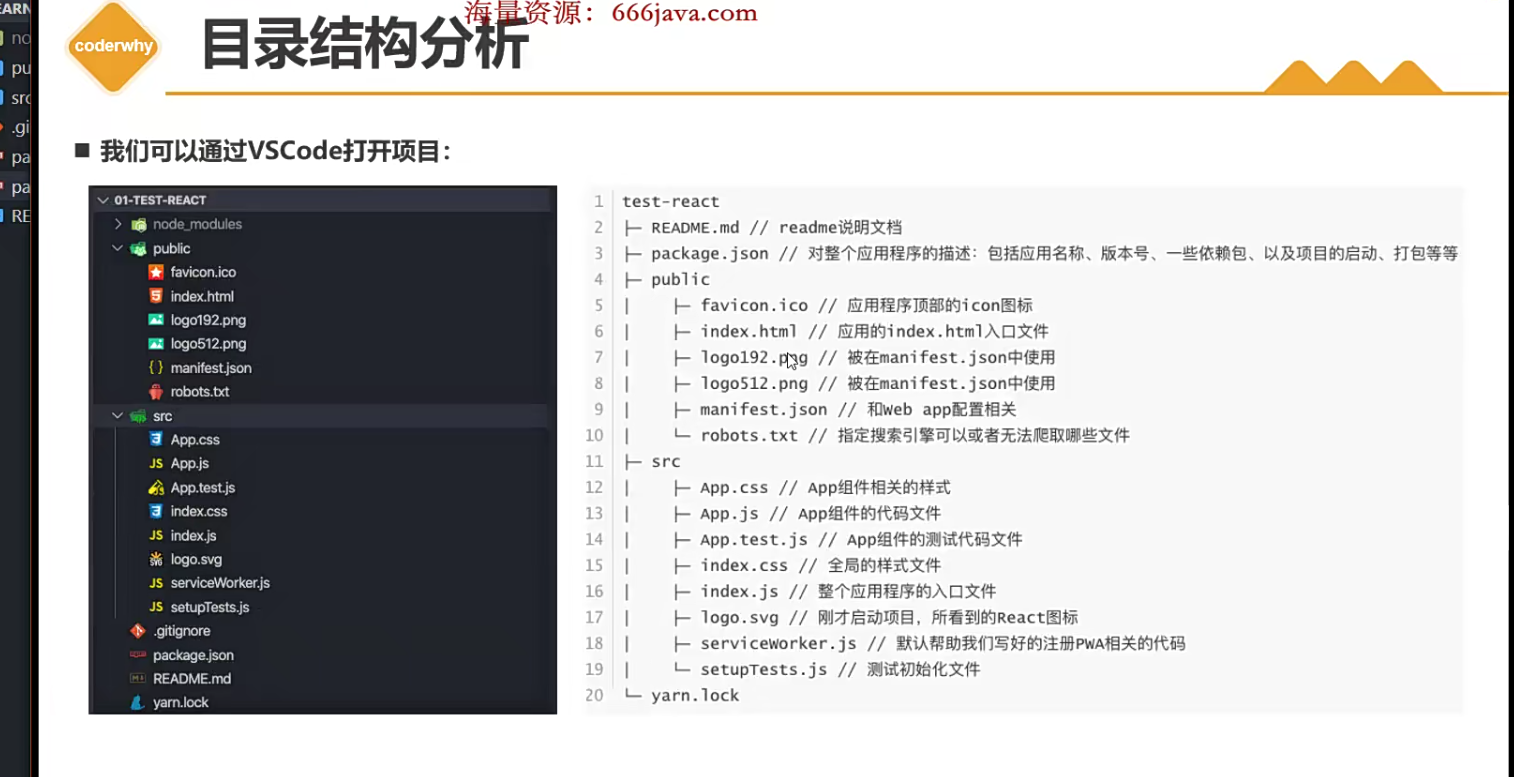
了解PWA

默认创建好的脚手架项目会发现没有webpack相关的配置文件等信息,这是因为脚手架默认将webpack的配置信息隐藏起来了,目的是为了避免开发者随意修改导致项目无法启动,但在实际开发中配置文件大概率是需要修改的。
rca默认将webpack相关的启动配置信息存放到了node_modules/react-script,也就是说自己编写了一个脚本库来隐藏webpack的配置文件,以及快捷启动react项目。
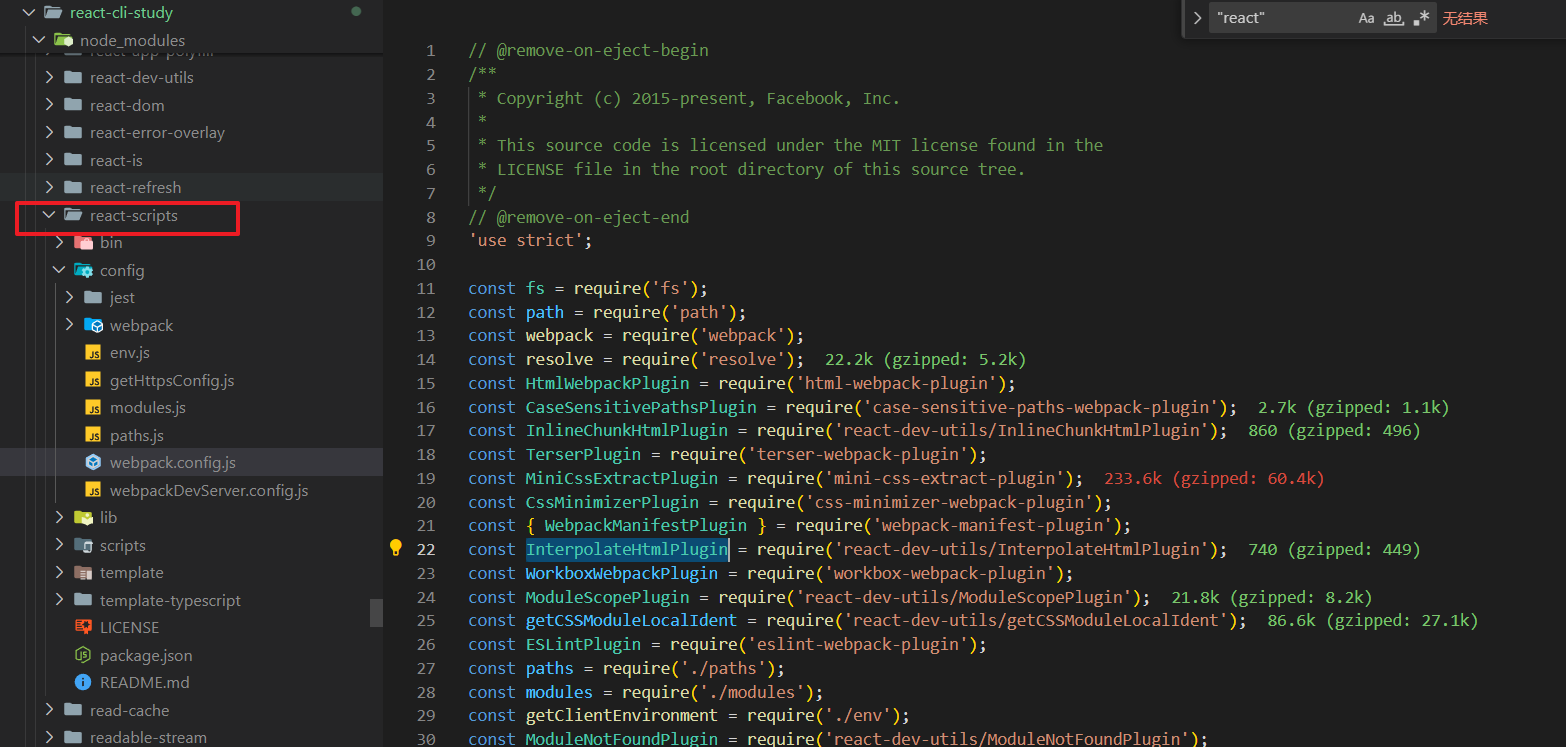
可以运行以下命令将webpack相关的配置暴露出来
npm run eject运行命令后即可将webpack相关的配置暴露出来
前面有快速提到React的基本语法,接下来需要进行深入和扩展
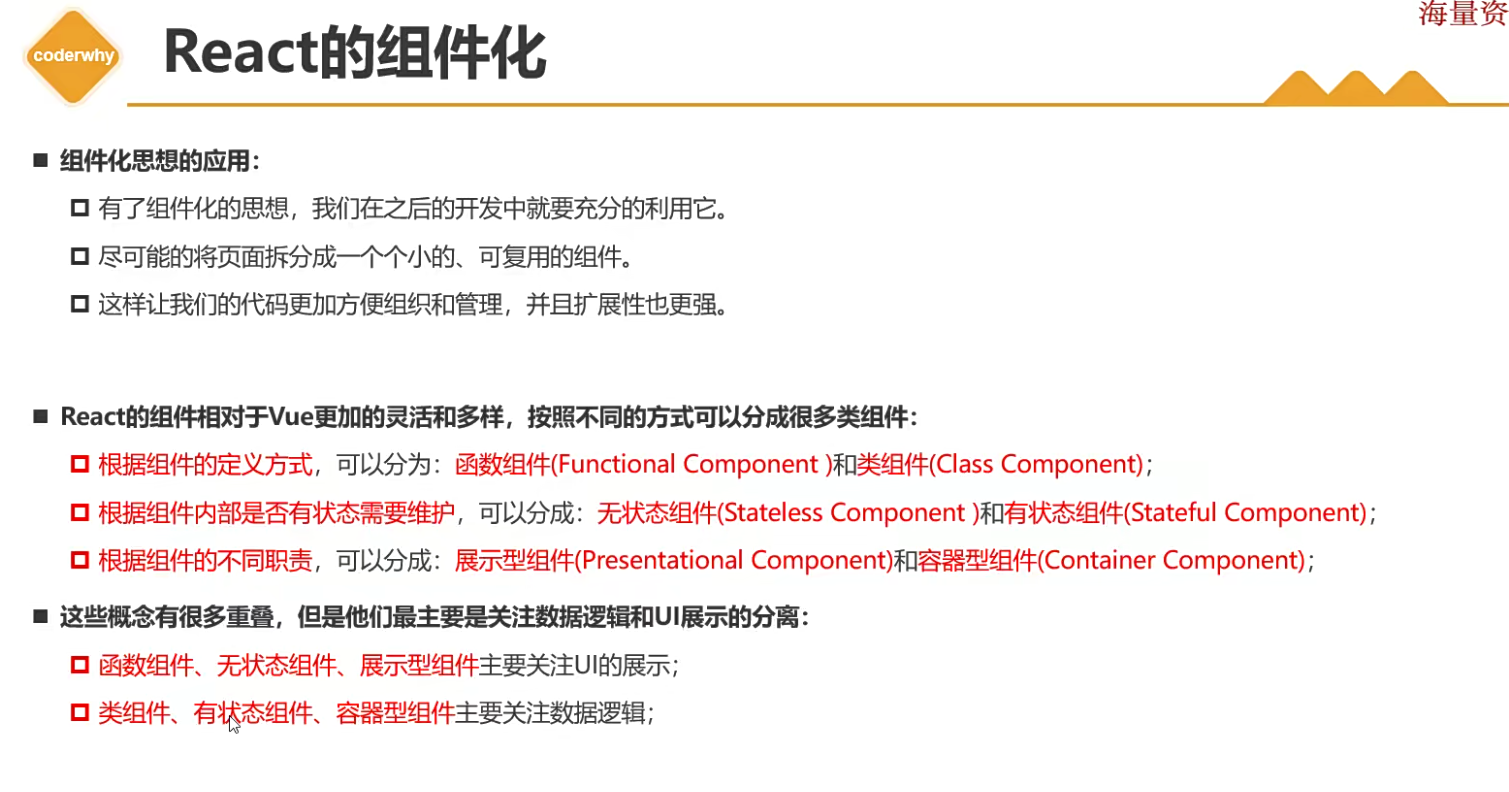
React组件按照定义方式可分为类组件和函数式组件,早期函数式组件有很多缺点,例如没有状态和生命周期,所以最开始都是使用类组件来进行开发的,但是后面由于Hooks的出现,弥补了函数式组件的这些缺点,所以现在开发多以函数式组件优先。
类组件的特点
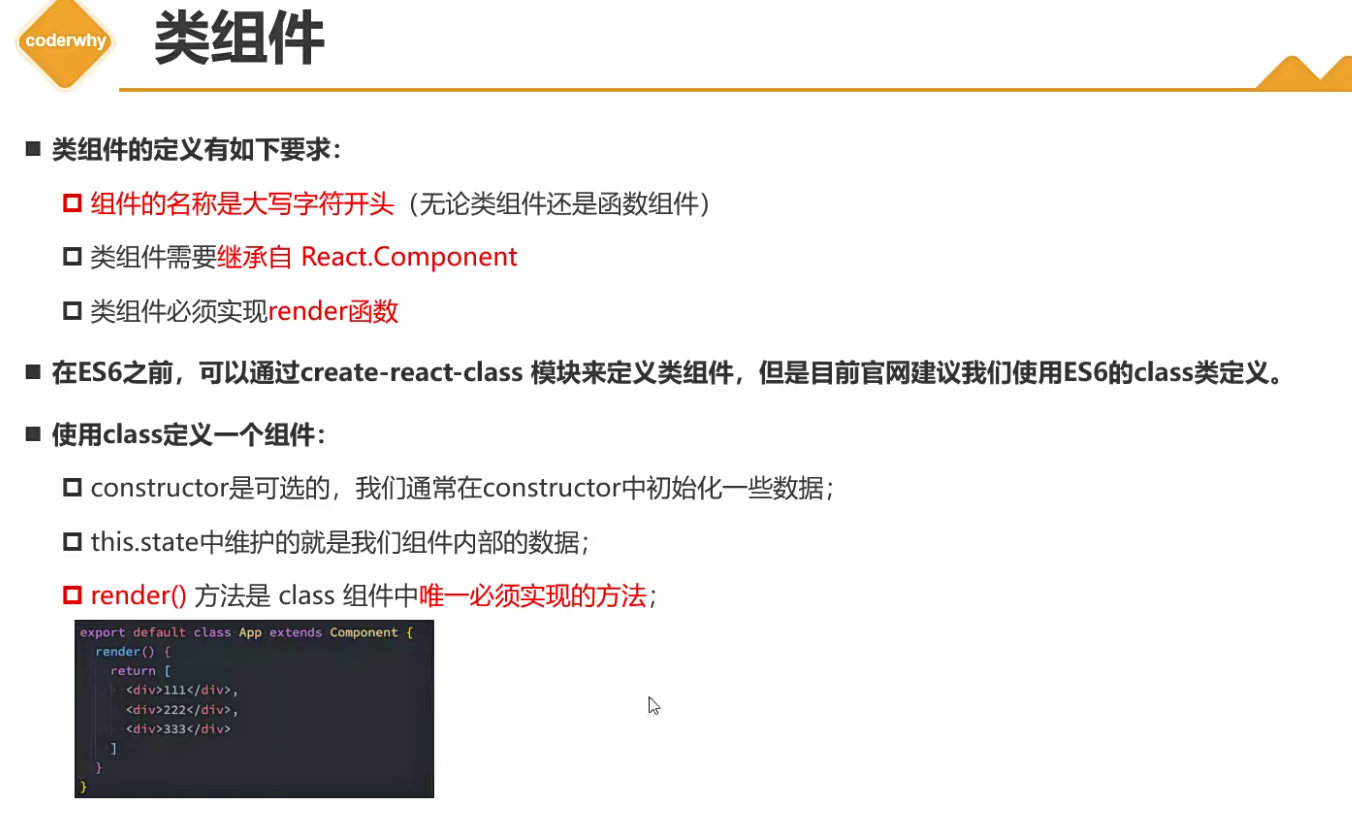
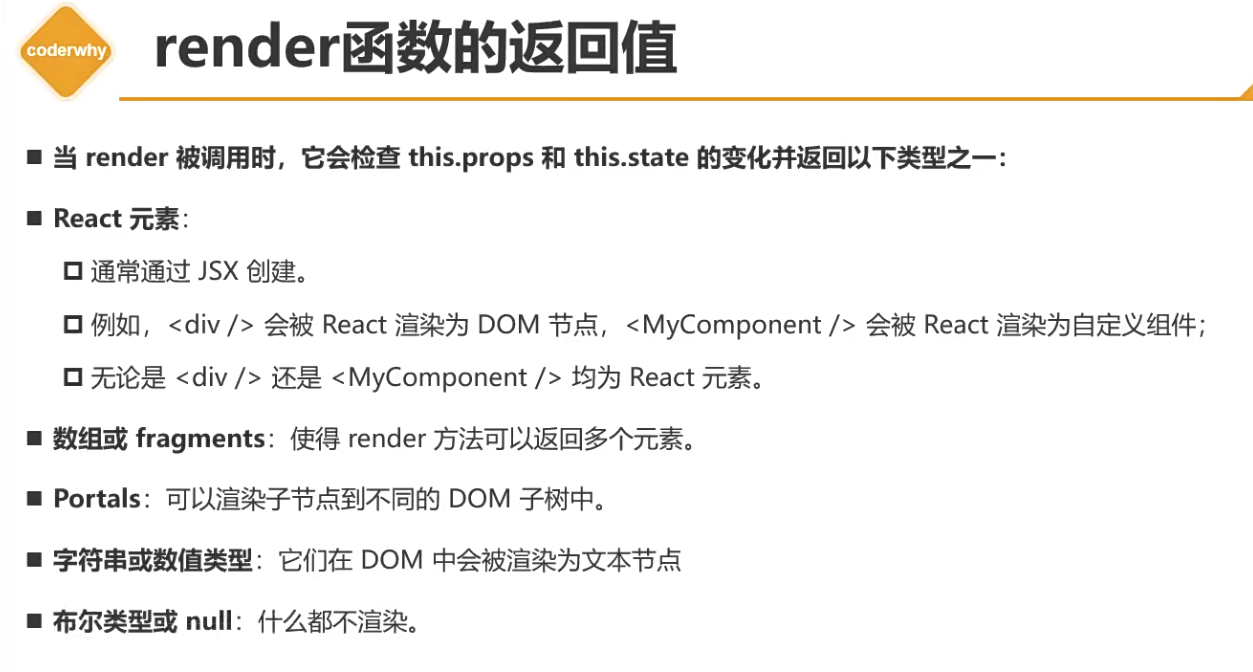
需要注意的是,类组件还能返回一个数组,返回数组的时候会按顺序渲染元素
class App {
    render(){
        return ["a","b","c"]

        return [<AppOne/>,<AppTwo/>]

        return [
            <h1>h1元素</h1>,
            <h2>h2元素</h2>
            <h3>h3元素</h3>
        ]
    }
}
函数式组件的特点:
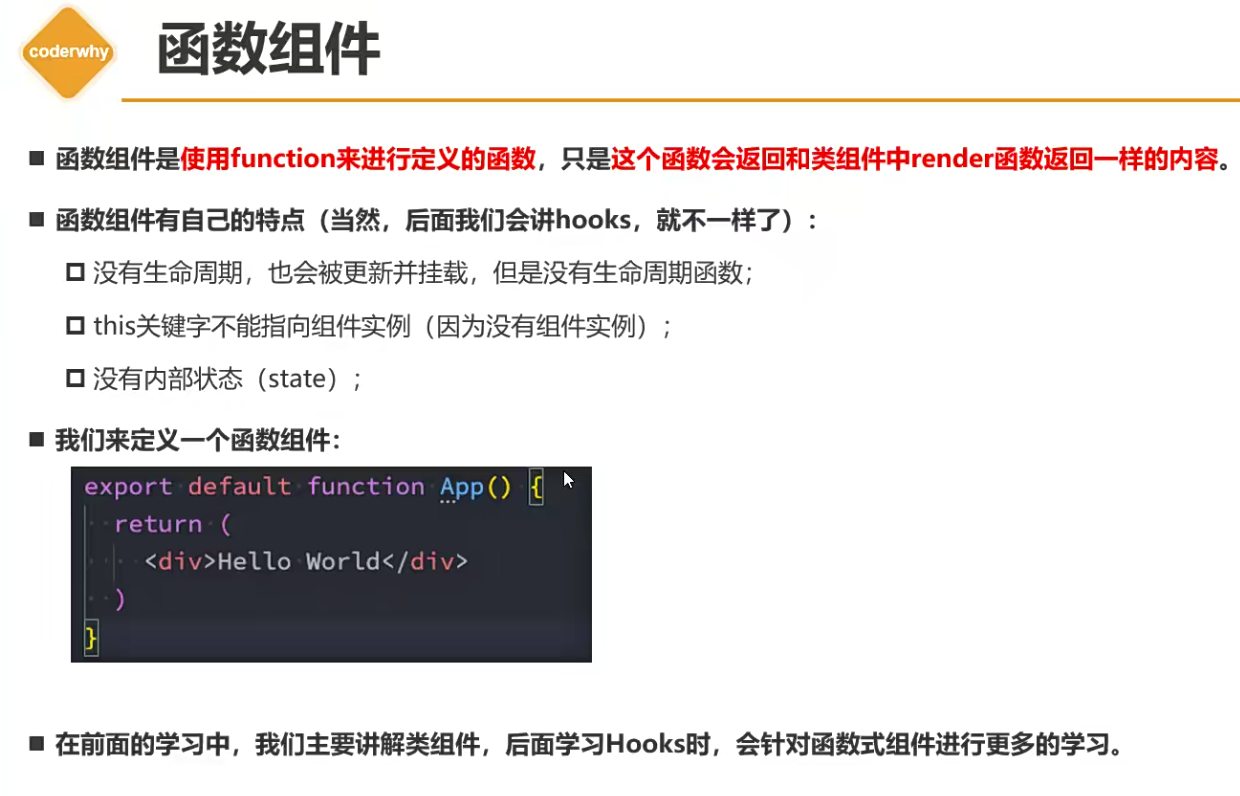
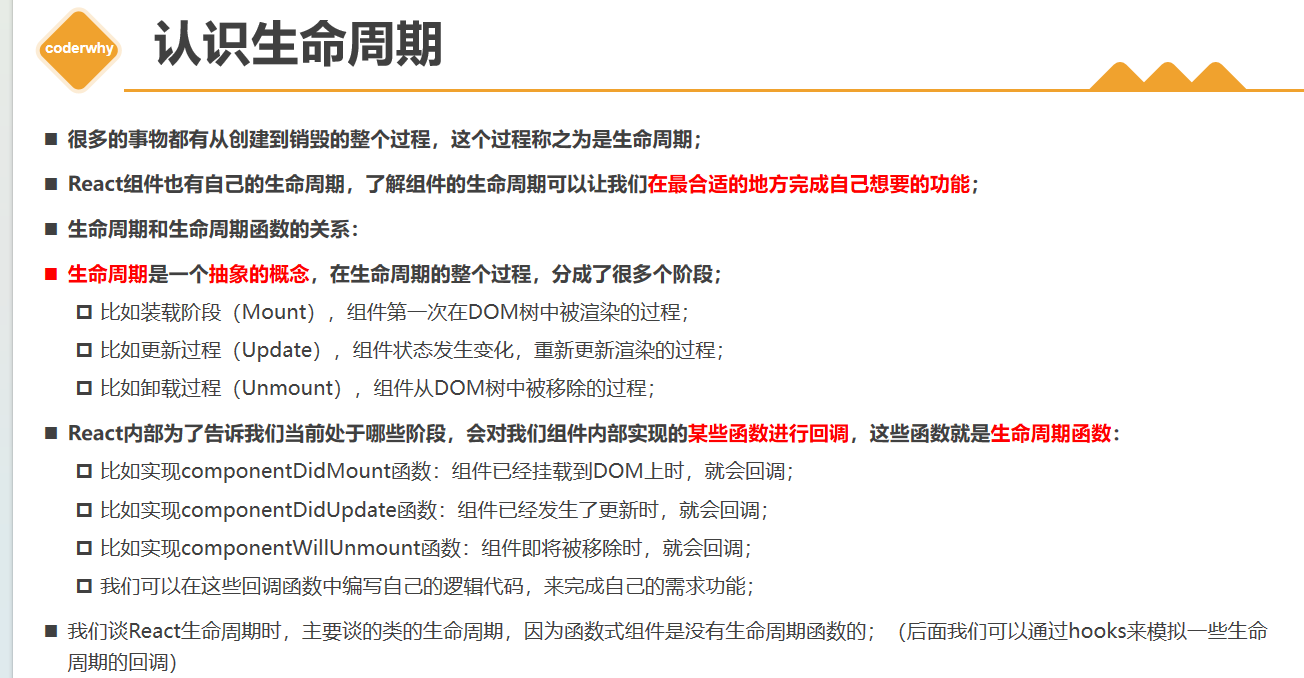
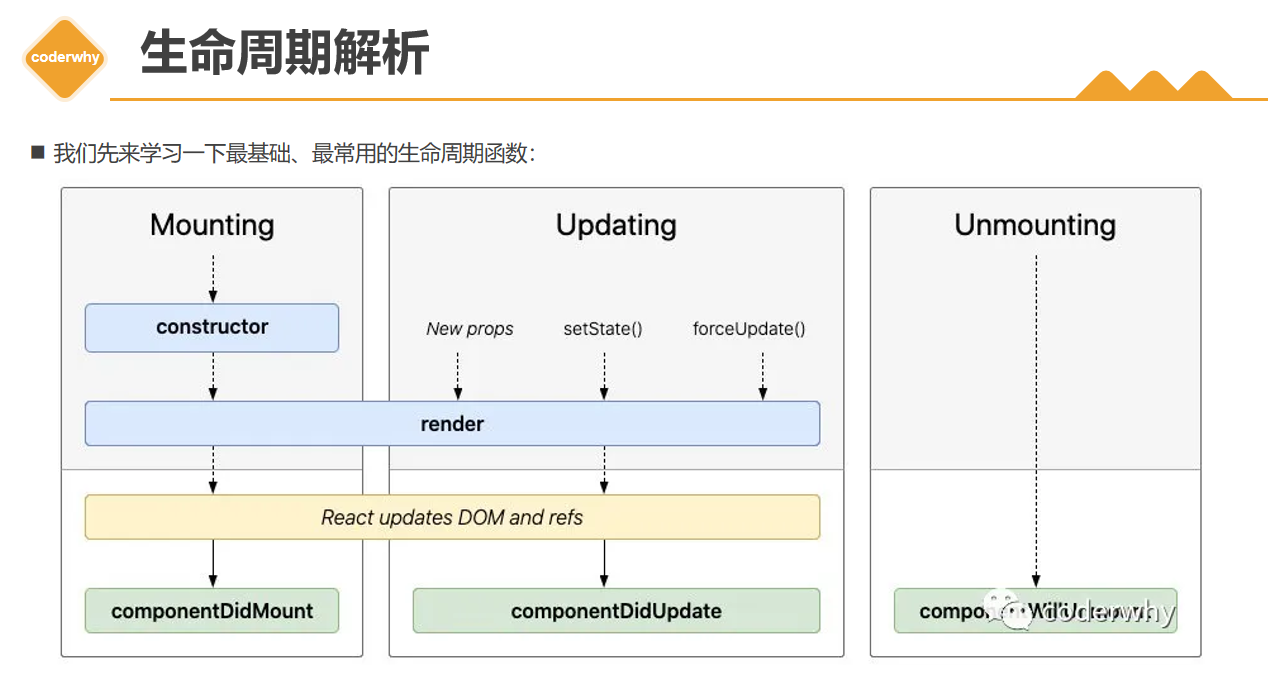
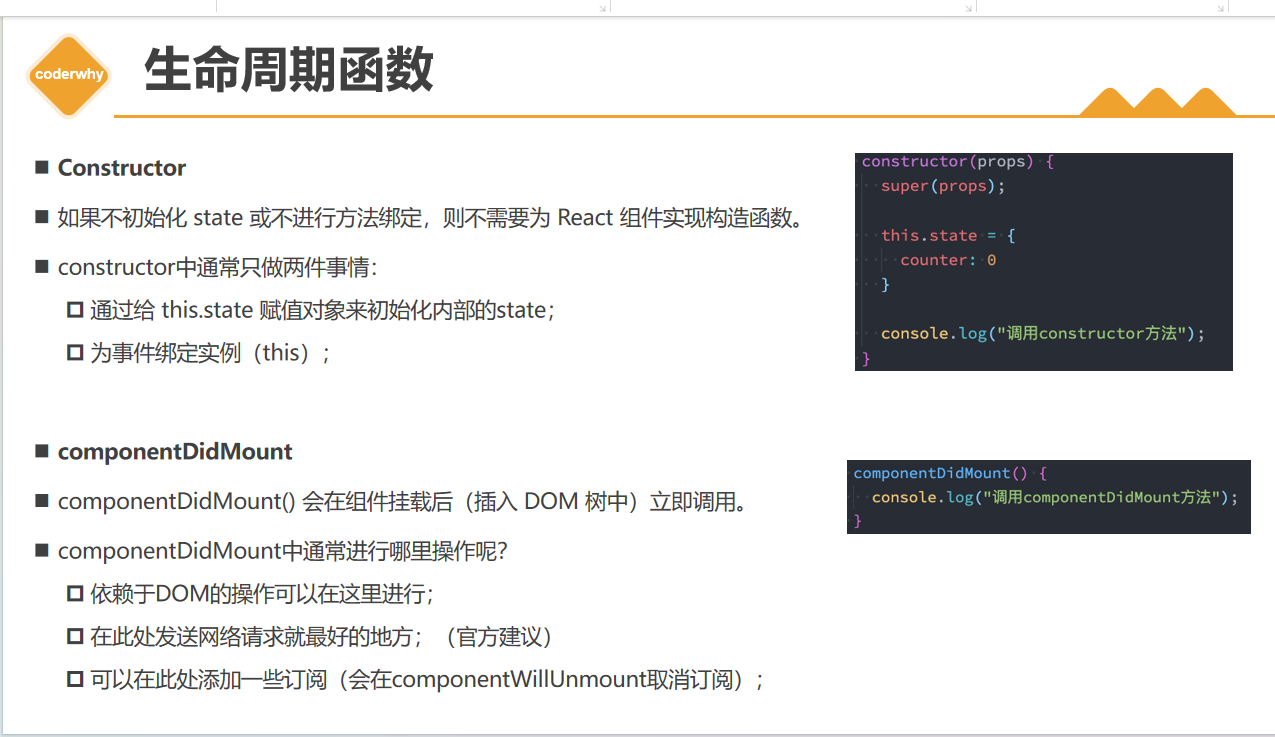
父组件向子组件通信
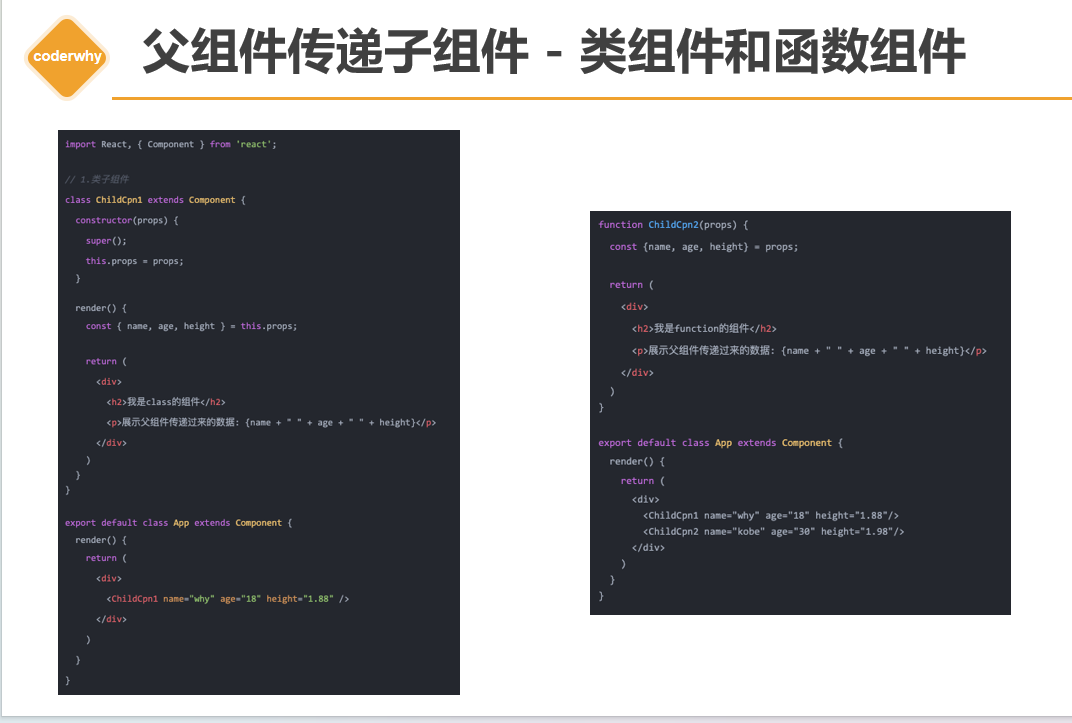
类型限制

在后面添加isRequired限制参数是否必传

子组件向父组件通信主要原理是利用了父组件向子组件通信,传递一个Function给子组件给子组件调用
父组件
import React from "react"
import Child from "./components/Child"

export default class App extends React.Component {
  constructor() {
    super()
    this.state = {
      count: 15
    }
  }

  changeCount(count) {
    this.setState({ count })
  }

  render() {
    const { count } = this.state
    return (
      <div>
        <h1>父组件:{count}</h1>
        <Child count={this.state.count} changeCount={(count) => { this.changeCount(count) }} />
      </div>

    )
  }

}
子组件
import React from "react"
import PropTypes from 'prop-types';
export default class Child extends React.Component {
    constructor() {
        super()
    }
    changeCount(count) {
        this.props.changeCount(count)
    }
    render() {
        const { count } = this.props
        return (
            <div>
                <h1>子组件:{count}</h1>
                <button onClick={() => { this.changeCount(2) }}>变2</button>
                <button onClick={() => { this.changeCount(5) }}>变5</button>
            </div>

        )
    }
}
Child.protoTypes = {
    count: PropTypes.number
}
Child.defaultProps = {
    count: 0
}第一种方式是children来实现
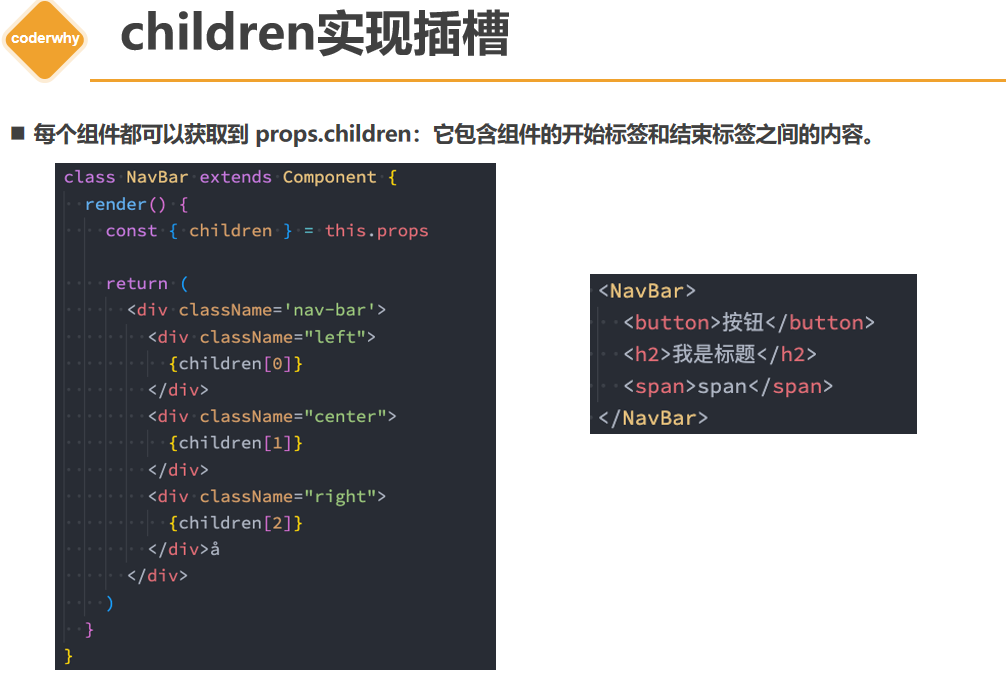
通过children实现的方案虽然可行,但是有一个弊端:通过索引值获取传入的元素很容易出错,不能精准的获取传入的原生;
需要注意的是:当传入多个react元素的时候children是一个数组,当传入一个元素的时候children就是组件本身
第二种方式是采用props实现插槽,第二种方式类似Vue中的具名插槽
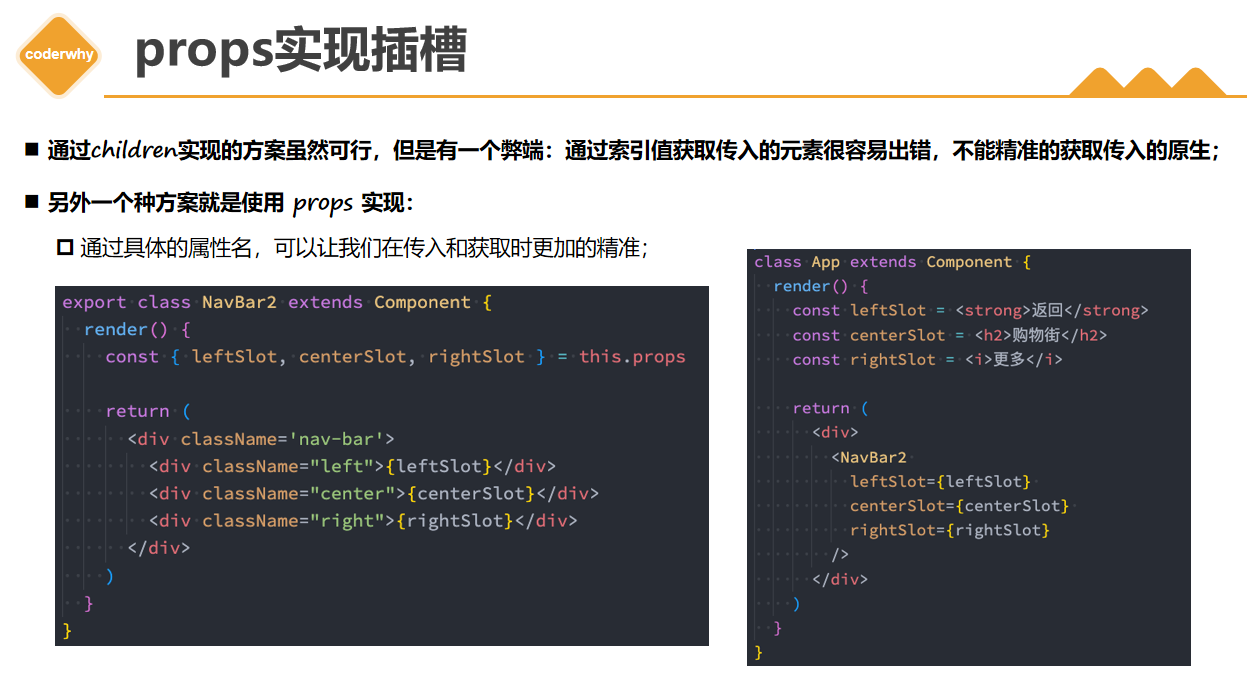
通过具体的属性名,可以让我们在传入和获取时更加的精准;
第三种方式类似Vue中的作用域插槽,作用域插槽的主要作用是传递子组件内的数据到父组件去使用,在封装一些高级组件的时候用的特别多
子组件
import React, { Component } from 'react'

export class Navbar extends Component {
    constructor() {
        super()
        this.state = { message: "hello" }
    }
    render() {
        const { leftSlot, scopedSlot } = this.props
        return (
            <div>
                <div>leftSlot: {leftSlot}</div>
                <h3>作用域插槽</h3>
                <div>scopedSlot: {scopedSlot({ name: this.state.message })}</div>
                <button onClick={() => { this.setState({message: 'hi'}) }}>切换</button>
            </div>
        )
    }
}

export default Navbarimport React from "react"
import Navbar from "./components/Navbar"
export default class App extends React.Component {
constructor() {
super()
}
getElement(data){
return <h2>data.name : { data.name }</h2>
}
render() {
const leftSlot = (
<h2>leftSlot内容</h2>
)
return (
<div>
{/* props插槽的使用,这里scopedSlot用一个带参函数进行接受,就可以获取到子组件传递给父组件的参数 */}
<Navbar leftSlot={leftSlot} scopedSlot={ data => this.getElement(data) }>
</Navbar>
</div>
)
}
}通过ref获取DOM对象
import React, {PureComponent,createRef} from 'react'

class Index extends PureComponent {
    constructor() {
        super();
        this.state = {}

        this.titleRef = createRef();

        this.titleEl = null
    }
    getNativeDom(){
        // 第一种方式
        console.log("refs",this.refs.why)
        // 第二种方式(推荐),提前使用createRef创建元素,进行绑定
        console.log("refs",this.titleRef.current)
        // 第三种方式
        console.log(this.titleEl)
    }
    render() {
        return (
            <div>
                <h2 ref="why">hello world</h2>
                <h2 ref={this.titleRef}>你好啊李银河</h2>
                <h2 ref={el => { this.titleEl = el }}>你好啊,师姐</h2>
                <button onClick={e=>{this.getNativeDom()}}>获取DOM</button>
            </div>
        )
    }
}
export default Index通过ref获取组件实例
import React, {PureComponent, createRef} from 'react'

class HelloWorld extends PureComponent {
    constructor() {
        super();
        this.state = {
            message: "hello world"
        }
    }
    test() {
        console.log("HelloWorld test")
    }

    render() {
        return (
            <div>
                <h2>HelloWorld</h2>
            </div>
        )
    }
}

class Index extends PureComponent {
    constructor() {
        super();
        this.state = {}
        this.hwRef = createRef();
    }

    getNativeDom() {
        console.log("组件实例",this.hwRef.current)
        this.hwRef.current.test()
    }

    render() {
        return (
            <div>
                <HelloWorld ref={this.hwRef} name="zhansgan"/>
                <button onClick={e => {
                    this.getNativeDom()
                }}>获取组件实例
                </button>
            </div>
        )
    }
}

export default Index函数式组件获取ref
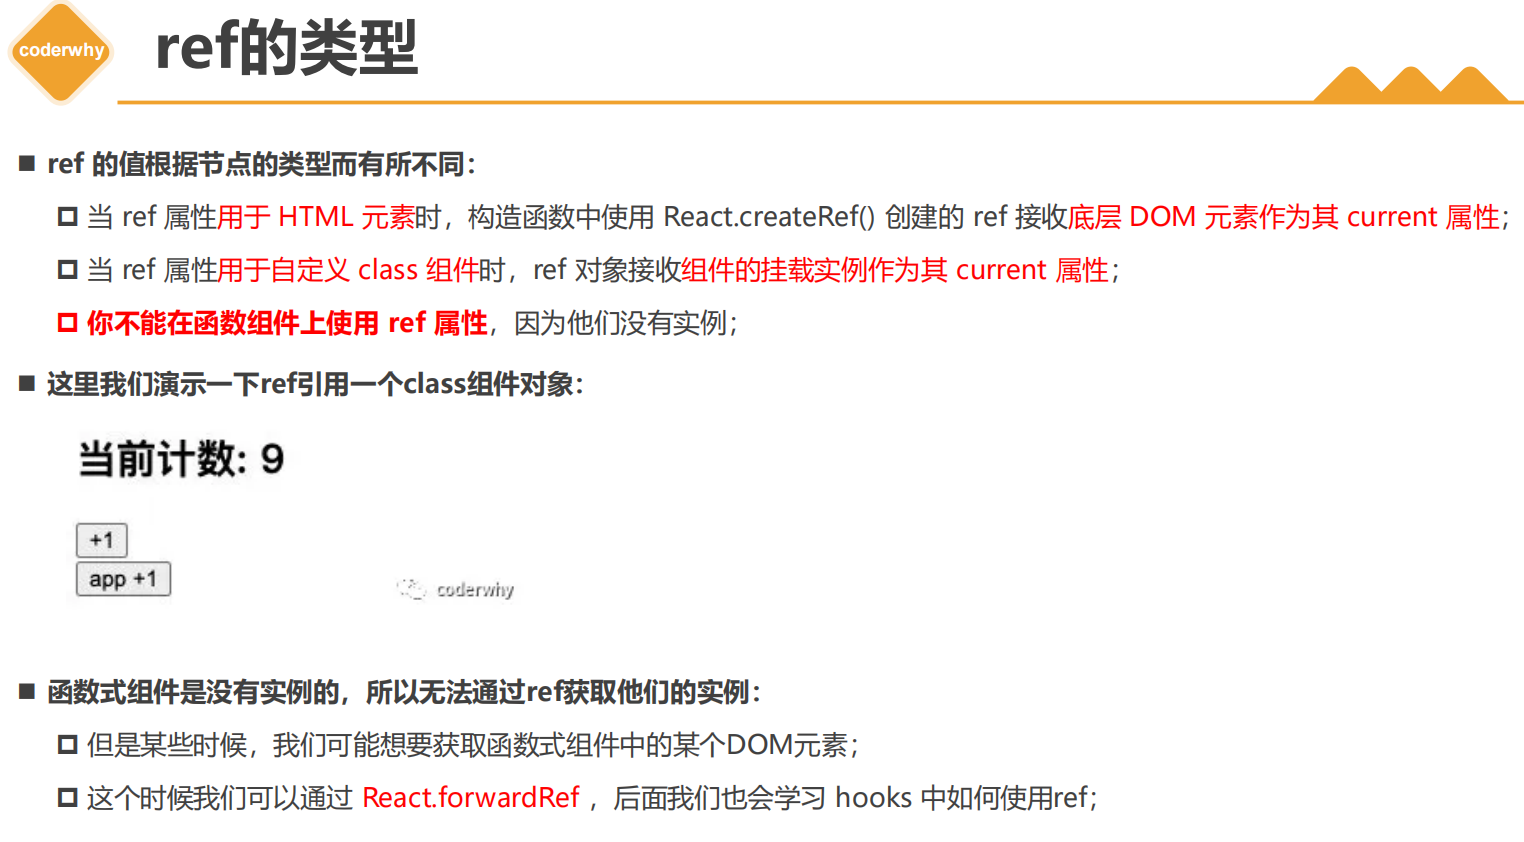
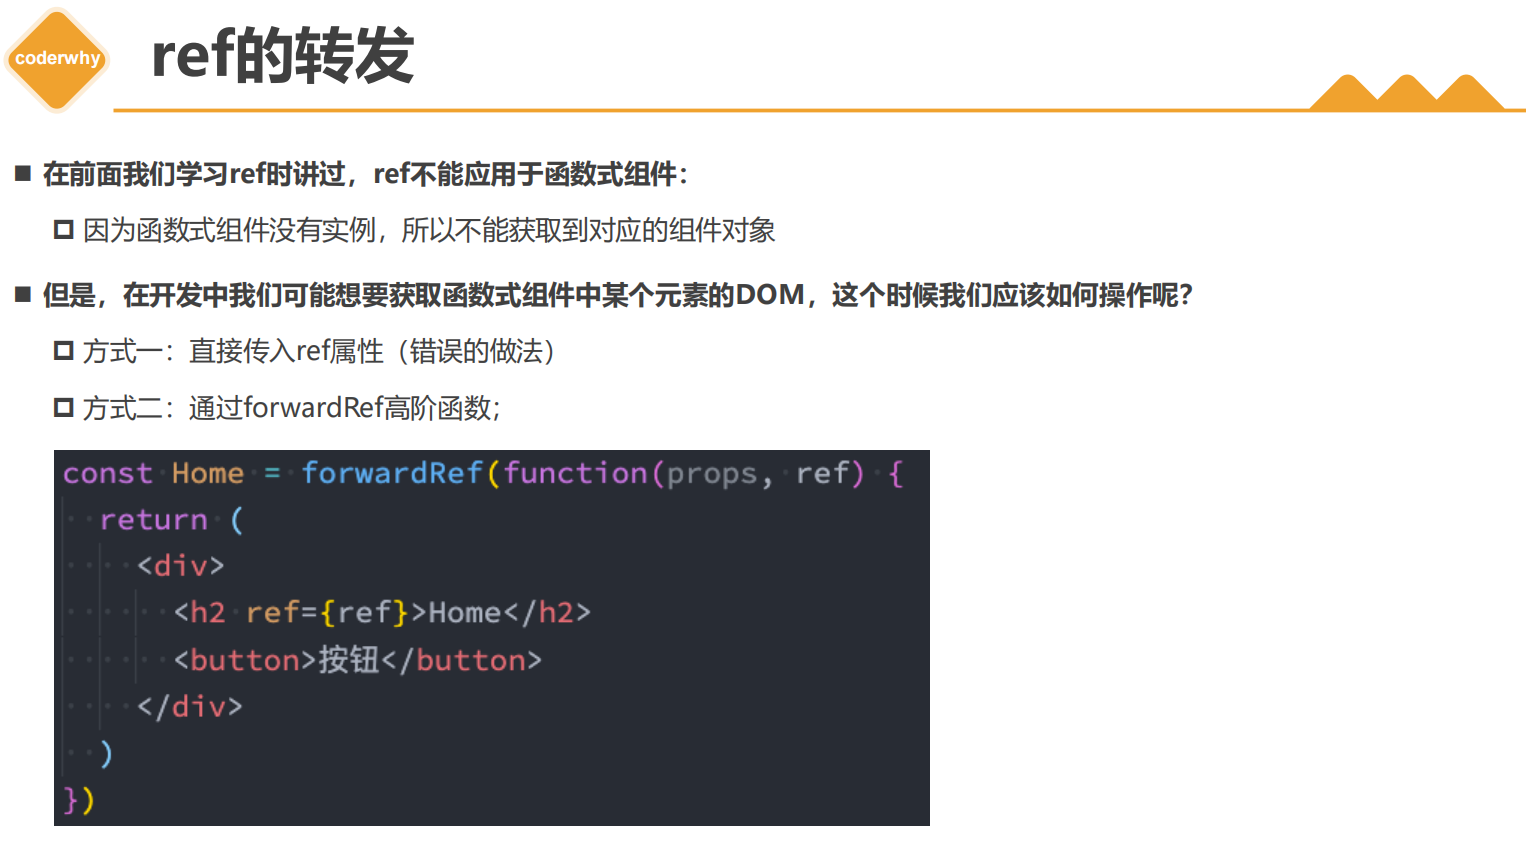
通过ref获取函数式组件实例,这里需要借助一个高阶函数forwardRef
import React, {PureComponent, createRef, forwardRef} from 'react'

const Home = forwardRef(function(props,ref){
    return (
        <div>
            <h2 ref={ref}>home ref</h2>
        </div>
    )
})

class Index extends PureComponent {
    constructor() {
        super();
        this.state = {}
        this.funcRef = createRef();
    }

    getNativeDom() {
        console.log("函数式组件实例",this.funcRef.current)
    }

    render() {
        return (
            <div>
                <Home ref={this.funcRef} name="zhangsan"/>
                <button onClick={e => {
                    this.getNativeDom()
                }}>获取组件实例
                </button>
            </div>
        )
    }
}

export default Index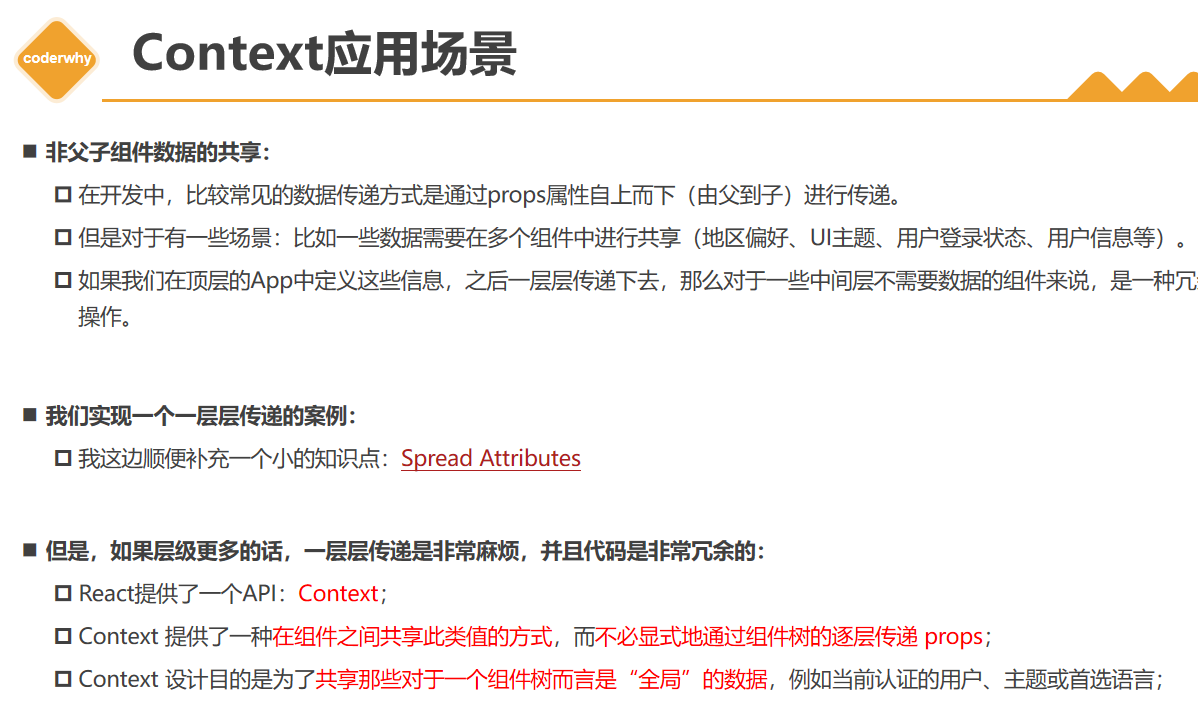
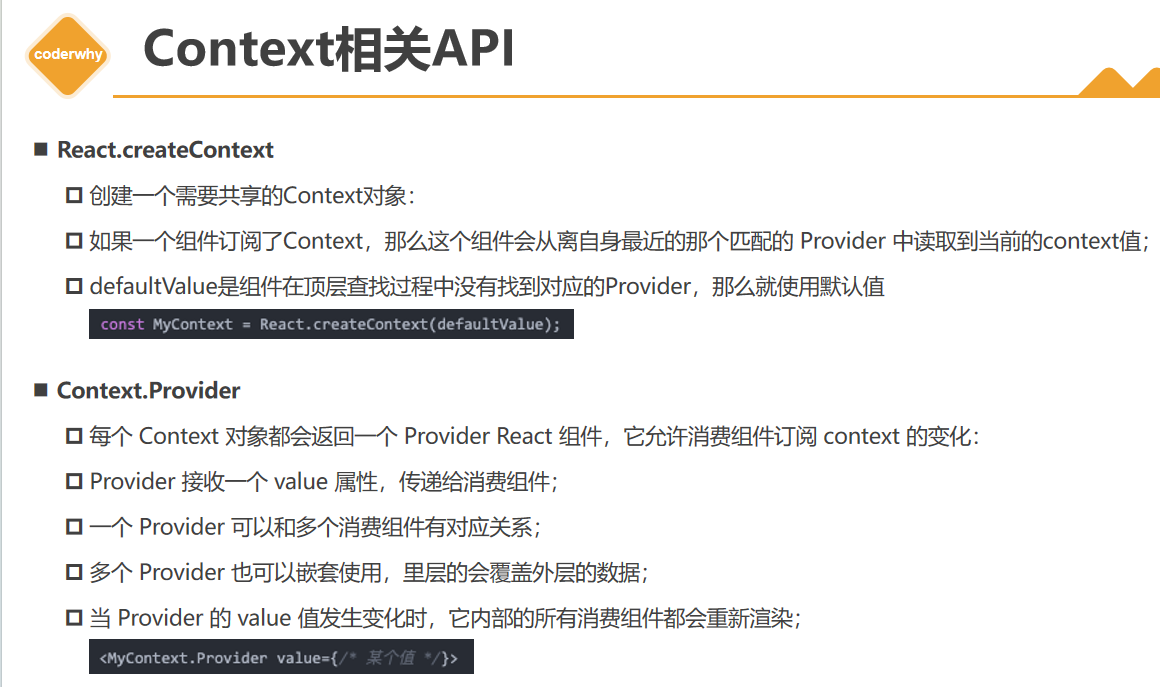
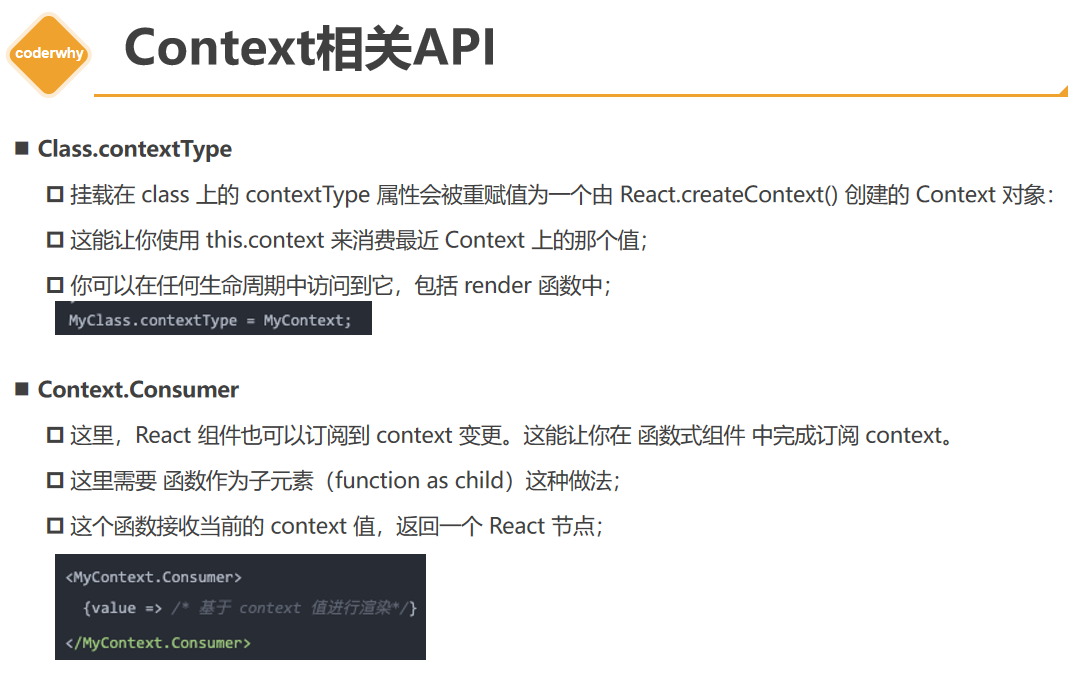
context的基本使用流程
1、需要单独定义一个js文件
import React from 'react'

const ThemeContext = React.createContext()

export default ThemeContext2、使用ThemeContext.Provide包裹住需要传值的子组件
import React from "react"
import Child from "./components/Child"
import ThemeContext from "./context/theme-context"

export default class App extends React.Component {
  render() {
    return (
      <div>
        <ThemeContext.Provider value={{ color: 'red', size: 30 }}>
          <Child></Child>
        </ThemeContext.Provider>
      </div>
    )
  }
}3、使用contextType指定context,然后就可以通过this.context获取数据
import React from "react"
import ThemeContext from "../context/theme-context";

export default class Child extends React.Component {
    render() {
        console.log("context",this.context);
        const { size } = this.context

        return (
            <div>
                <h2>size:{size}</h2>
            </div>

        )
    }
}

Child.contextType = ThemeContext在函数式组件中使用方法和类组件中使用唯一的区别就是接收参数方式不同
import ThemeContext from "../context/theme-context"

function Banner(){
    return (
        <div>
            <span>banner</span>

            <ThemeContext.Consumer>
                {
                    value => {
                        return <h2>{value.size}</h2>
                    }
                }
            </ThemeContext.Consumer>
        </div>
    )
}

export default Bannerimport React from "react"
import Child from "./components/Child"
import ThemeContext from "./context/theme-context"
import UserContext from "./context/user-context"
export default class App extends React.Component {
render() {
return (
<div>
<UserContext.Provider value={{nickName: "kan",age:24}}>
<ThemeContext.Provider value={{ color: 'red', size: 30 }}>
<Child></Child>
</ThemeContext.Provider>
</UserContext.Provider>
</div>
)
}
}如何使用共享的数据
import React from "react"
import ThemeContext from "../context/theme-context";
import UserContext from "../context/user-context";

export default class Child extends React.Component {
    render() {
        console.log("context",this.context);
        const { size } = this.context

        return (
            <div>
                <UserContext.Consumer>
                {
                    value => {
                        return <h2>{value.nickName}</h2>
                    }
                }
                </UserContext.Consumer>
            </div>

        )
    }
}

Child.contextType = ThemeContext如果还有多个Context共享数据还可以继续使用Consumer的方式获取共享的数据
import React from 'react'

const ThemeContext = React.createContext({color: "默认颜色",size:20})

export default ThemeContext如果ThemeContext未包裹子组件,那么子组件依然可以使用Context的默认值
export default class App extends React.Component {
  render() {
    return (
      <div>
             <ThemeContext.Provider value={{ color: 'red', size: 30 }}>
            </ThemeContext.Provider>

            <Child></Child>
      </div>
    )
  }
}此时this.context打印的是ThemeContext的默认值
import React from "react"
import ThemeContext from "../context/theme-context";

export default class Child extends React.Component {
    render() {
        console.log("context",this.context);
        const { size } = this.context

        return (
            <div>
                <h2>size:{size}</h2>
            </div>

        )
    }
}

Child.contextType = ThemeContextbus总线其实是一种设计模式:发布-订阅者模式,这里可以借助类实例来实现这个设计模式
HYEventBus
class HYEventBus {
  constructor() {
    this.eventBus = {}
  }

  on(eventName, eventCallback, thisArg) {
    if (typeof eventName !== "string") {
      throw new TypeError("the event name must be string type")
    }

    if (typeof eventCallback !== "function") {
      throw new TypeError("the event callback must be function type")
    }

    let hanlders = this.eventBus[eventName]
    if (!hanlders) {
      hanlders = []
      this.eventBus[eventName] = hanlders
    }

    hanlders.push({
      eventCallback,
      thisArg
    })
    return this
  }

  once(eventName, eventCallback, thisArg) {
    if (typeof eventName !== "string") {
      throw new TypeError("the event name must be string type")
    }

    if (typeof eventCallback !== "function") {
      throw new TypeError("the event callback must be function type")
    }

    const tempCallback = (...payload) => {
      this.off(eventName, tempCallback)
      eventCallback.apply(thisArg, payload)
    }

    return this.on(eventName, tempCallback, thisArg)
  }

  emit(eventName, ...payload) {
    if (typeof eventName !== "string") {
      throw new TypeError("the event name must be string type")
    }

    const handlers = this.eventBus[eventName] || []
    handlers.forEach(handler => {
      handler.eventCallback.apply(handler.thisArg, payload)
    })
    return this
  }

  off(eventName, eventCallback) {
    if (typeof eventName !== "string") {
      throw new TypeError("the event name must be string type")
    }

    if (typeof eventCallback !== "function") {
      throw new TypeError("the event callback must be function type")
    }

    const handlers = this.eventBus[eventName]
    if (handlers && eventCallback) {
      const newHandlers = [...handlers]
      for (let i = 0; i < newHandlers.length; i++) {
        const handler = newHandlers[i]
        if (handler.eventCallback === eventCallback) {
          const index = handlers.indexOf(handler)
          handlers.splice(index, 1)
        }
      }
    }

    if (handlers.length === 0) {
      delete this.eventBus[eventName]
    }
  }

  clear() {
    this.emitBus = {}
  }

  hasEvent(eventName) {
    return Object.keys(this.emitBus).includes(eventName)
  }
}

module.exports = HYEventBus引入并创建bus实例
import {HYEventBus} from "hy-event-store"

const eventBus = new HYEventBus()

export default eventBus
Child.js
import React, { Component } from 'react'
import eventBus from "../../utils/event-bus";

class Child extends Component {
    emitClick(){
        eventBus.emit("emitClick","zhansgan",14);
    }
    render() {
        return (
            <div>
                <h2>Child</h2>
                <button onClick={ () => { this.emitClick() } }>发送事件</button>
            </div>
        )
    }
}

export default Child
Father
import React, { Component } from 'react'
import Child from "./Child";

class Father extends Component {
    constructor(props) {
        super(props)
        this.state = {

        }
    }
    render() {
        return (
            <div>
                <h2>Father</h2>
                <Child/>
            </div>
        )
    }
}

export default Father
使用示例
import React, {Component} from 'react'
import Father from "./Father";
import eventBus from "../../utils/event-bus";

class Index extends Component {
    constructor() {
        super();
        this.state = {
            name: "",
            age: 0
        }
    }

    emitOnClick(name, age) {
        console.log("触发", name, age)
        this.setState({
            name,
            age
        })
    }

    componentDidMount() {
        eventBus.on("emitClick", this.emitOnClick, this)
    }

    componentWillUnmount() {
        eventBus.off("emitClick", this.emitOnClick)
    }

    render() {
        return (
            <div>
                <h2>Index Top</h2>
                <div>name: {this.state.name}</div>
                <div>age: {this.state.age}</div>
                <Father/>
            </div>
        )
    }
}

export default IndexsetState 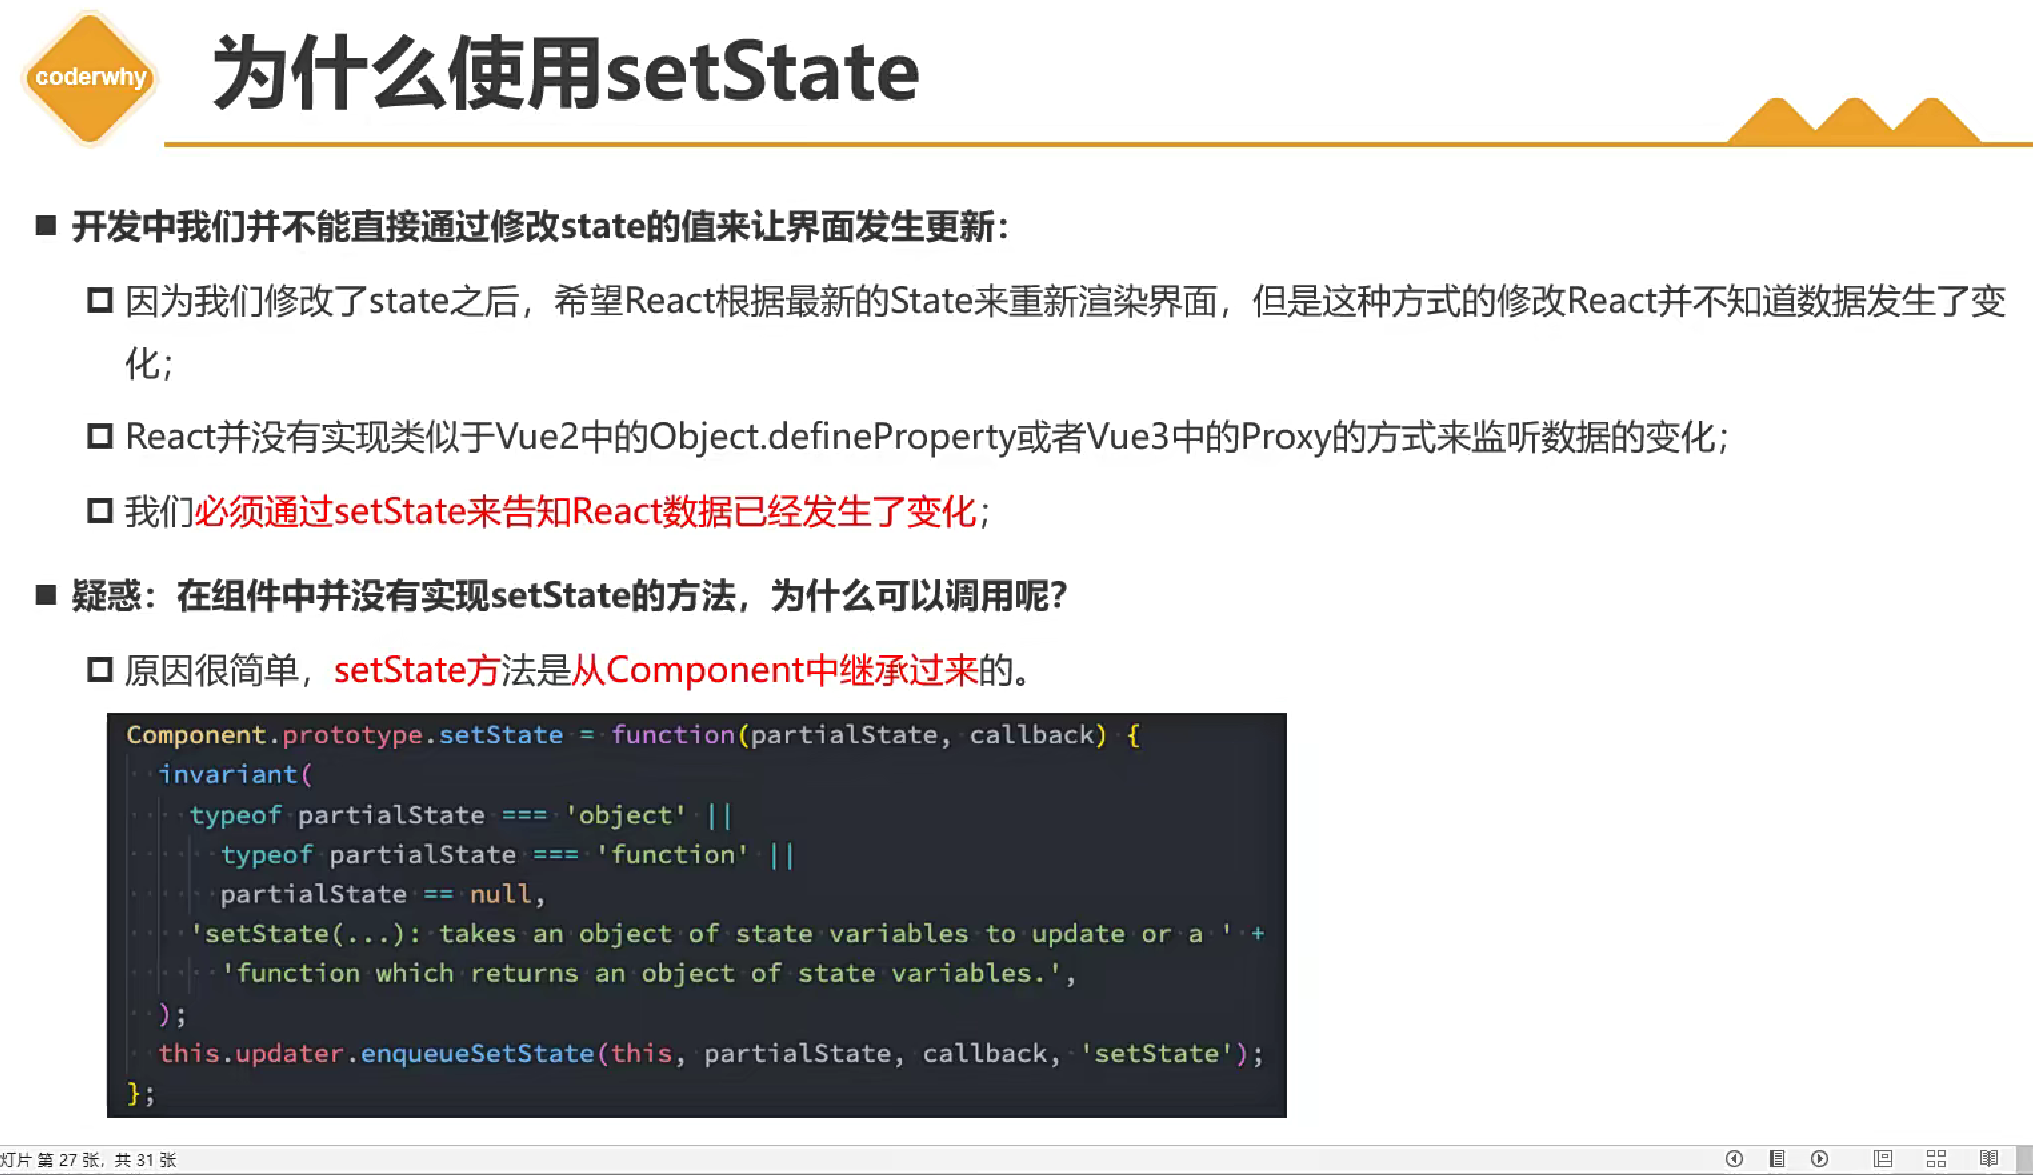
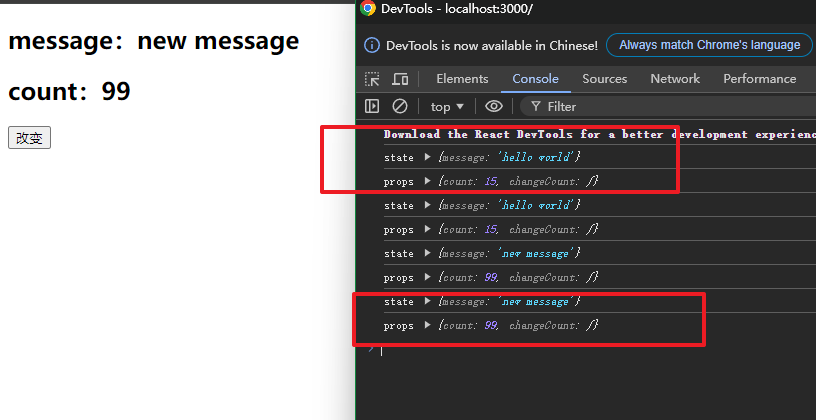
setState可以传入一个回调函数,回调函数的参数中可以获取到当前state中最新的值
优点一:可以在回调函数中编写新的state逻辑
优点二:当前回调函数可以获取到更新前旧的props和state
示例代码
import React, {Component} from 'react'

class Index extends Component {
    constructor() {
        super();
        this.state = {
            message: 'hello world'
        }
    }

    changeVal() {
        this.setState((state, props) => {
            console.log("state", state)
            console.log("props", props)
            this.props.changeCount(99)
            return {
                message: 'new message'
            }
        })
    }

    render() {
        return (
            <div>
                <h2>message:{this.state.message}</h2>
                <h2>count:{this.props.count}</h2>
                <button onClick={() => {
                    this.changeVal()
                }}>改变
                </button>
            </div>
        )
    }
}

export default Index在changeVal中的setState,每一次都可以获取到旧的state和props
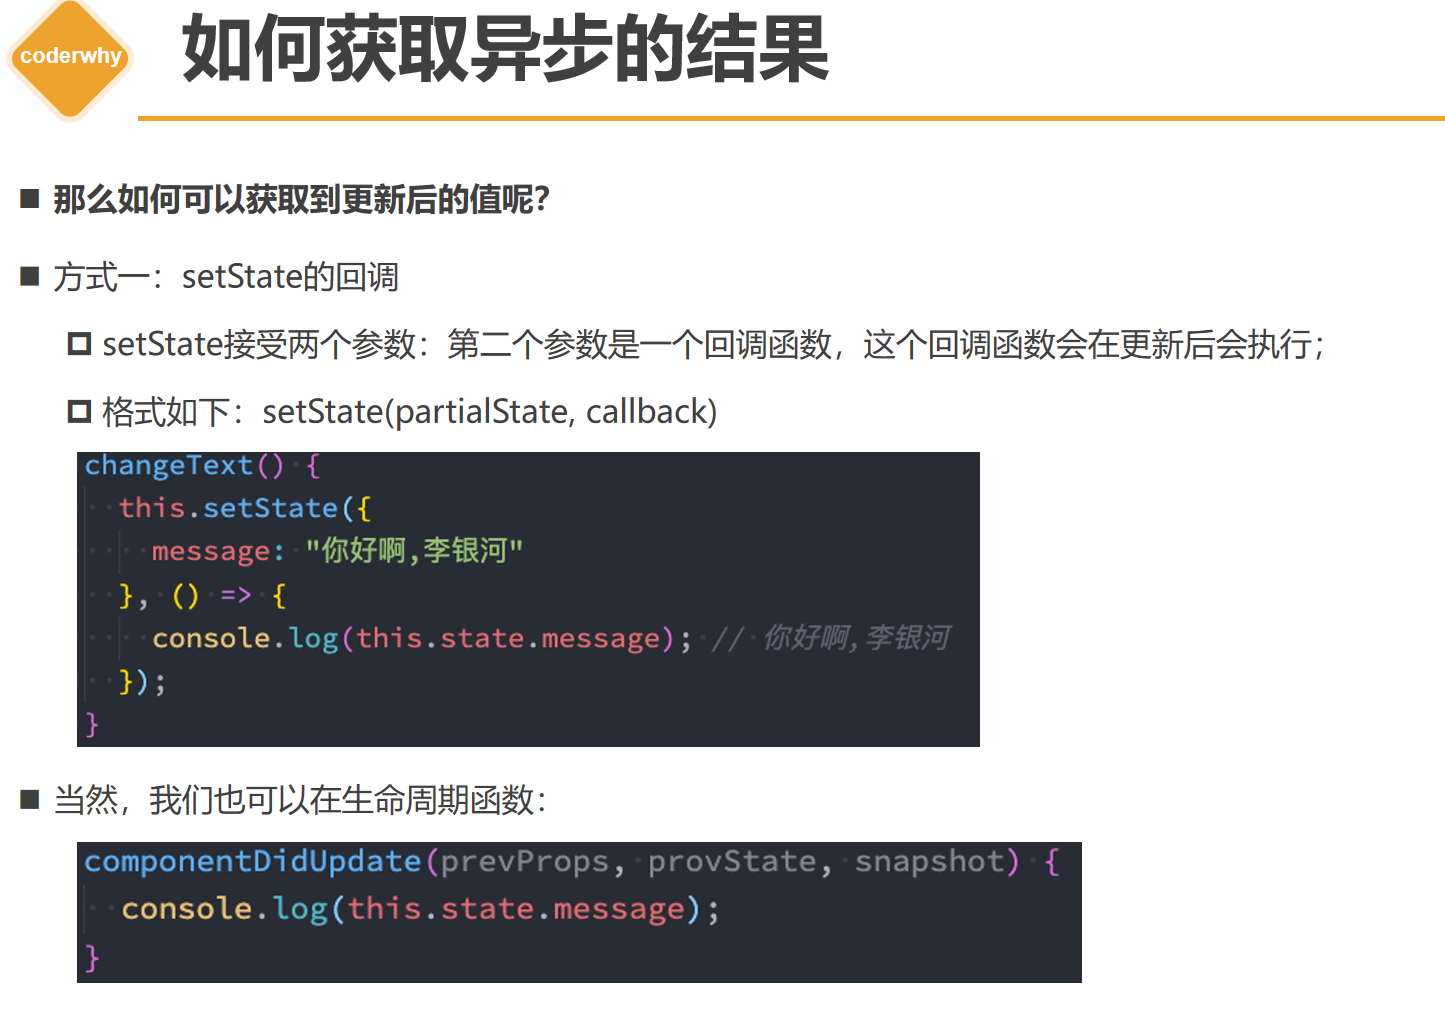
setState是一个异步的操作,接收两个参数,第二个参数是一个回调函数,如果需要在数据确定更新后做一些操作可以在setState的第二个参数中编写代码
import React, {Component} from 'react'

class Index extends Component {
    constructor() {
        super();
        this.state = {
            message: 'hello world'
        }
    }

    changeVal() {
        this.setState({
            message: "zhangsan"
        })
        console.log("message",this.state.message) // 打印 hello world ,然后页面上message更新
    }

    changeVal() {
        this.setState({
            message: "zhangsan"
        },() => {
        console.log("message",this.state.message) // 打印 zhangsan ,并且页面上也更新为zhangsan
        })
    }

    render() {
        return (
            <div>
                <h2>message:{this.state.message}</h2>
                <button onClick={() => {
                    this.changeVal()
                }}>改变
                </button>
            </div>
        )
    }
}
export default Index开发中有一些场景需要执行setState后马上获取到最新的state中的值,可以利用setState第二个参数callback的方式以及setState直接返回一个函数的方式获取到最新的state
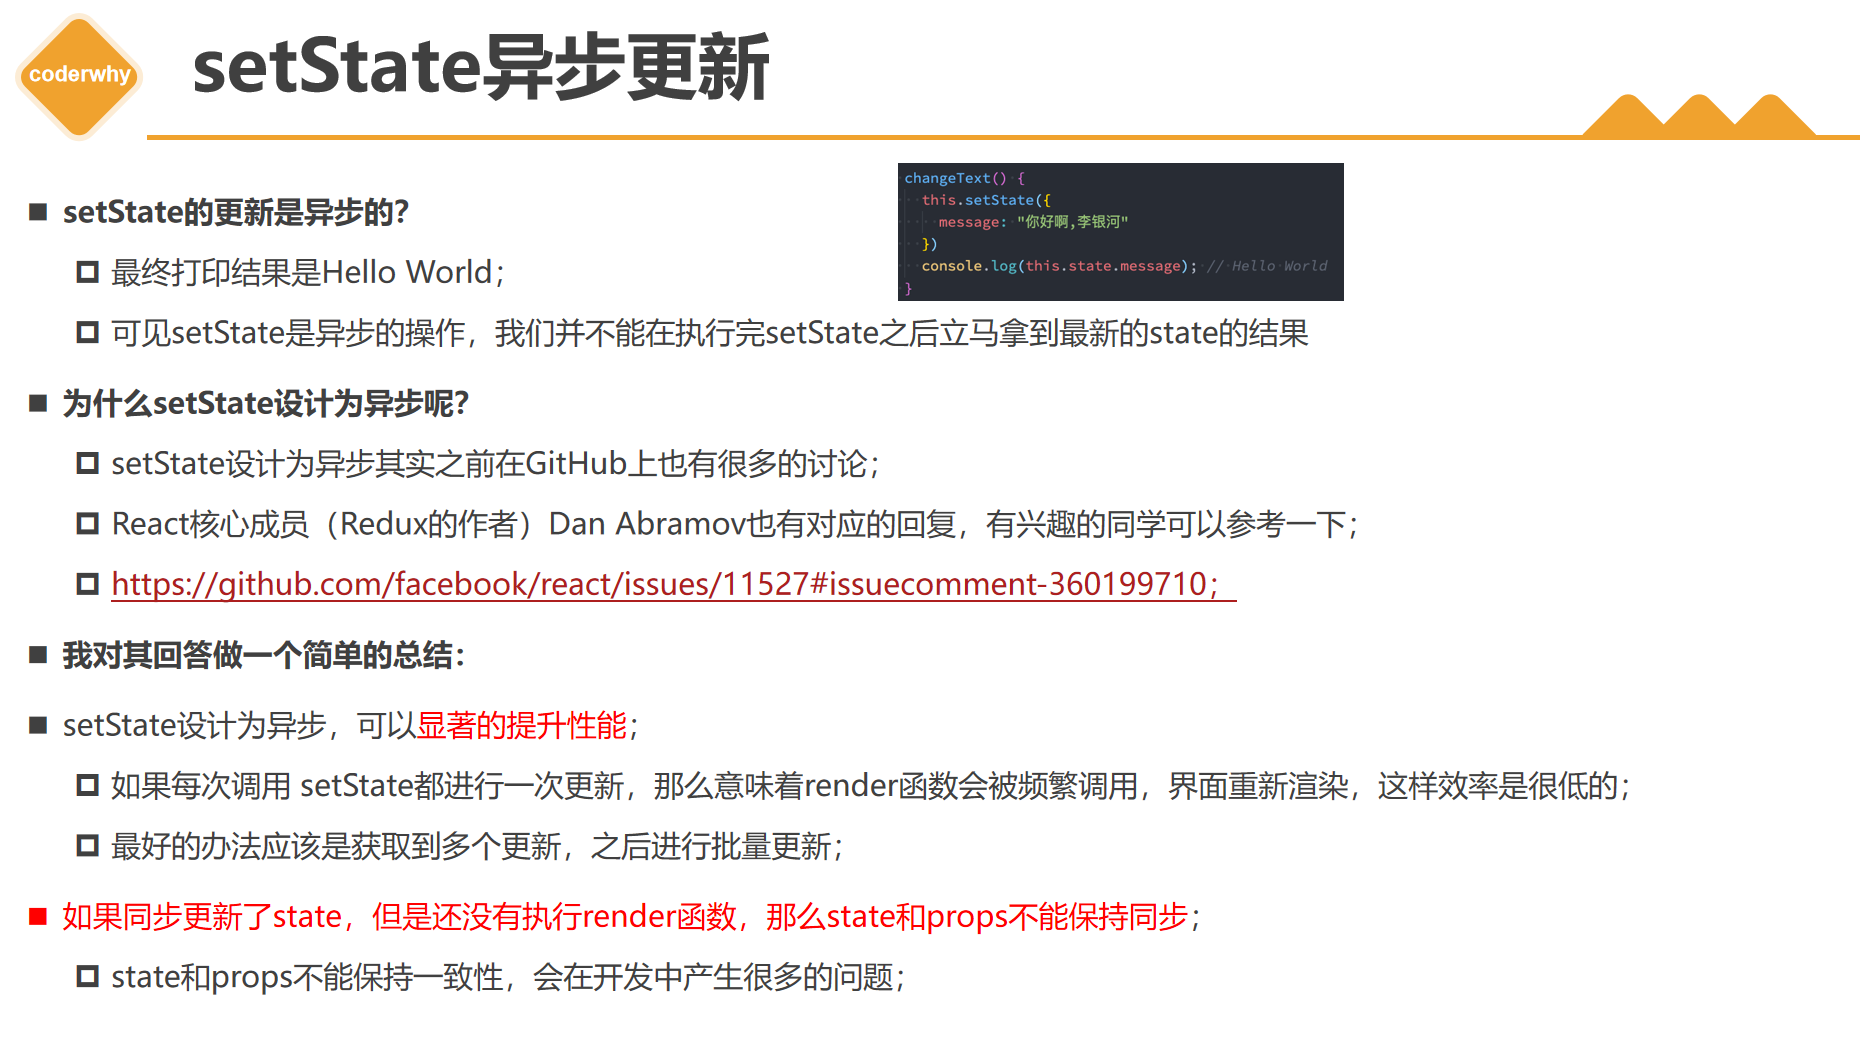
1、setState设计为异步,可以显著的提升性能;
2、如果同步更新了state,但是还没有执行render函数,那么state和props不能保持同步
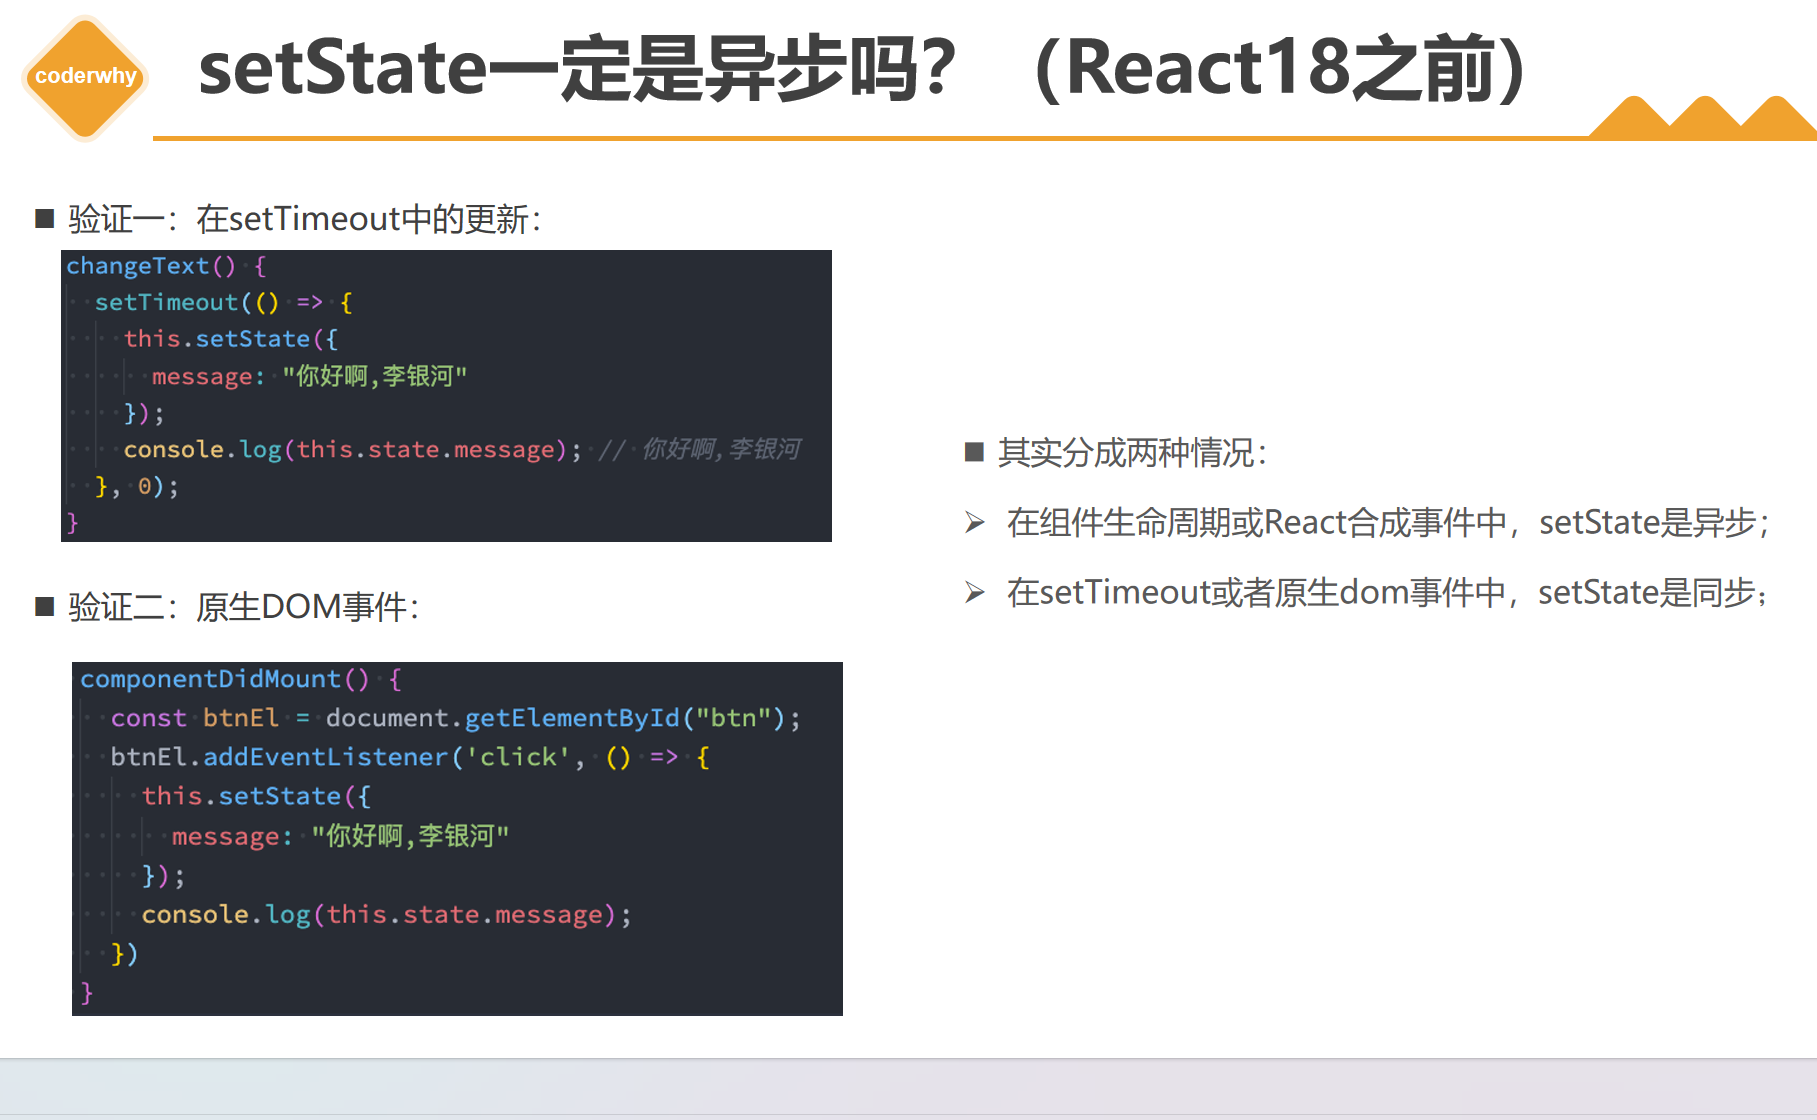
react18之前部分操作是同步的
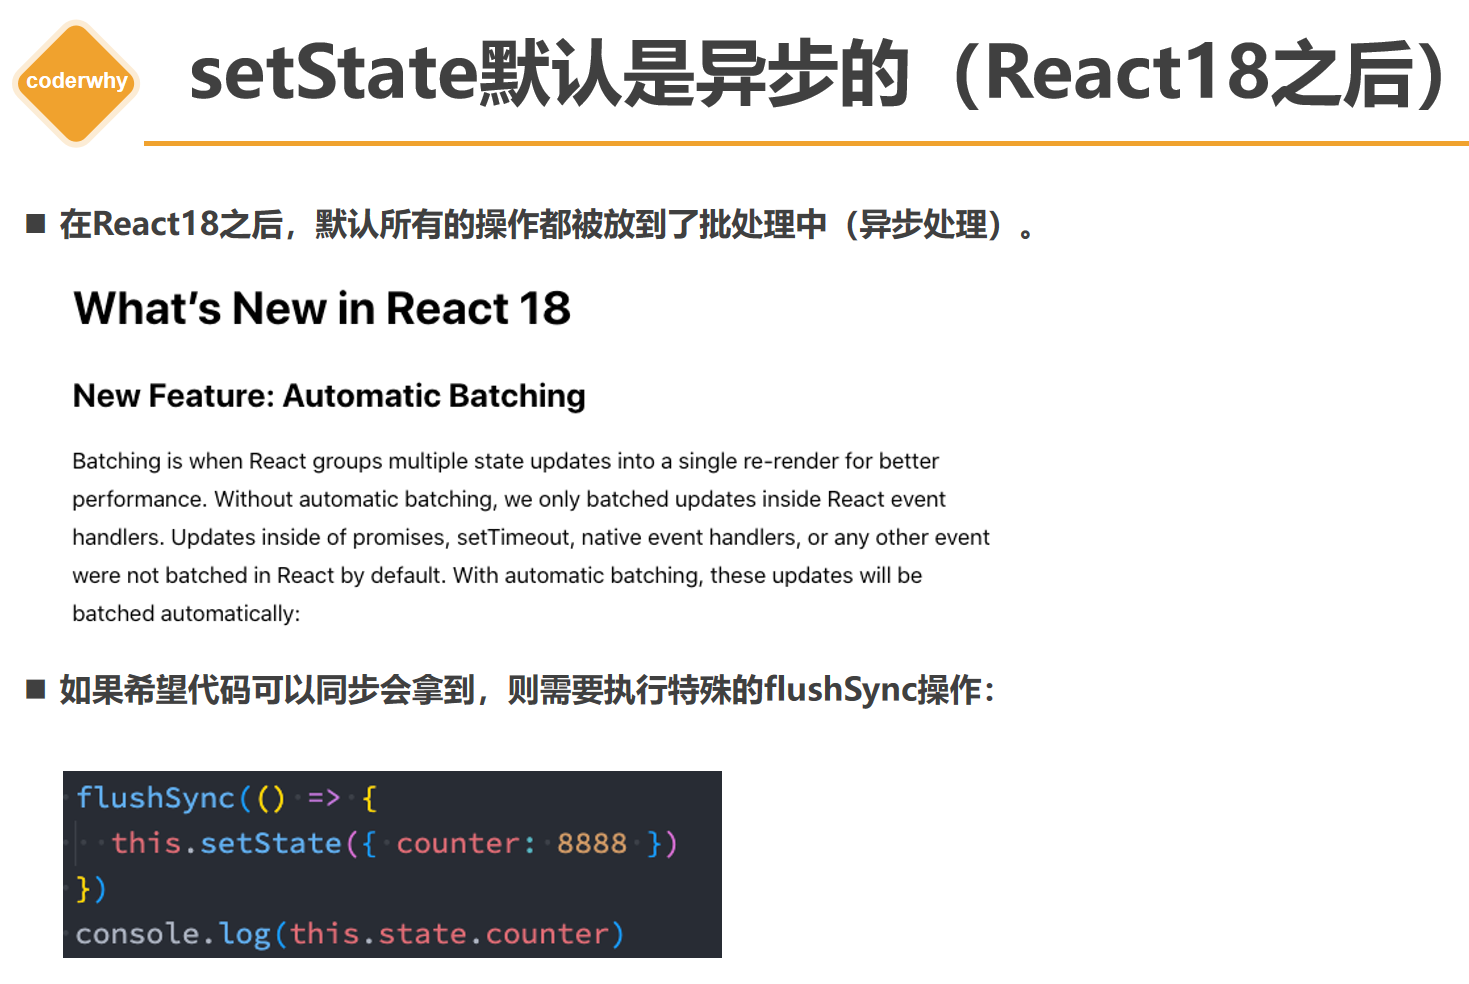
react18以后需要使用flushSync获取同步数据
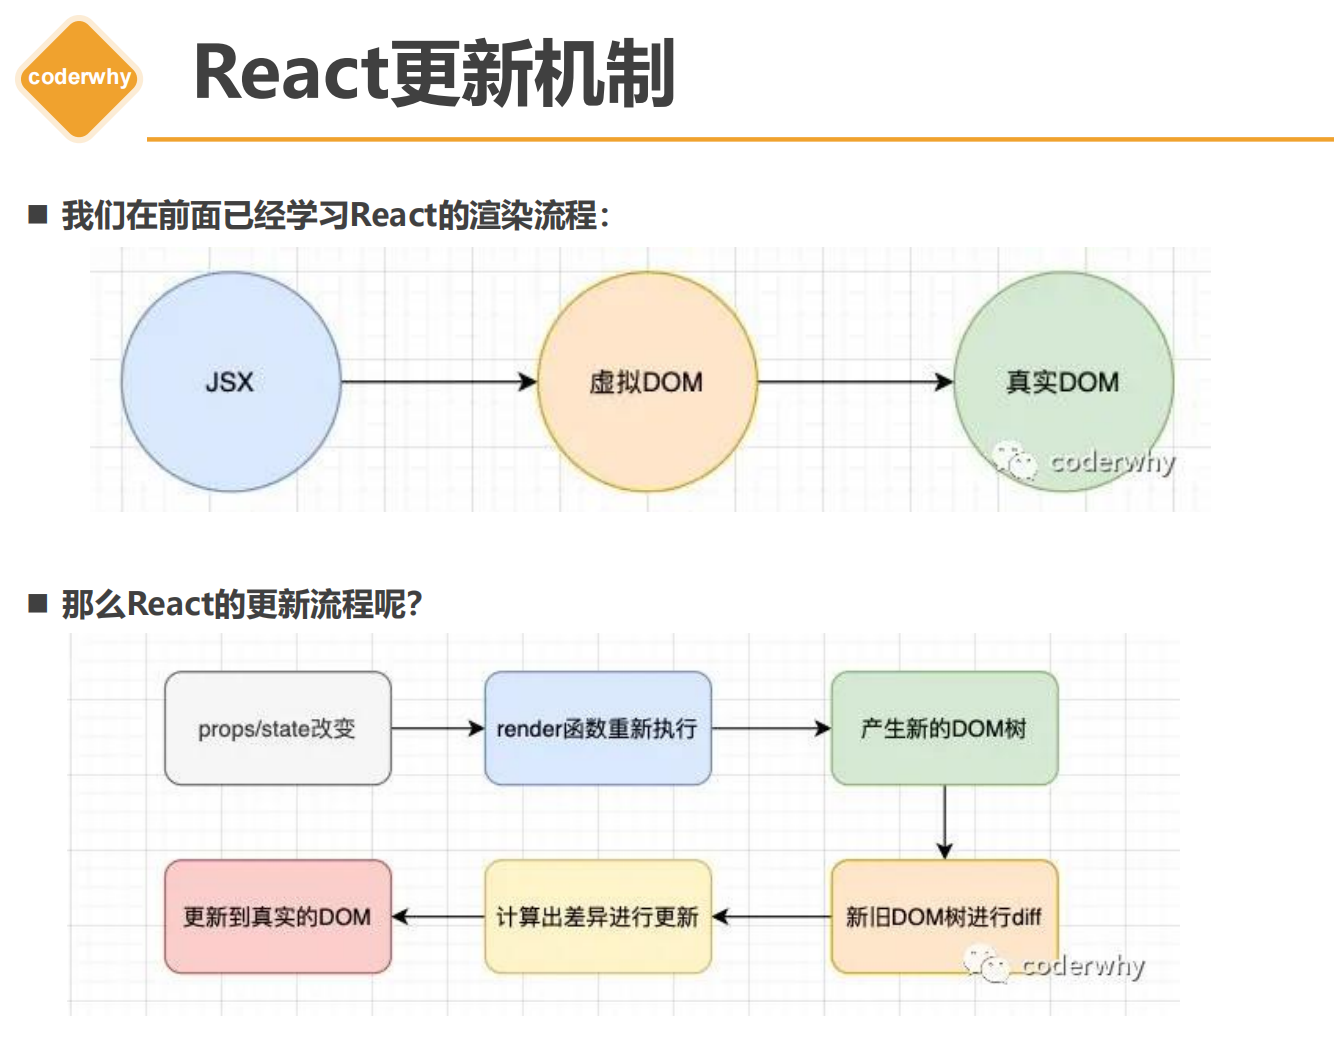
react更新机制
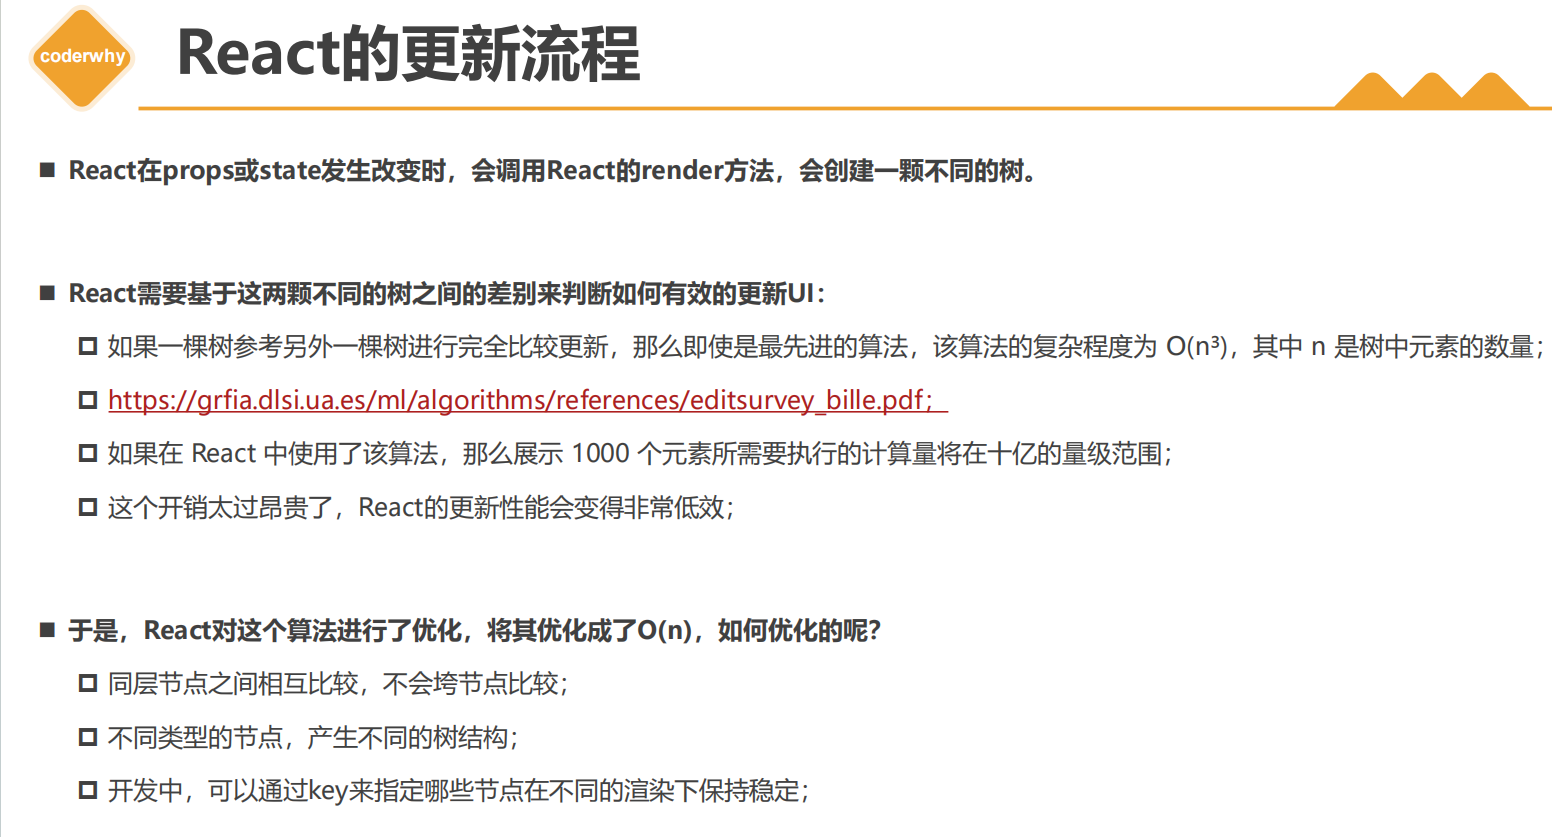
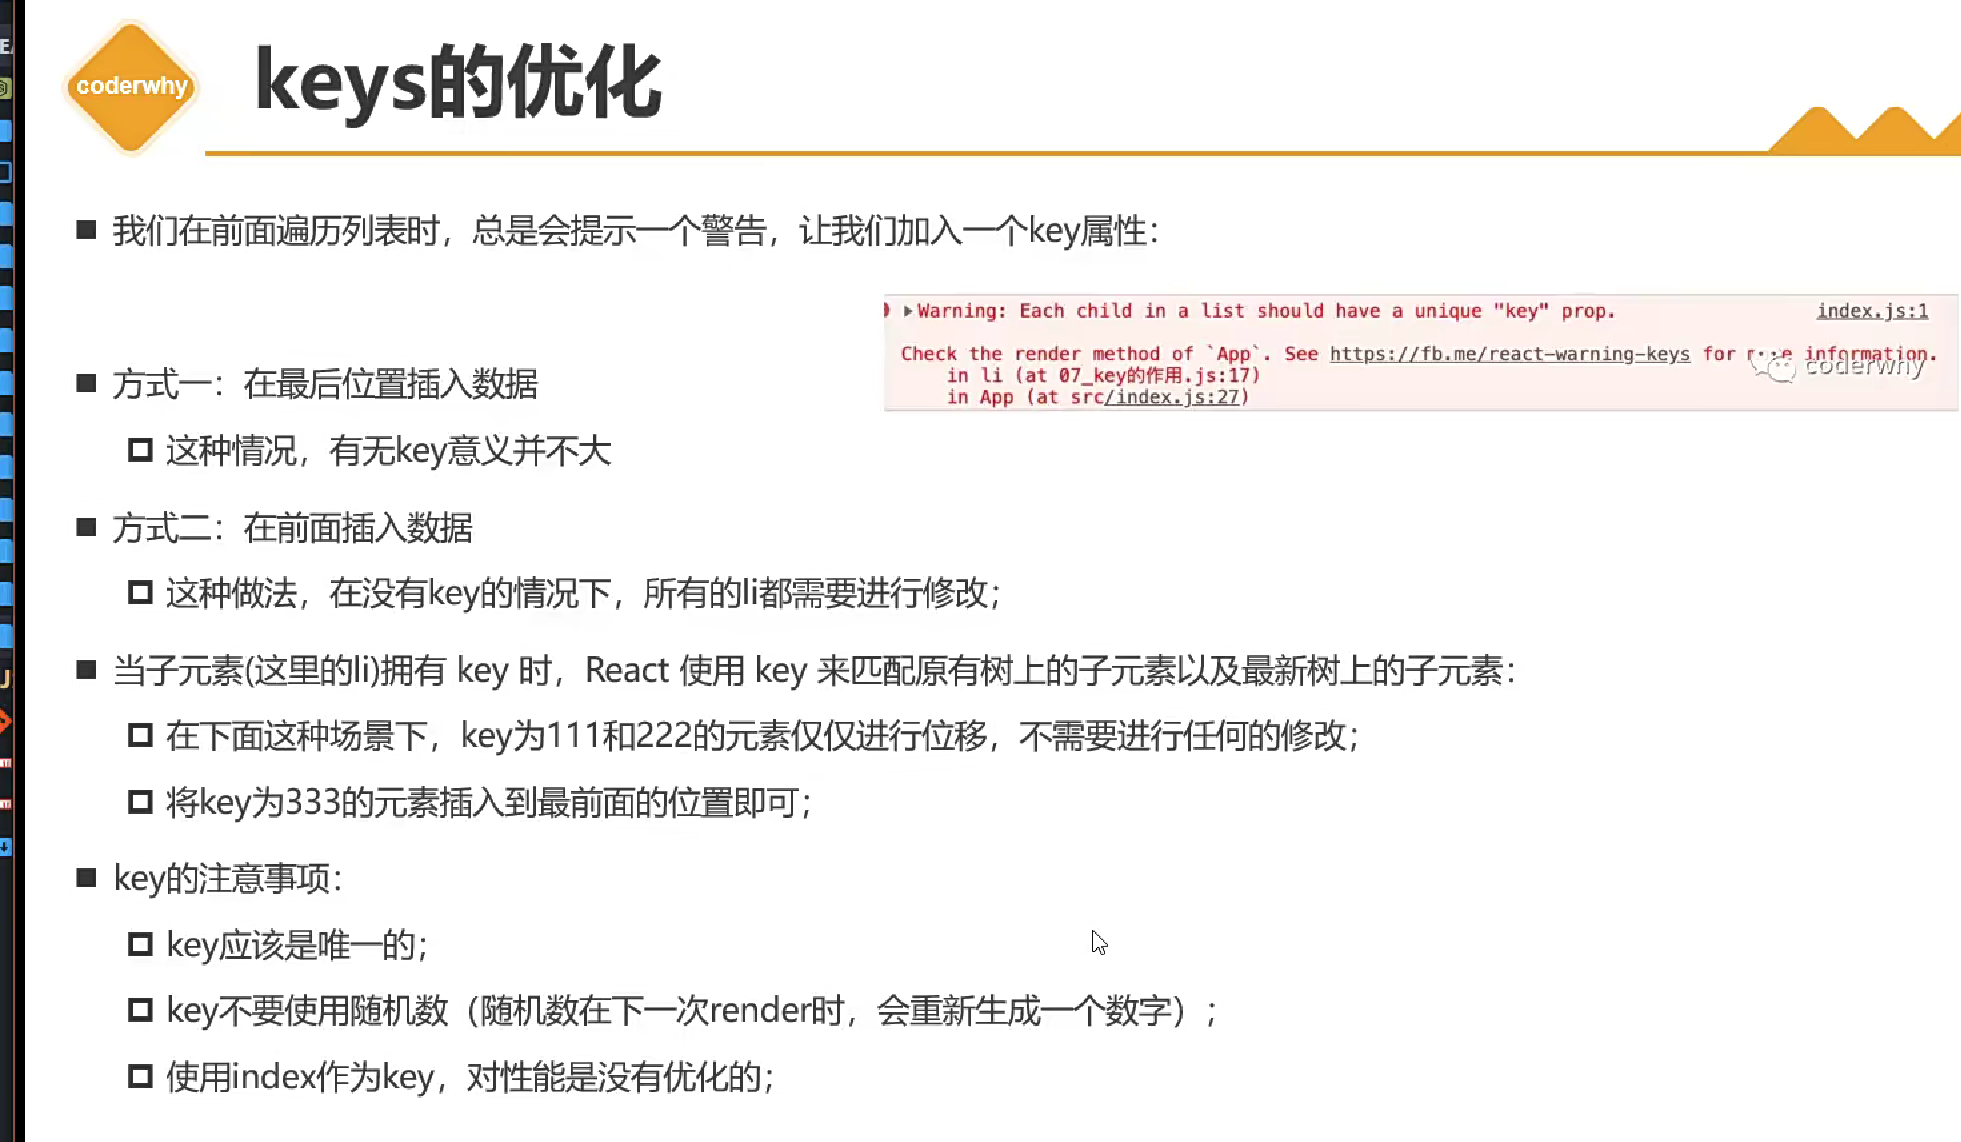
假设是针对树和树之间的比较,那么最小的时间复杂度为O(n)²次方


例子
import React, {Component} from 'react'
import Father from "./Father";

class Index extends Component {
    constructor() {
        super();
        this.state = {
            count: 0
        }
    }

    changeCount() {
        this.setState({count: this.state.count+1})
    }

    render() {
        console.log("Index render");
        return (
            <div>
                <h2>Index Top</h2>
                <div>message: {this.state.count}</div>
                <button onClick={() => {
                    this.changeCount()
                }}>change count
                </button>
                <Father count={this.state.count+1}/>
            </div>
        )
    }
}
export default Index
输出结果:
Index render

father render

child render这个例子中我们只是改变最外层组件的message数据,并没有改变father和child组件,当执行changeCount函数的时候会发现所有子组件都重新出发render函数了
可以在shouldComponentUpdate(SCU)周期函数中进行判断,只有当传入的count值变化后再进行刷新,这里父组件如果传入的count没有变化,那么就不会重新渲染
import React, { Component } from 'react'
import Child from "./Child";

class Father extends Component {
    constructor(props) {
        super(props);
    }

    shouldComponentUpdate(nextProps, nextState, nextContext) {
        if(this.props.count !== nextProps.count) {
            return true
        }

        return false
    }

    render() {
        console.log("father render");
        return (
            <div>
                <h2>Father</h2>
                <Child/>
            </div>
        )
    }
}

export default Father
父组件
   changeCount() {
        this.setState({count: this.state.count})
  }
输出结果:
Index render利用SCU我们就可以对render函数进行优化,但是不可能每个组件都去手动编写代码,这样工作量太大
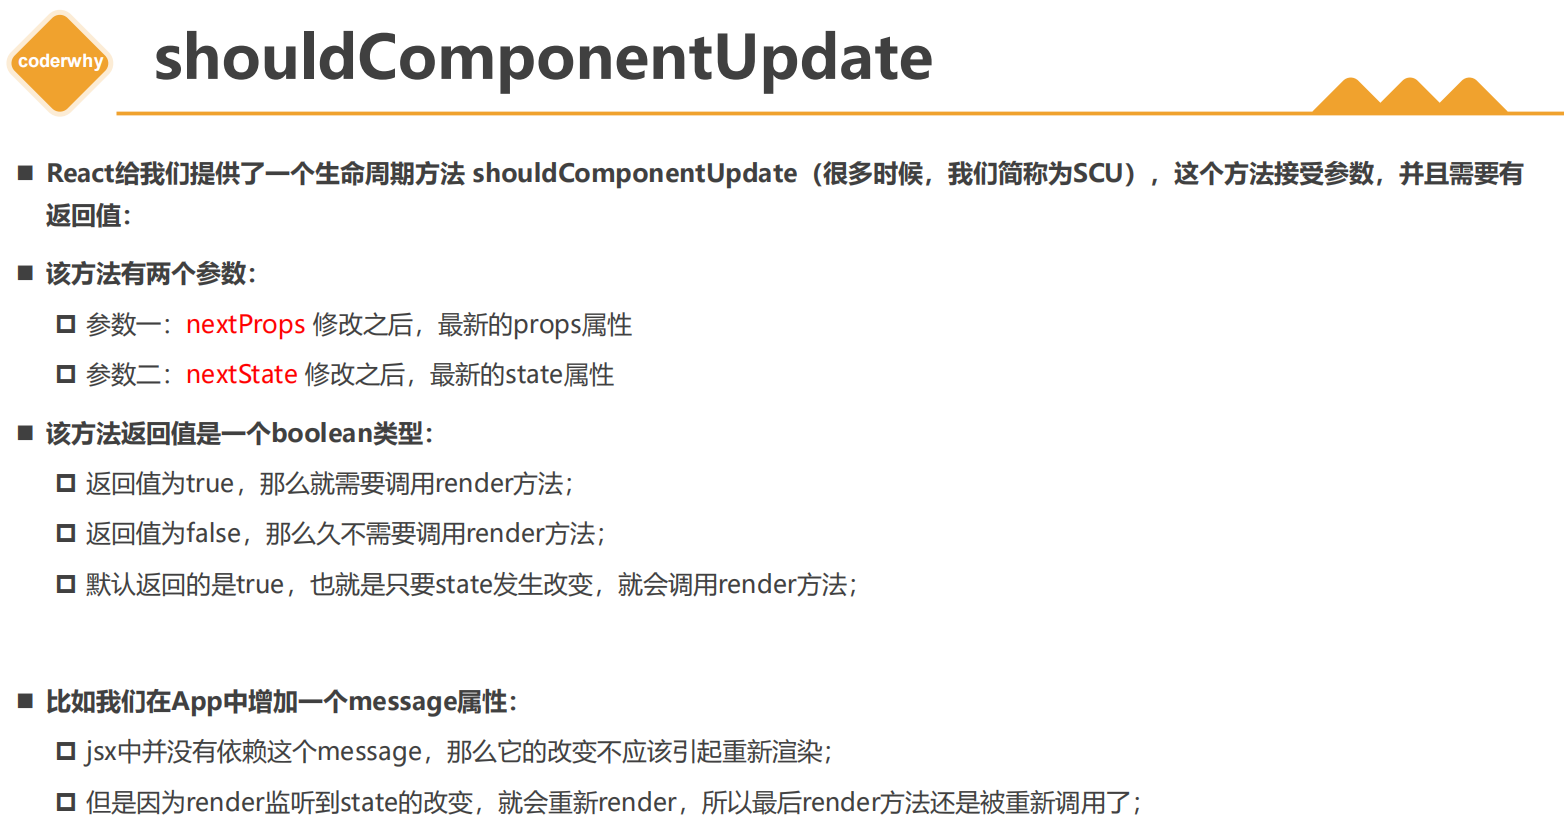
接下来从源码查看SCU更新的规则,SCU最后是否需要更新取决于shallowEqual函数,最后会调用shallowEqual函数对props和state进行比较,判断是否发生变化
代码位置:react-main/packages/react-reconciler/src/ReactFiberClassComponent.js
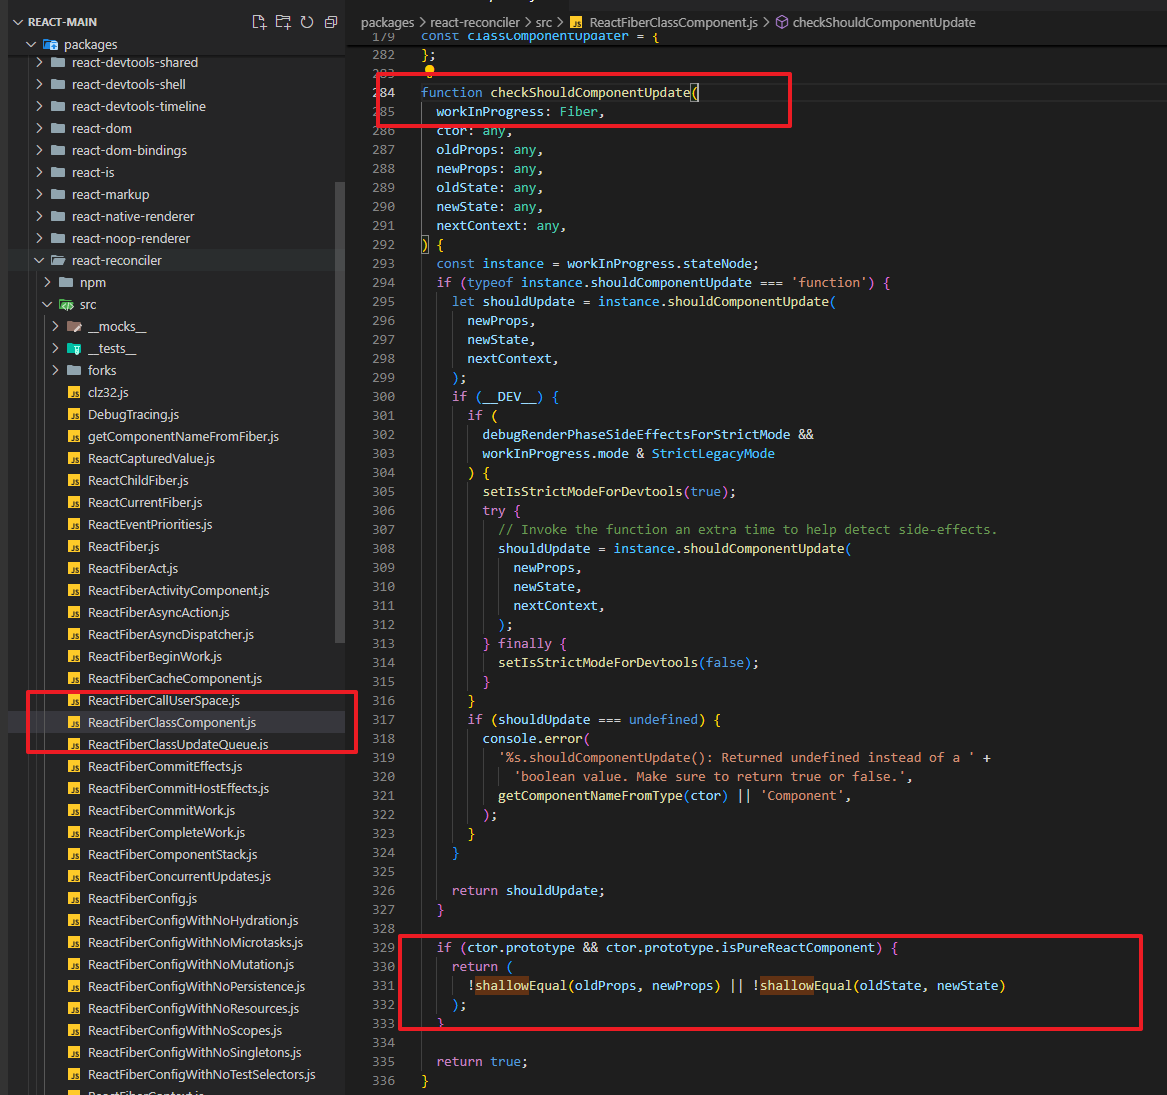
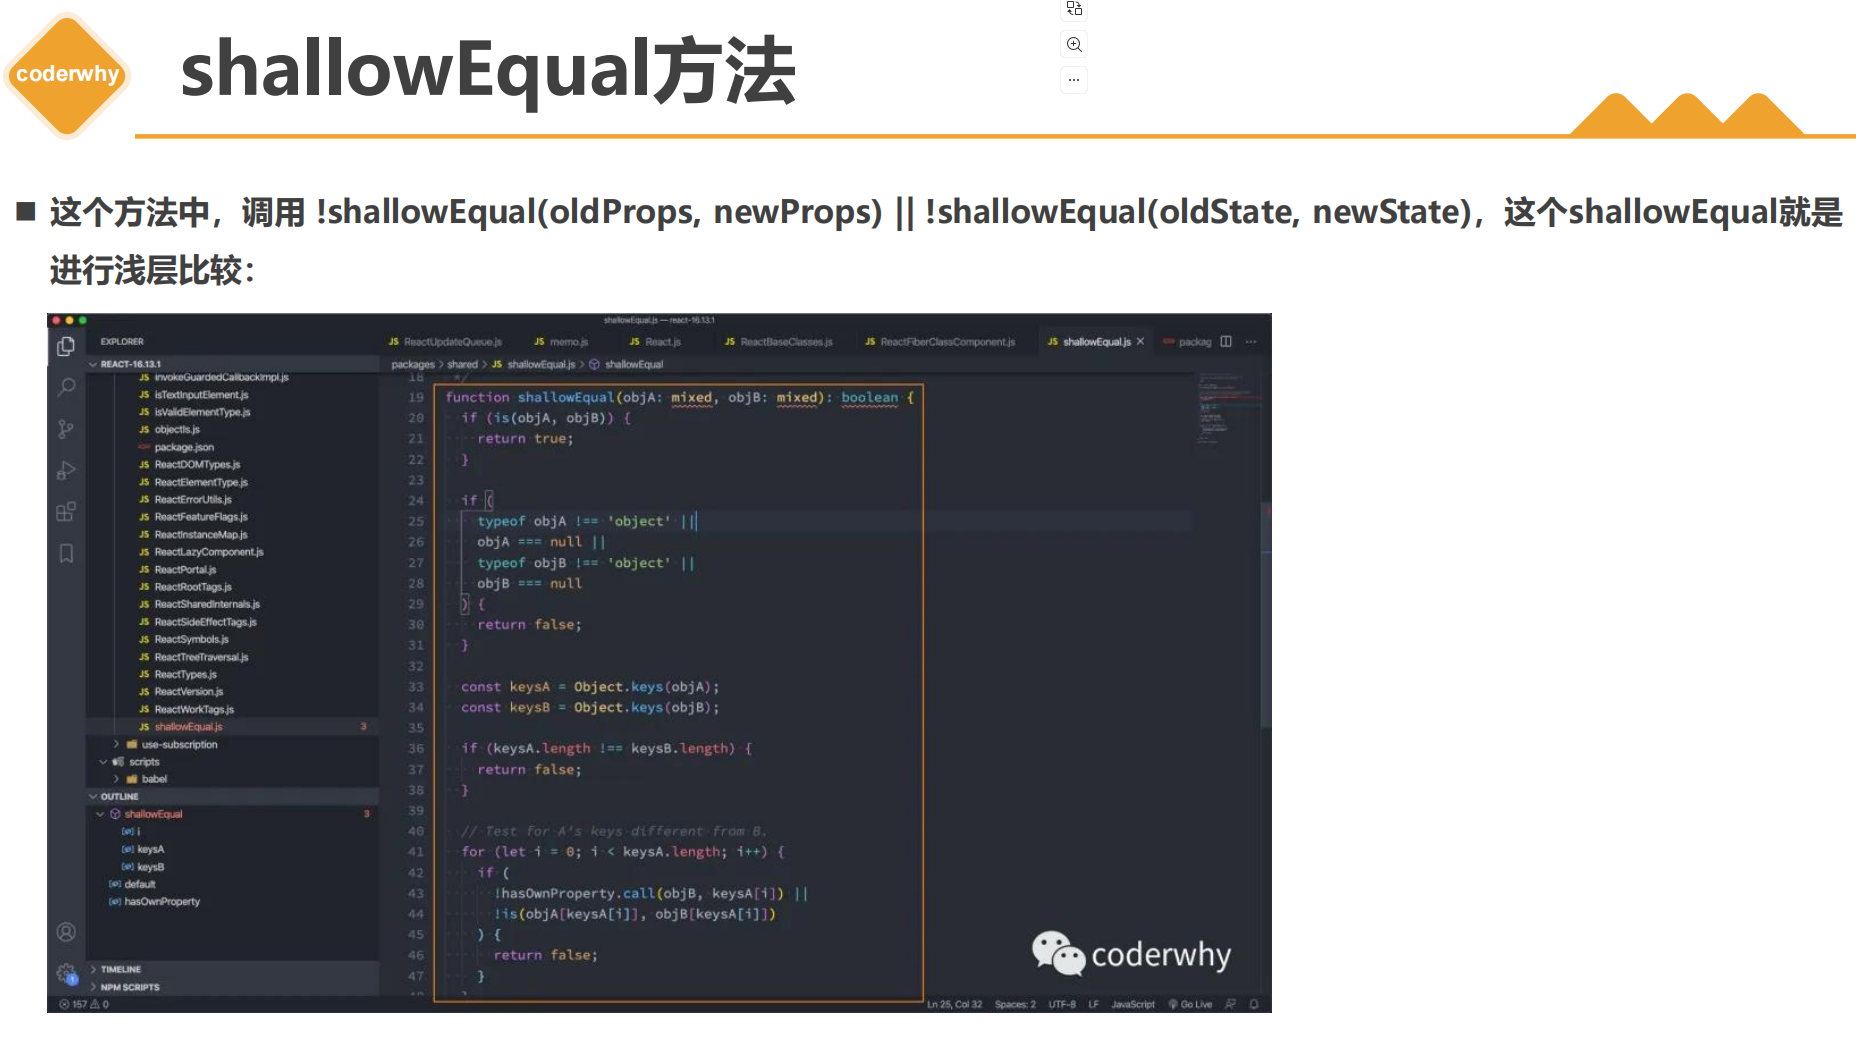
shallowEqual方法,位置:react-main/packages/shared/shallowEqual.js
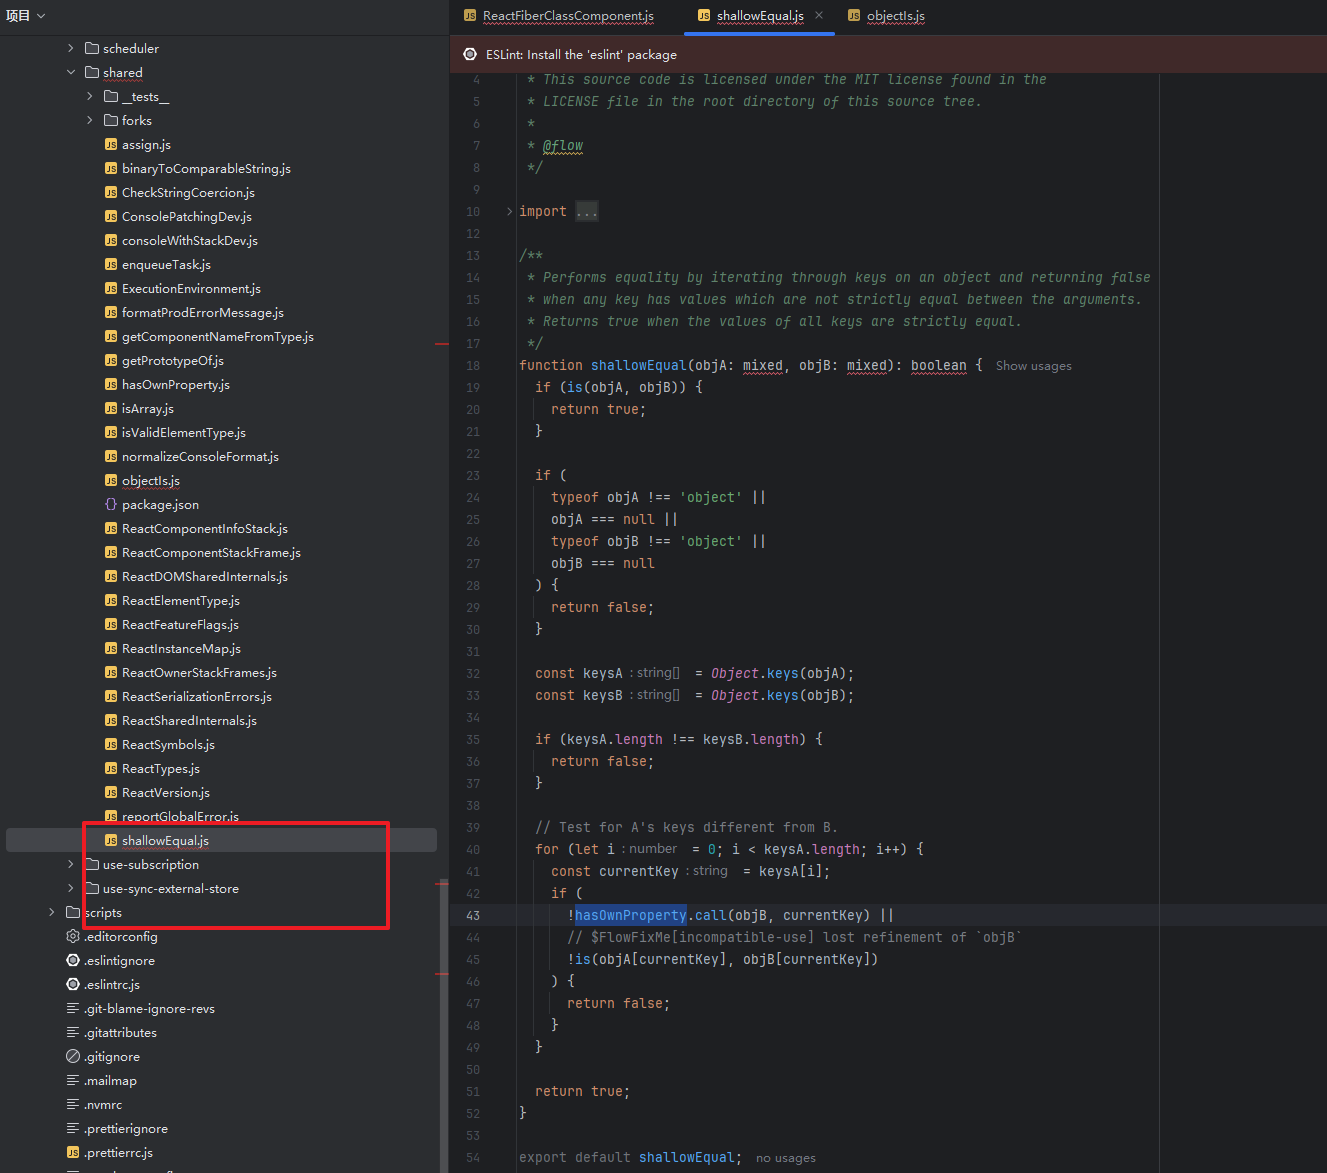
shallowEqual比较流程:
1、首先进行Object.is比较
2、比较objA和objB的keys的长度
3、遍历一次objA和objB,每个value进行比较(验证了前面的猜测,books是一个数组,里面不过添加多少元素,state[books]的引用始终没有改变,那么就不会触发SCU)
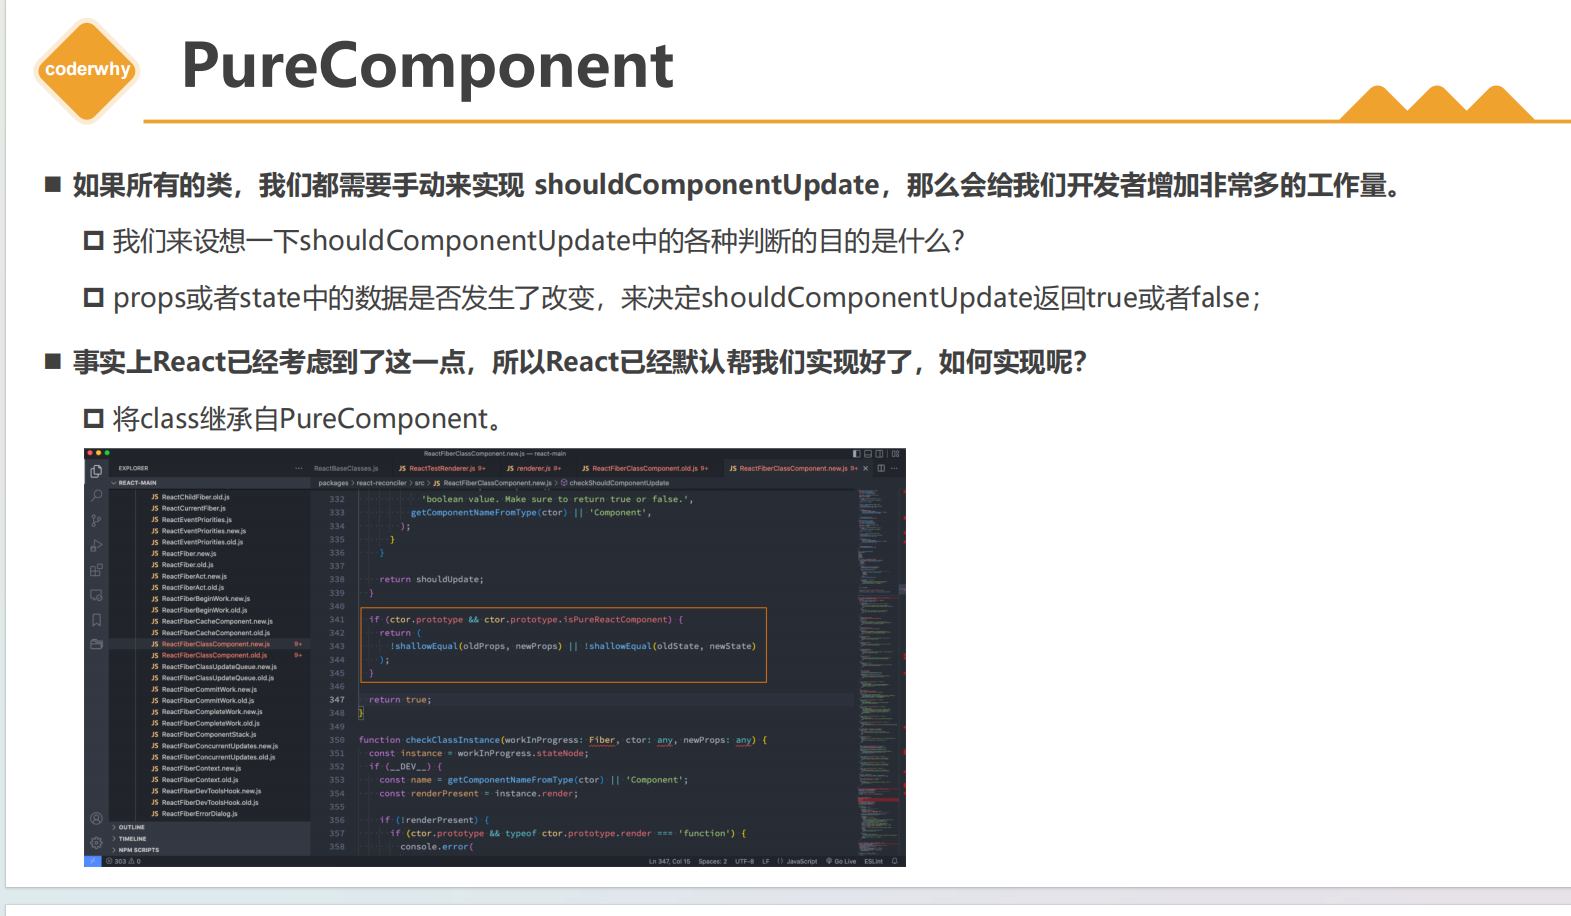
如何使用:
我们只需要在类组件中继承PureComponent组件,
import React, { PureComponent} from 'react'
import Child from "./Child";

class Father extends PureComponent {
    constructor(props) {
        super(props);
    }
    render() {
        console.log("father render");
        return (
            <div>
                <h2>Father</h2>
                <Child/>
            </div>
        )
    }
}

export default FatherPureComponent会帮我们完成SCU优化,但这种比较只能比较层次较浅的

函数式组件可以利用一个高阶函数memo进行优化
子组件
function FuncCom(props){
    console.log("FuncCom render")
    return (
        <h2>count:{ props.count }</h2>
    )
}

export default FuncCom
父组件
import React, {PureComponent} from 'react'

class Index extends PureComponent {
    constructor() {
        super();
        this.state = {
            count: 0,
            message: ""
        }
    }
    changeCount() {
        this.setState({message: "hello"})
    }

    render() {
        console.log("Index render");
        return (
            <div>
                <button onClick={() => {
                    this.changeCount()
                }}>change count
                </button>
                <FuncCom count={ this.state.count }/>
            </div>
        )
    }
}

export default Index当点击按钮的时候依然会输出FuncCom render
使用memo进行优化后,就可以避免函数组件中不必要的渲染,此时执行render函数,如果不涉及FuncCom组件中的变量那就不会执行渲染函数
import {memo} from "react";

const Profile = memo(function FuncCom(props) {
    console.log("FuncCom render")
    return (
        <h2>count:{props.count}</h2>
    )
})

export default Profile引自官方文档数据不可变的力量
这里以一个修改对象数组的场景为例子
例子:
import React, {PureComponent} from 'react'
class Index extends PureComponent {
    constructor() {
        super();
        this.state = {
            books: [
                {
                    name: "你不知道的JS",
                    price: 100,
                    count: 1
                },
                {
                    name: "JS高级程序设计",
                    price: 100,
                    count: 2
                },
                {
                    name: "React高级程序设计",
                    price: 100,
                    count: 3
                }
            ]
        }
    }

    addBook() {
        const newBook = ({
            name: "Vue高级程序设计",
            price: 100,
            count: 3
        })
        this.state.books.push(newBook)
        this.setState({
            books: this.state.books
        })
    }

    render() {
        return (
            <div>
                <h2>列表数据</h2>
                <div>
                    <ul>
                        {
                            this.state.books.map((item, index) => {
                                return (
                                    <li key={index}>
                                        <span>name:{item.name}-price:{item.price}-count:{item.count}</span>
                                    </li>
                                )
                            })
                        }
                    </ul>
                    <button onClick={()=>{this.addBook()}}>+1</button>
                </div>

            </div>
        )
    }
}
export default Index实际开发中我们经常会继承PureComponent组件,主要观察addBook函数,最后setState操作的时候,赋值的对象还是原本this.state.books的引用,前面提到了PureComponent的SCU比较是浅比较的,对于一些深层次对象无效的。
这里可以猜测PureComponent的比较是简单类型直接比较值,对于复杂类型比较的是引用,并不会遍历复杂对象内部比较,所以官方也给出了这类场景应该如何处理。
官方给出的解决方法是复制一个新的引用值:
 addBook() {
        const newBook = ({
            name: "Vue高级程序设计",
            price: 100,
            count: 3
        })
        // 创建一个新的引用变量
        const books = [...this.state.books, newBook]
        this.setState({
            books: books
        })
    }
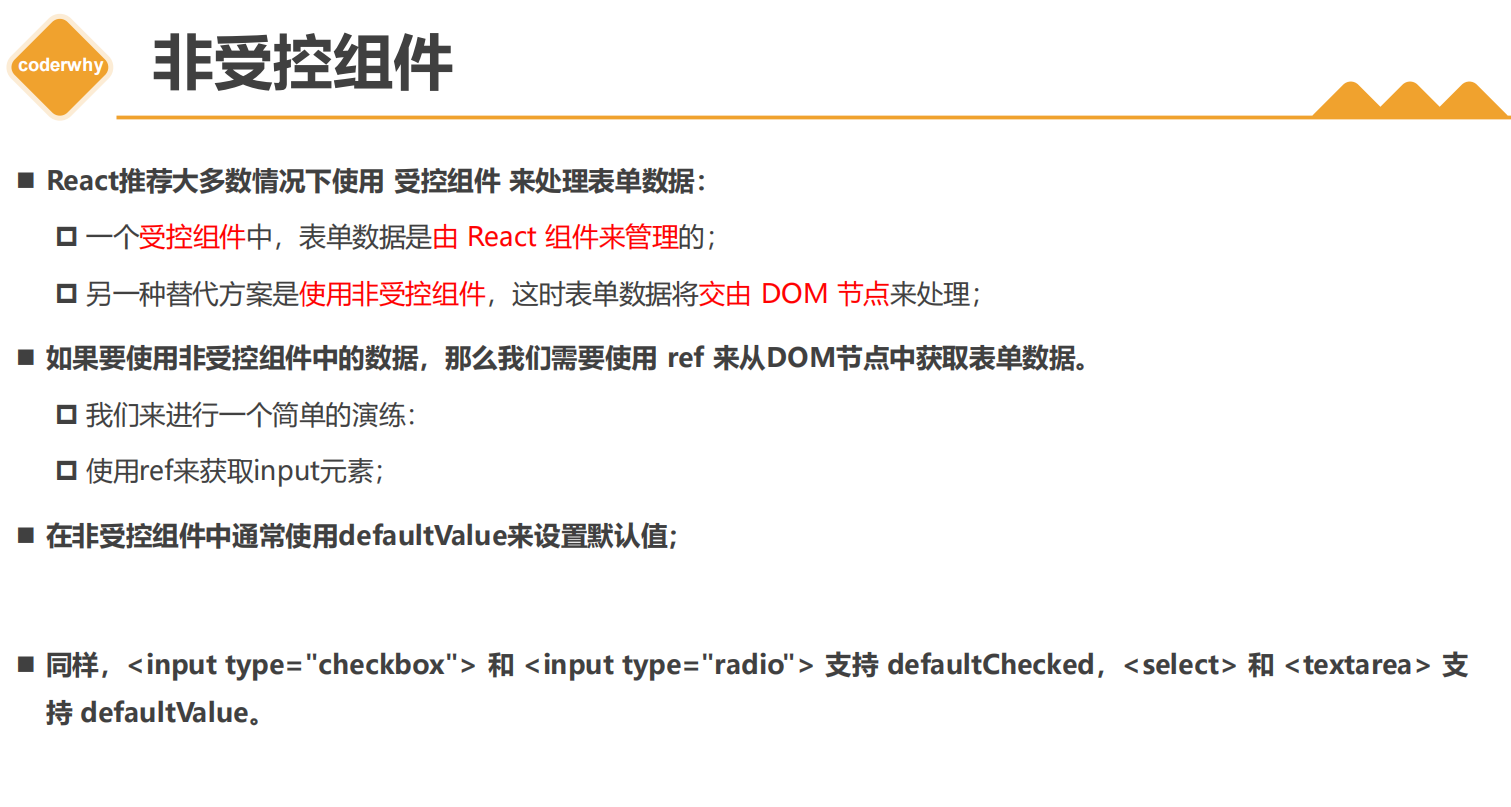
高阶组件本质上是一个函数,接收参数是一个组件,返回参数也是一个组件
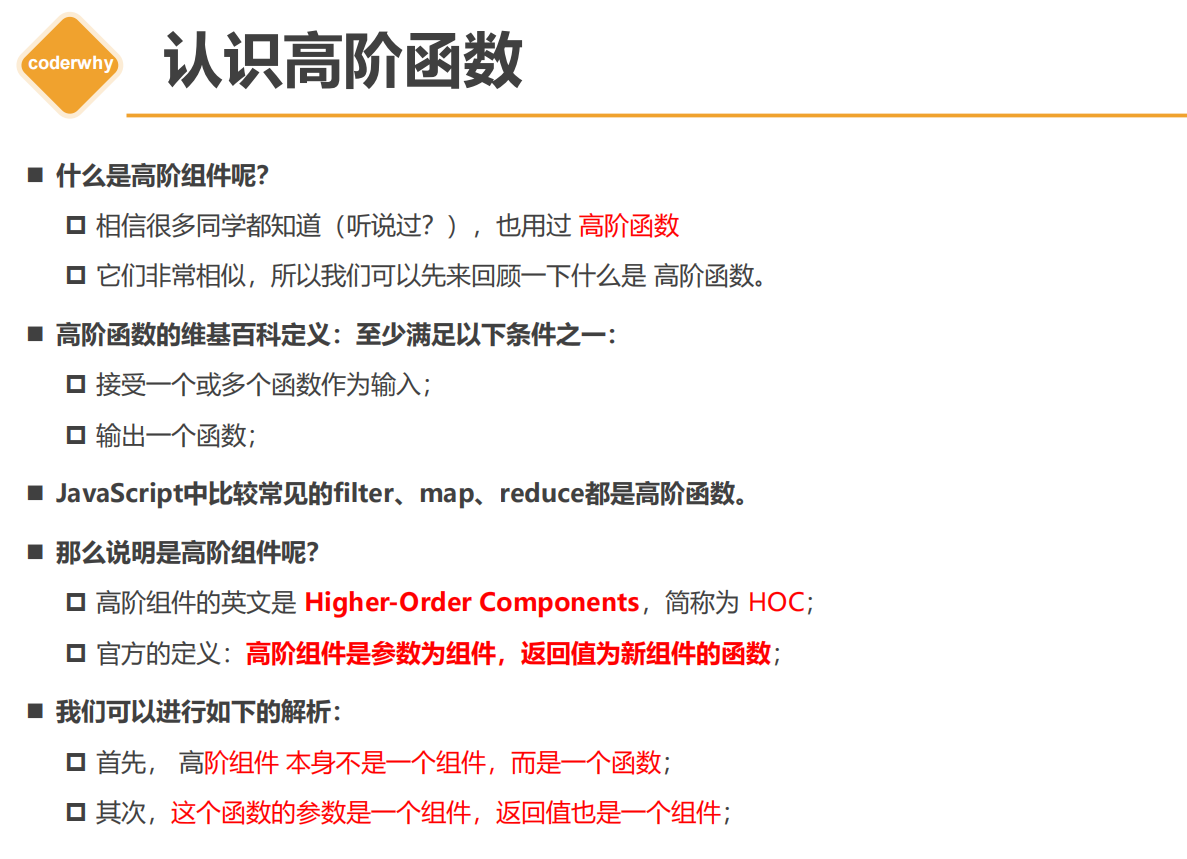

高阶组件大概长这样:
import React, {PureComponent, createRef, forwardRef} from 'react'

class HelloWorld extends PureComponent {
    render() {
        return (
            <h2>HelloWorld</h2>
        )
    }
}
/**
 * 高阶组件
 * @param Cpn
 * @returns {NewCpn}
 */
function hoc(Cpn) {
    class NewCpn extends PureComponent {
        render() {
            return <Cpn name="why"/>
        }
    }

    return NewCpn
}

const Hello = hoc(HelloWorld);

class Index extends PureComponent {
    render() {
        return (
            <div>
                <Hello/>
            </div>
        )
    }
}

export default Index
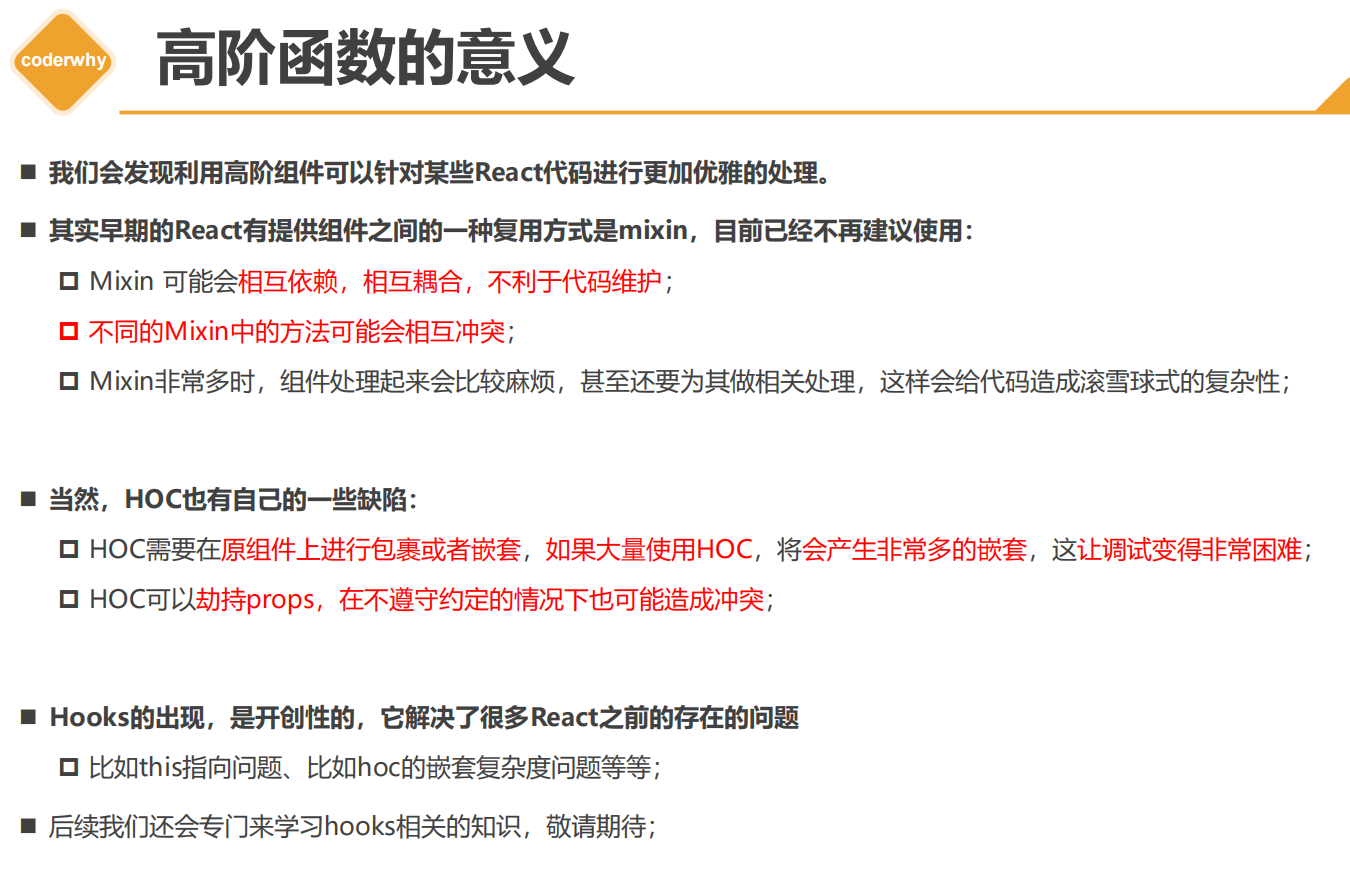
高阶组件的主要作用是对组件进行一层过滤,方便进行业务处理等操作
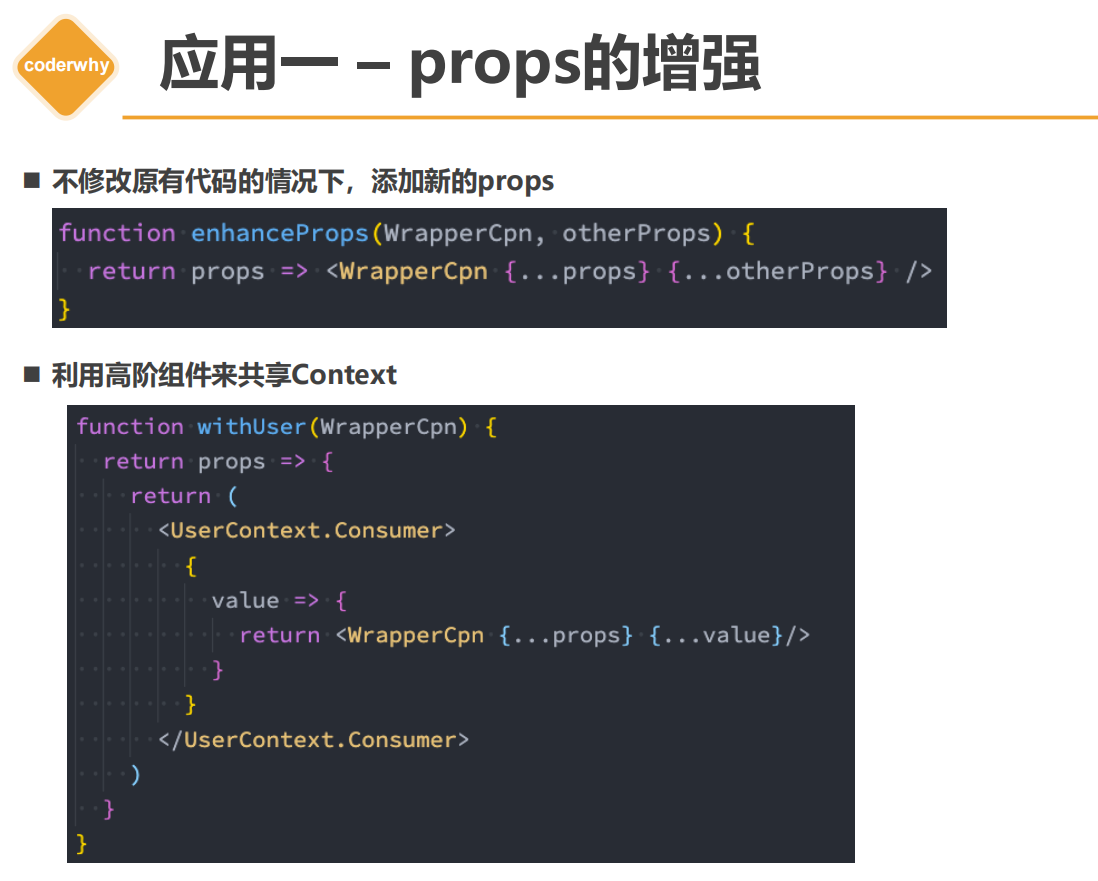
应用一:增强props
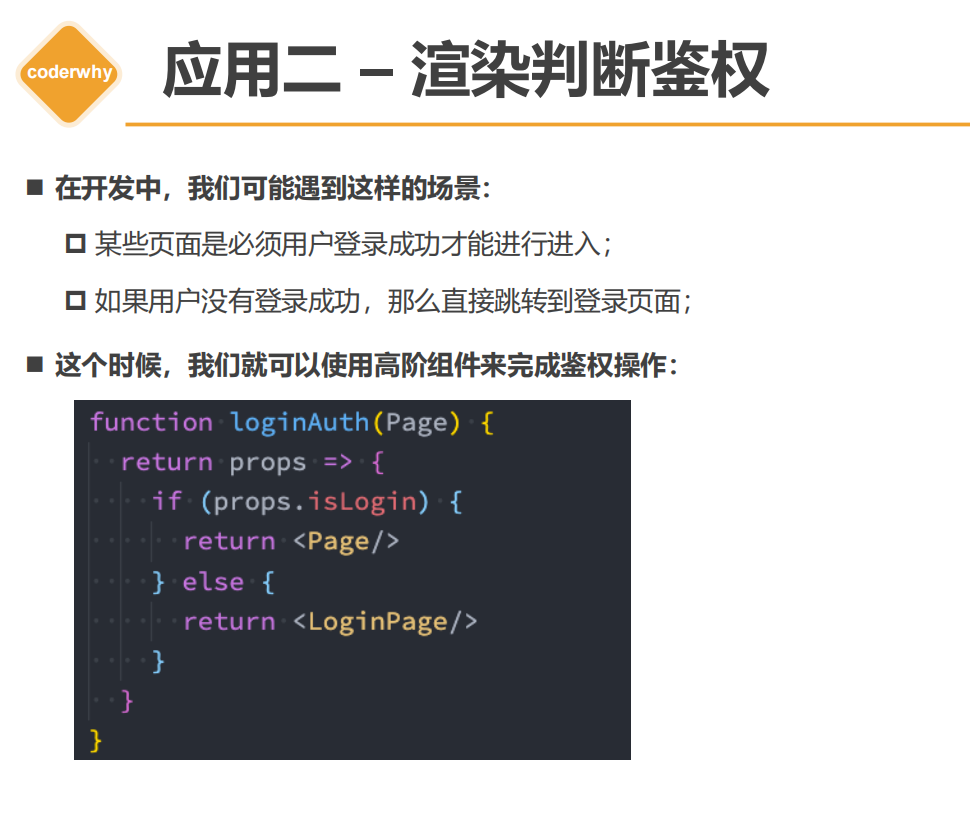
应用二:渲染判断鉴权
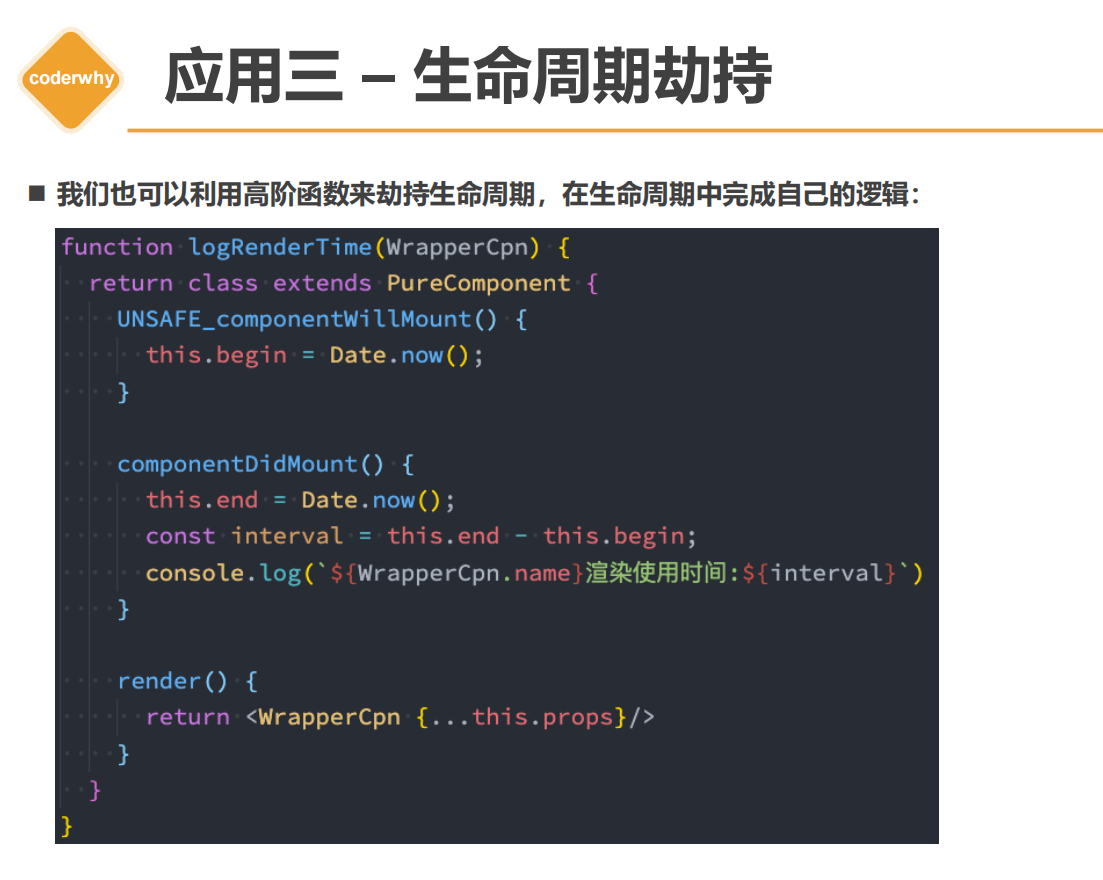
应用三:生命周期劫持
Ref转发
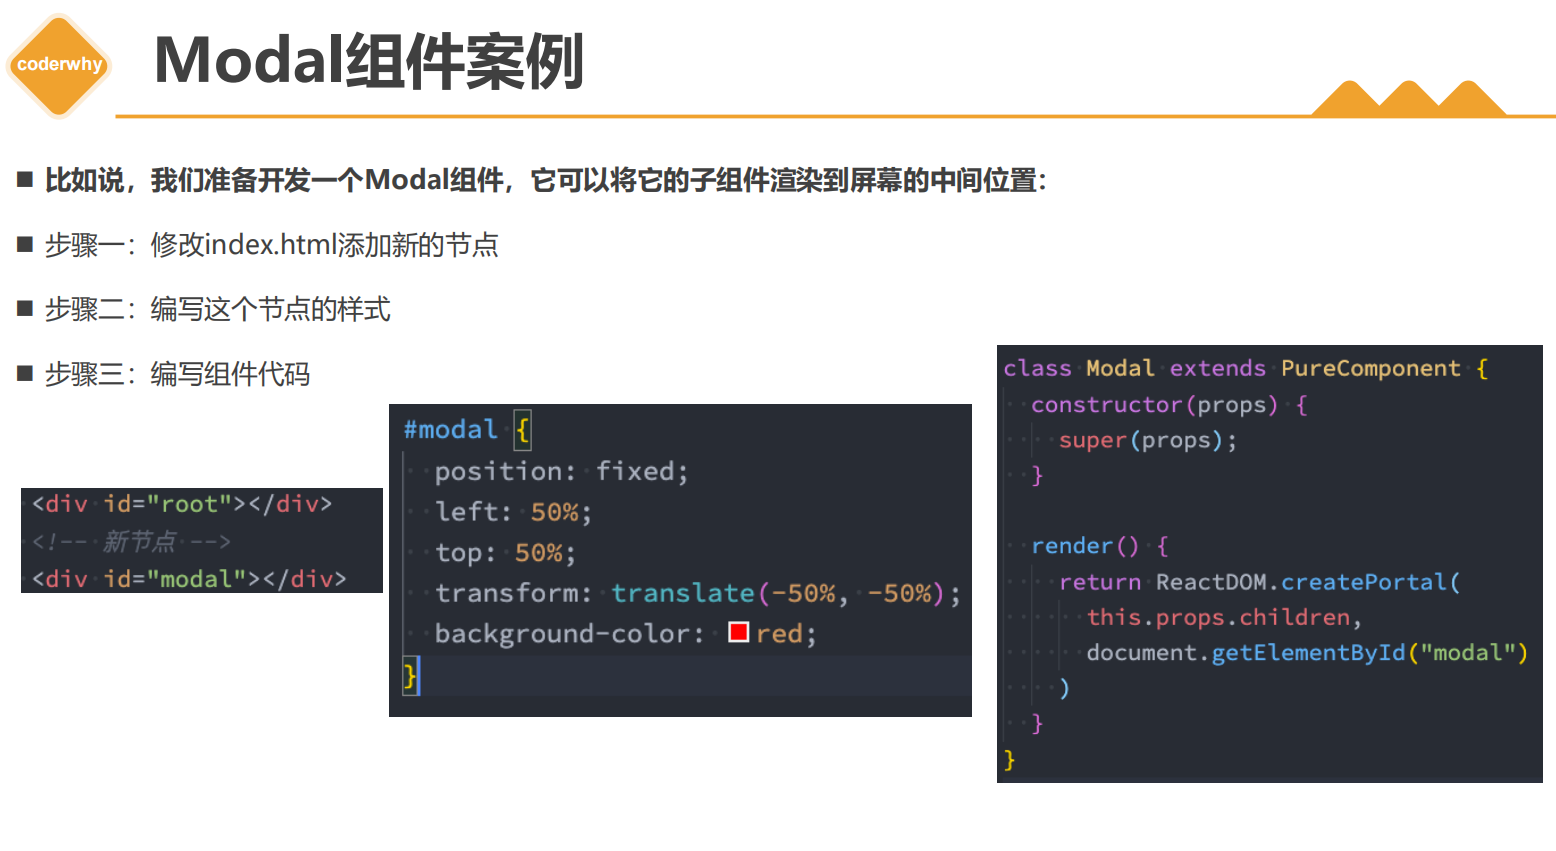
Portals
应用案例:
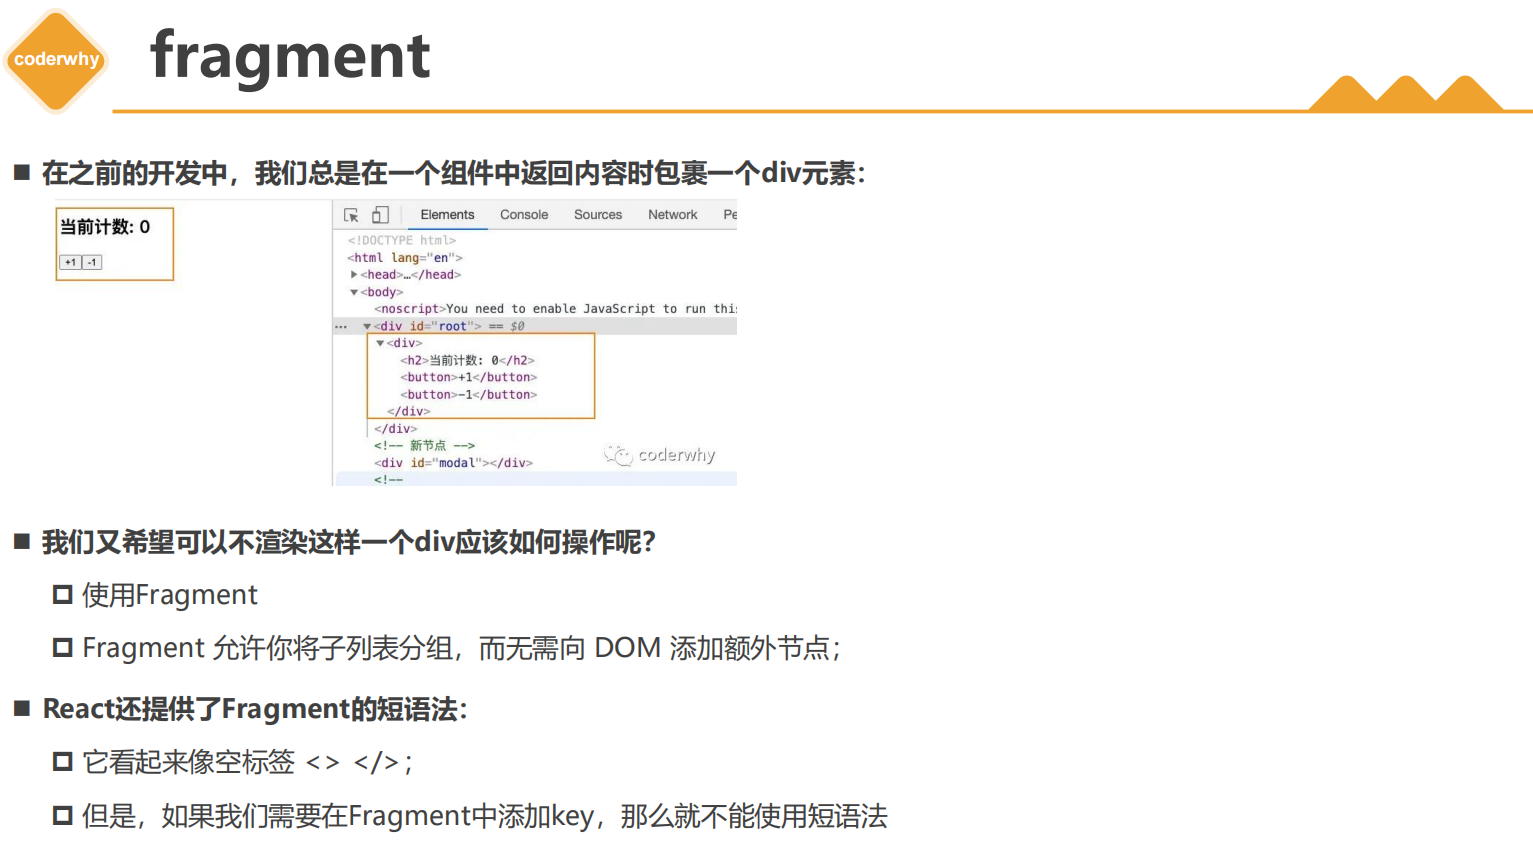
fragment 类似于Vue中的template
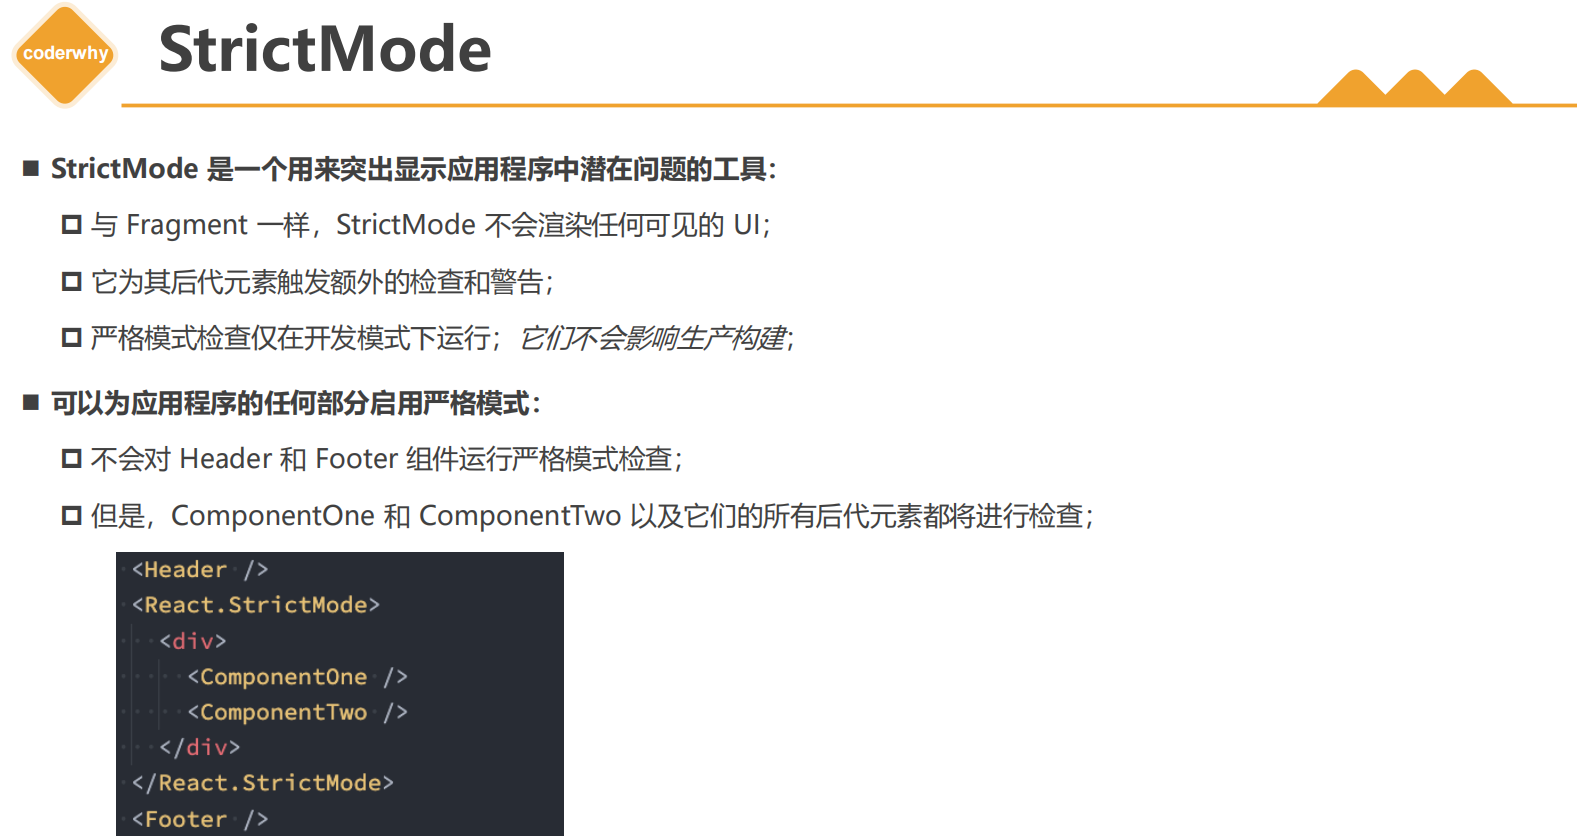
StrictMode
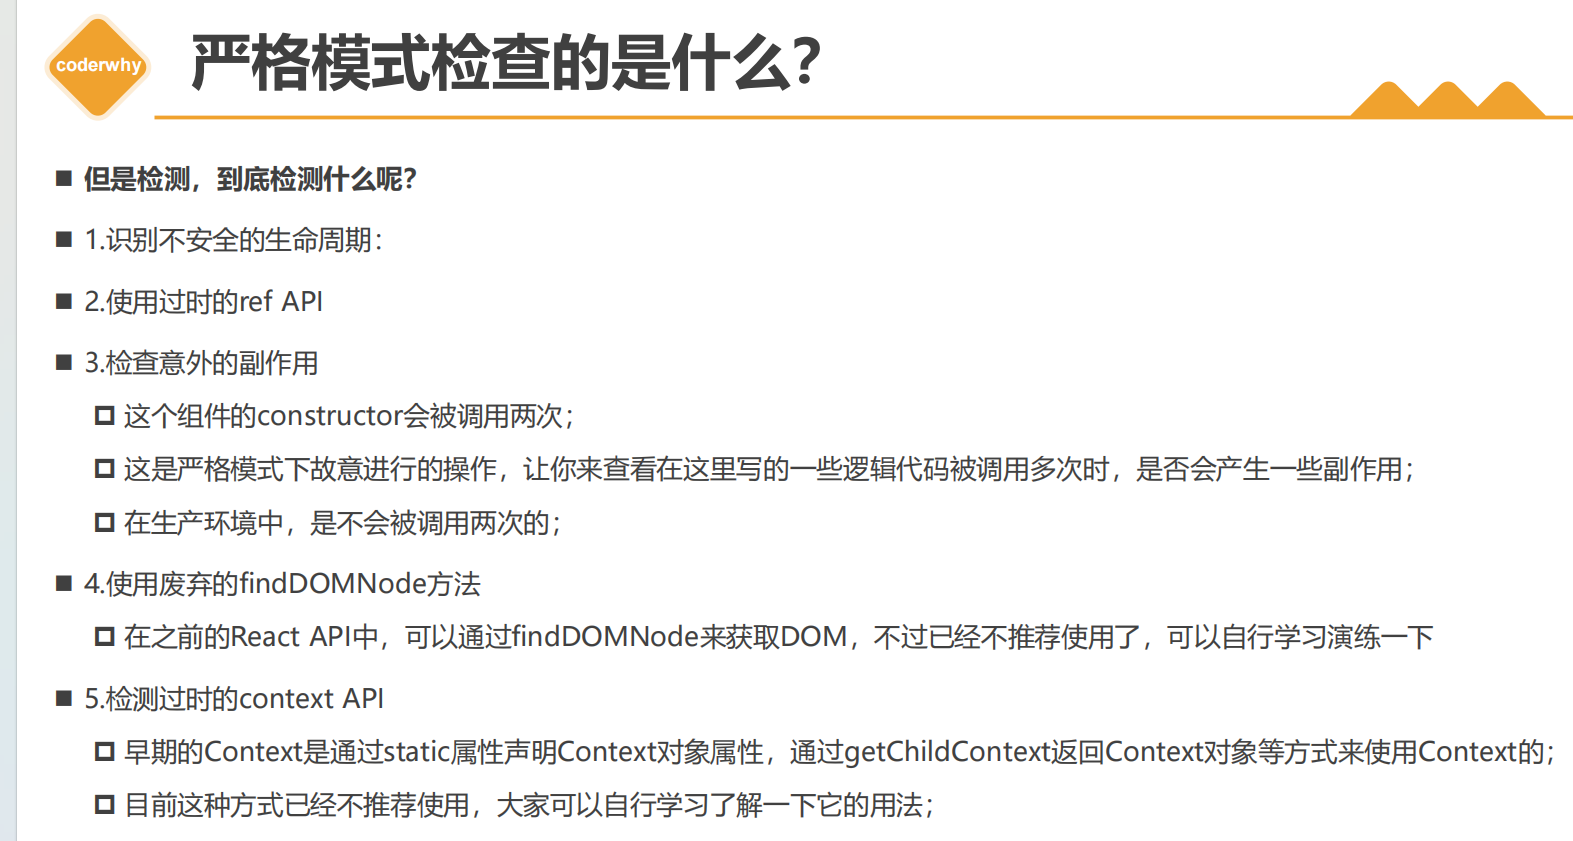
严格模式监测的内容
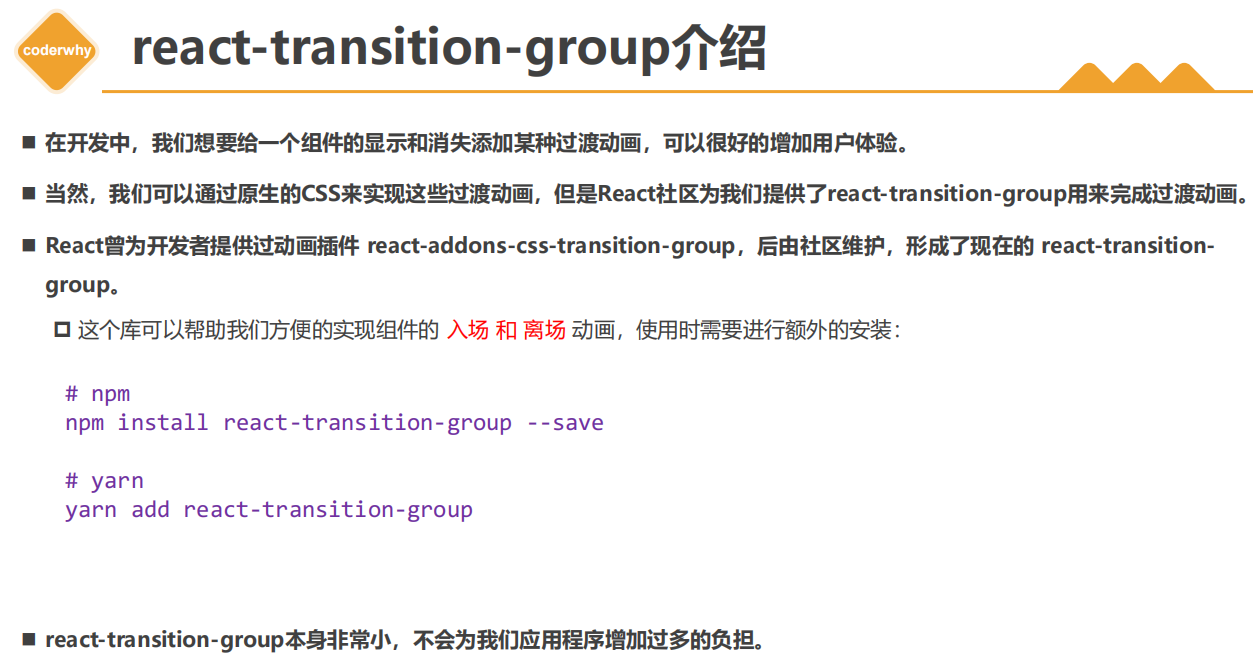
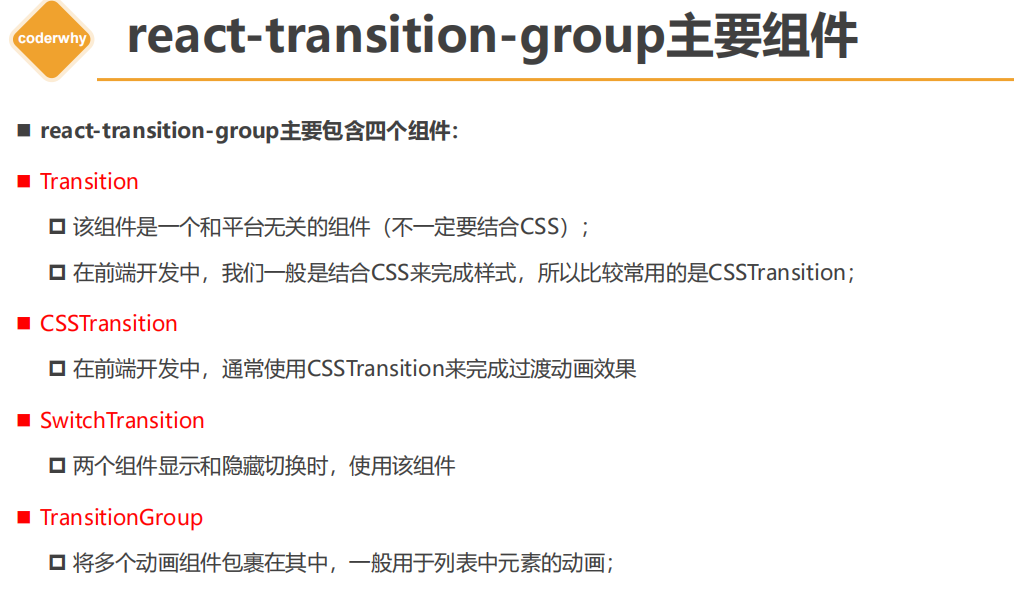
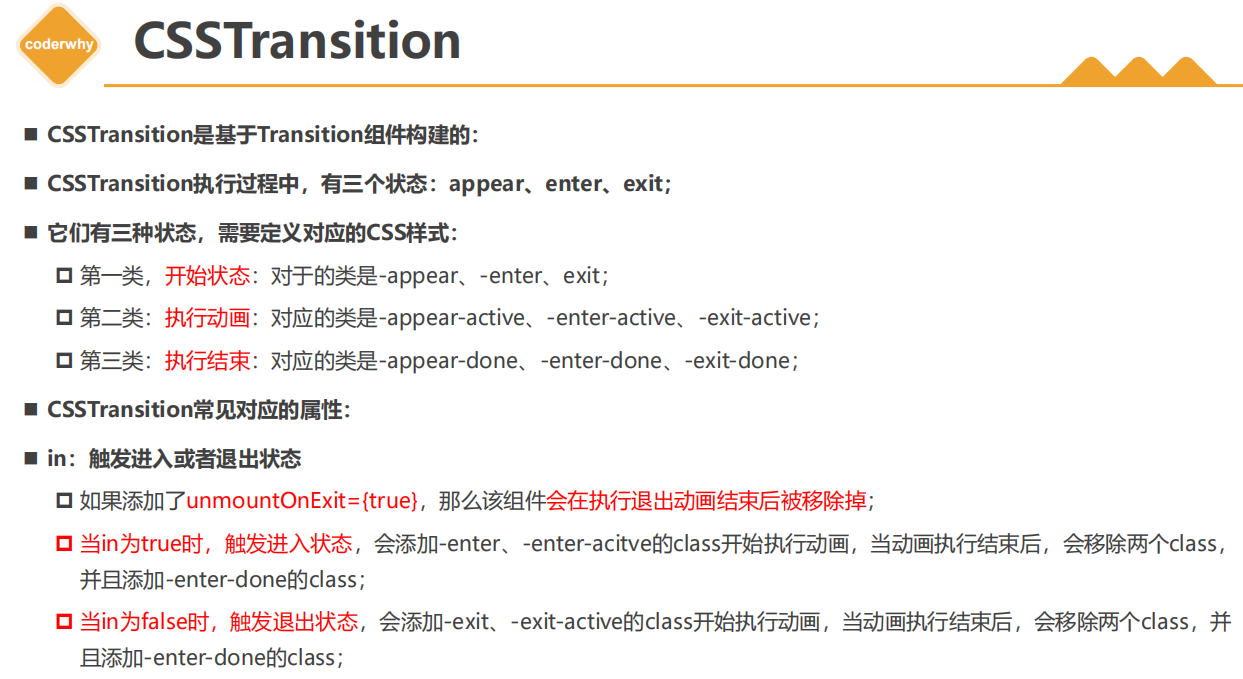
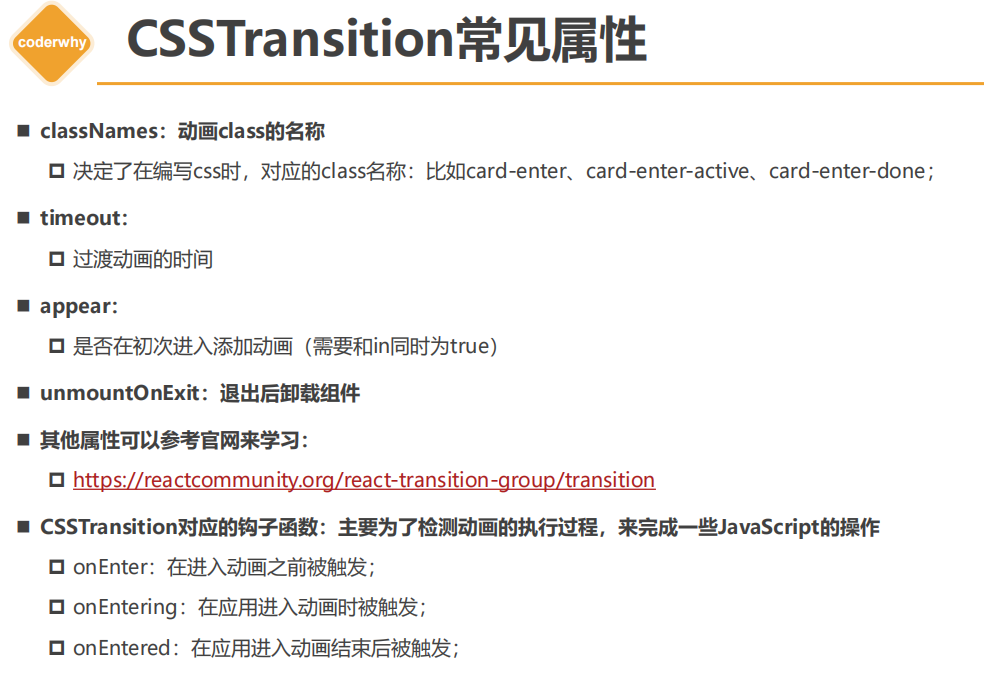
示例:
import React, {PureComponent} from 'react'
import {CSSTransition} from "react-transition-group";

class Father extends PureComponent {
    constructor(props) {
        super(props);
        this.state = {
            isShow: true
        }
    }

    render() {
        const {isShow} = this.state
        return (
            <div>
                <button onClick={e => {
                    this.setState({isShow: !isShow})
                }}>切换
                </button>

                <CSSTransition in={isShow} classNames="why" timeout={3000} unmountOnExit appear onEnter={e => {
                    console.log("开始执行动画")
                }} onEntering={e => {
                    console.log("执行进入动画")
                }} onEntered={e => {
                    console.log("执行进入结束动画")
                }} onExit={e => {
                    console.log("开始离开动画")
                }} onExiting={e => {
                    console.log("执行离开动画")
                }} onExited={e => {
                    console.log("执行离开结束动画")
                }}>
                    <div>
                        <h2>哈哈哈</h2>
                        <h2>content:我是内容</h2>
                    </div>
                </CSSTransition>
            </div>
        )
    }
}

export default Father
css
/*初次渲染时的动画*/
.why-appear{
  transform: translateX(-150px);
}

.why-appear-active{
  transform: translateX(0);
  transition: transform 3s;
}

/*进入时的动画*/
.why-enter{
  opacity: 0;
}

.why-enter-active{
  opacity: 1;
  transition: opacity 3s ease;
}

.why-enter-done{
  color: blue;
}

/*离开时的动画*/
.why-exit{
  opacity: 1;
}

.why-exit-active{
  opacity: 0;
  transition: opacity 3s ease;
}严格模式下会有一个findDOM的警告,可以通过以下方式解决

1、关闭严格模式
2、通过ref获取元素
import React, {createRef, PureComponent} from 'react'
import {CSSTransition} from "react-transition-group";

class Father extends PureComponent {
    constructor(props) {
        this.sectionRef = createRef();
    }

    render() {
        const {isShow} = this.state
        return (
            <div>
                ...
                <CSSTransition nodeRef={this.sectionRef} in={isShow} classNames="why" timeout={3000} unmountOnExit appear>
                    <div ref={this.sectionRef}>
                        <h2>哈哈哈</h2>
                        <h2>content:我是内容</h2>
                    </div>
                </CSSTransition>
            </div>
        )
    }
}
export default Father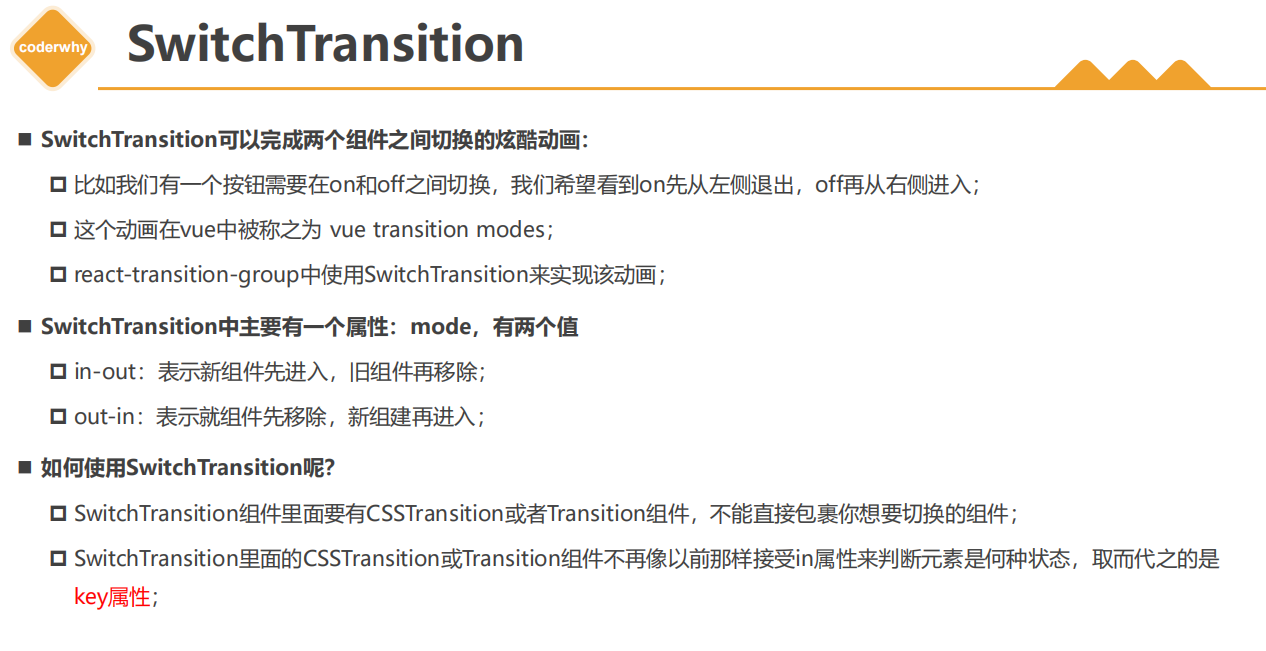
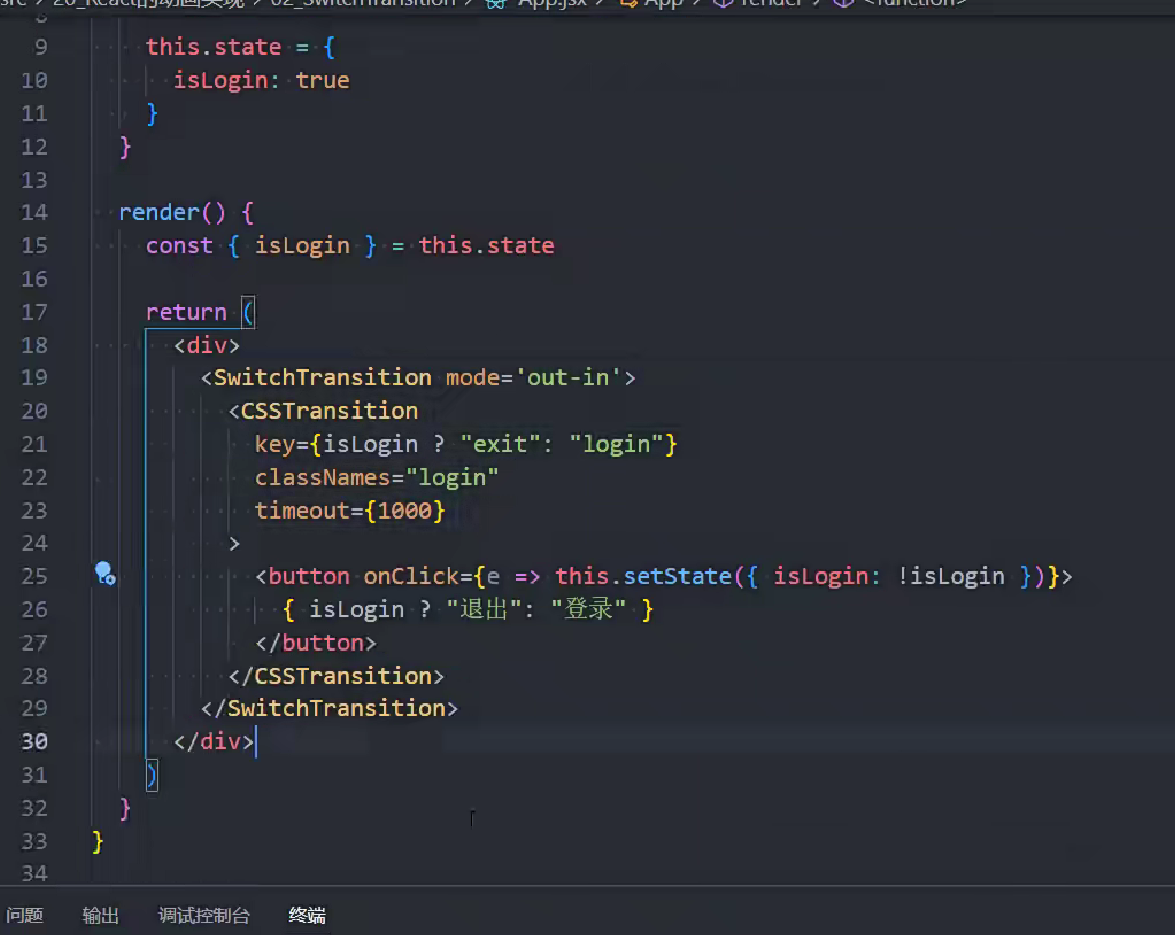
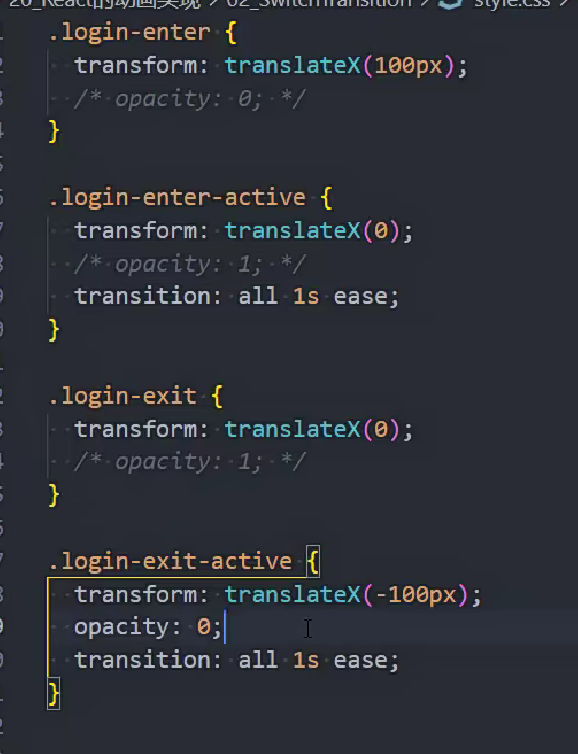
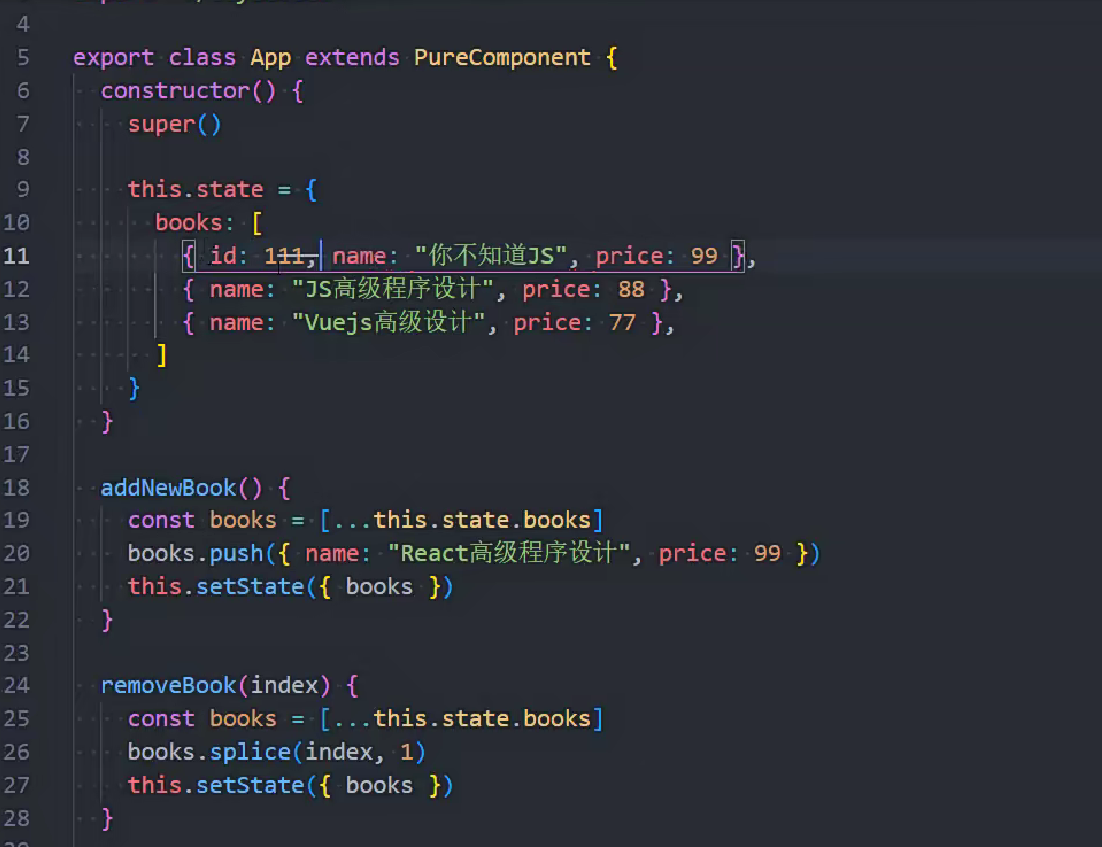
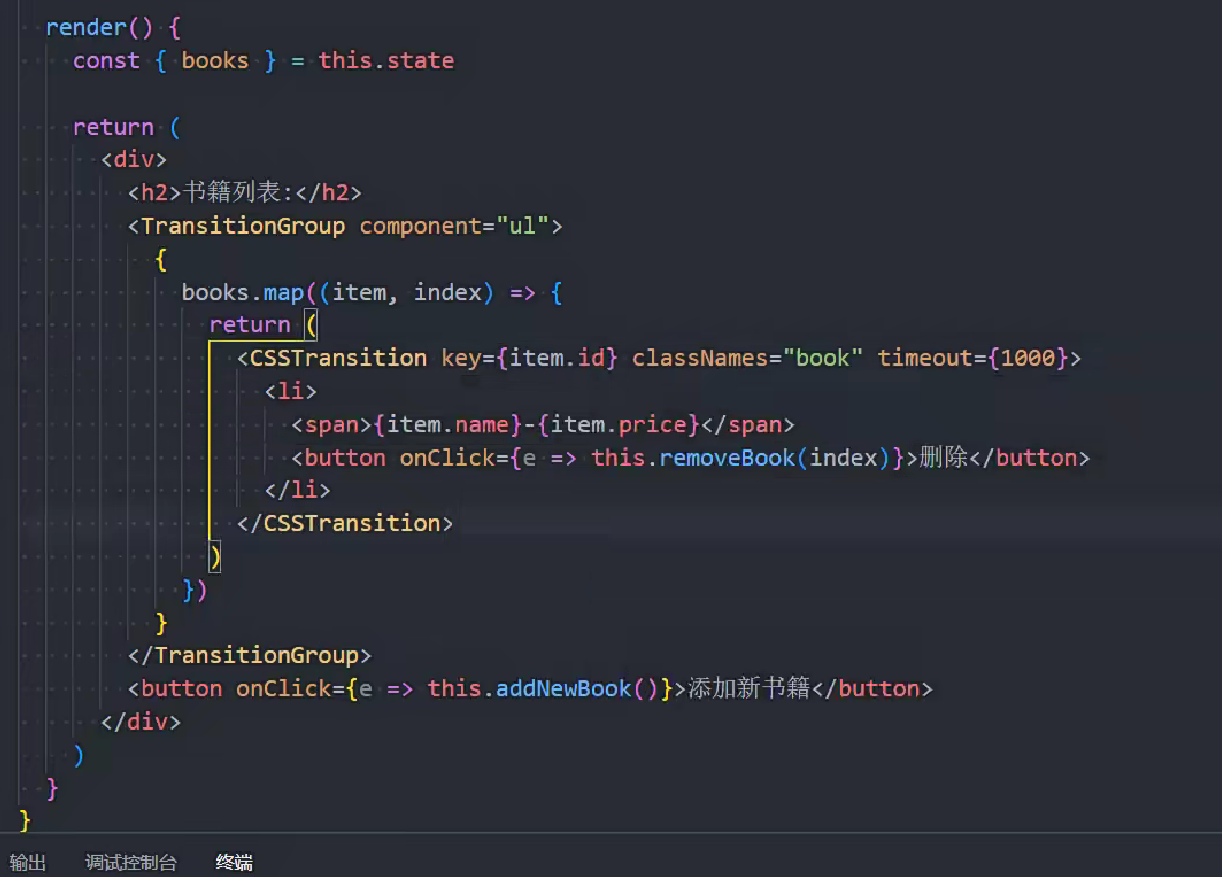
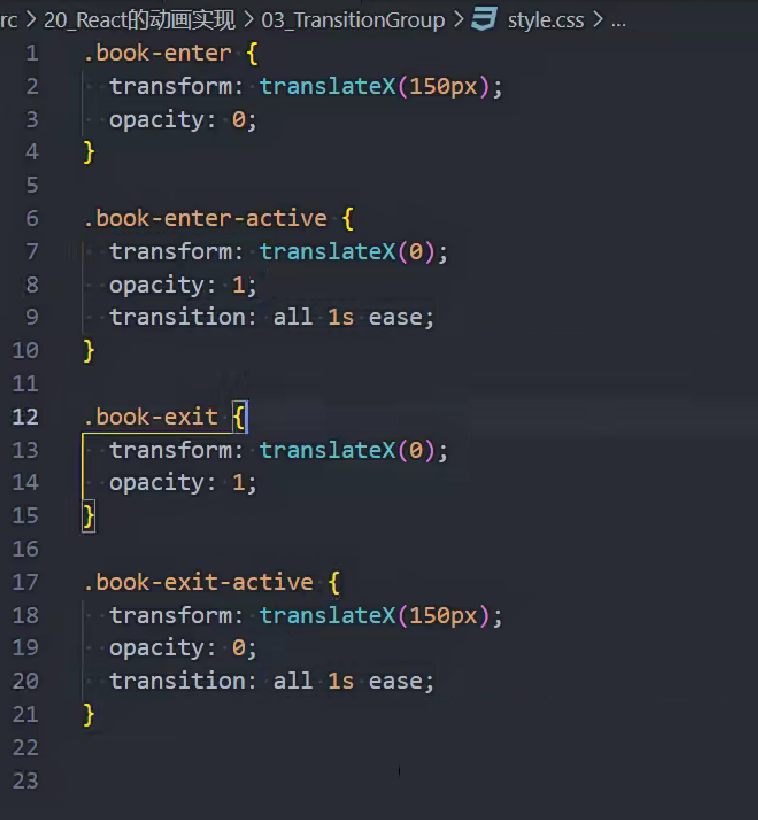
当我们有一组动画时,需要将这些CSSTransition放入到一个TransitionGroup中来完成动画
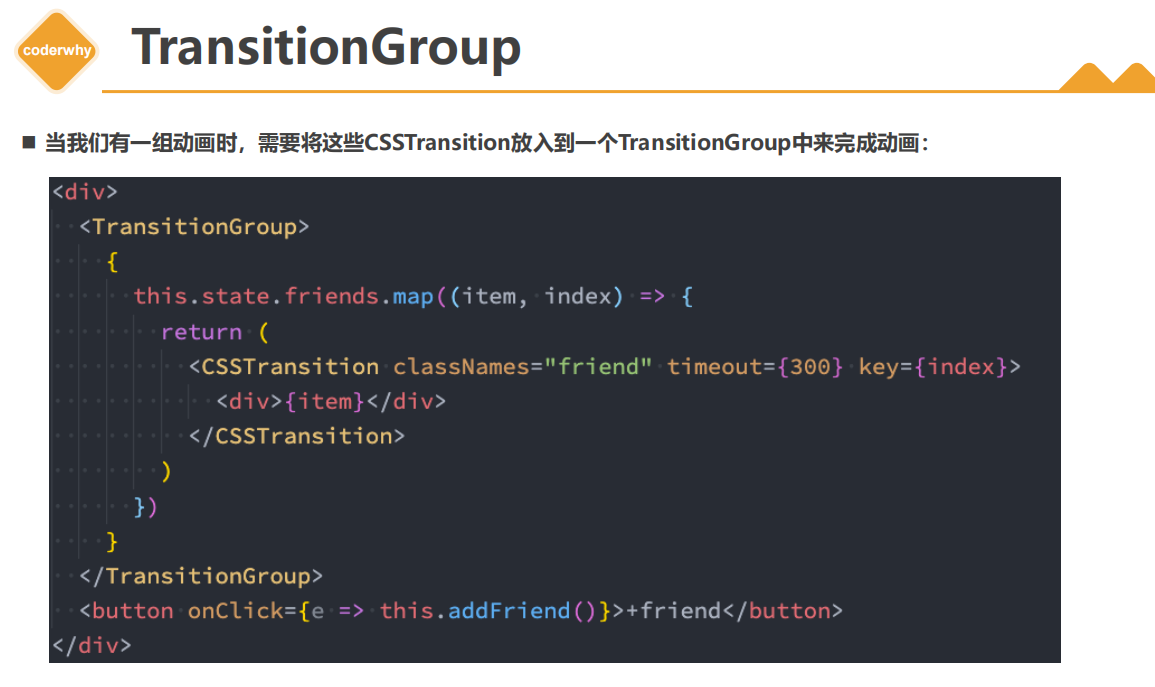
示例
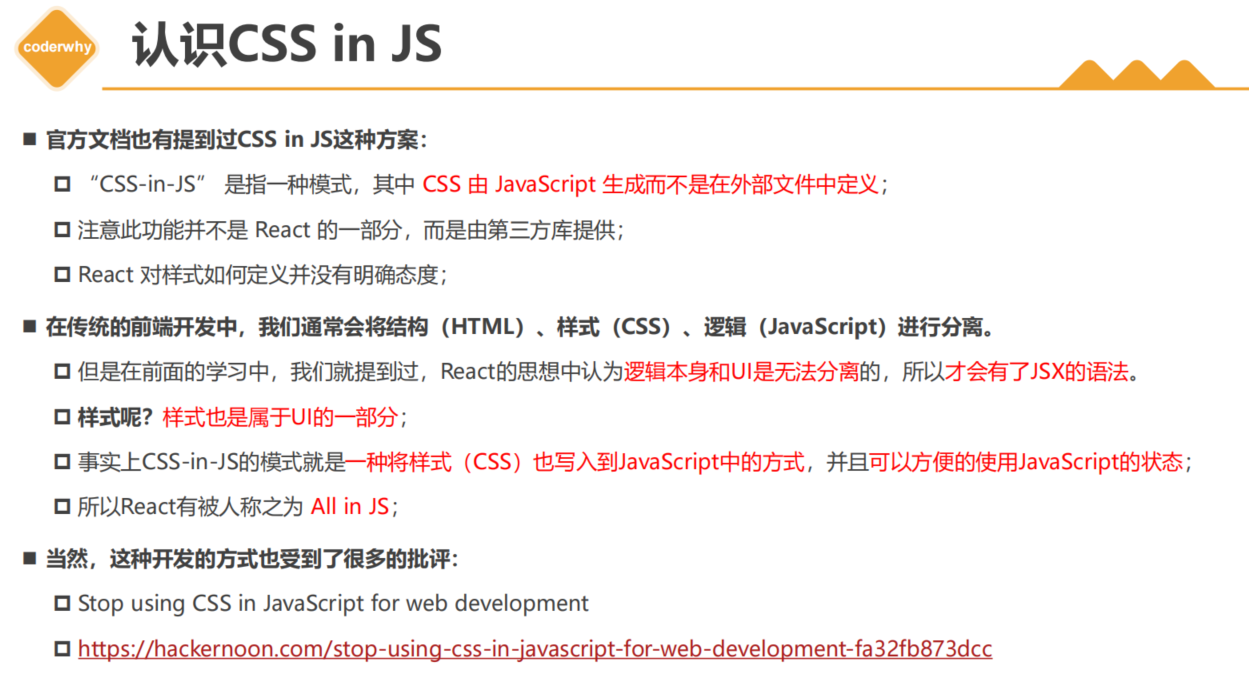
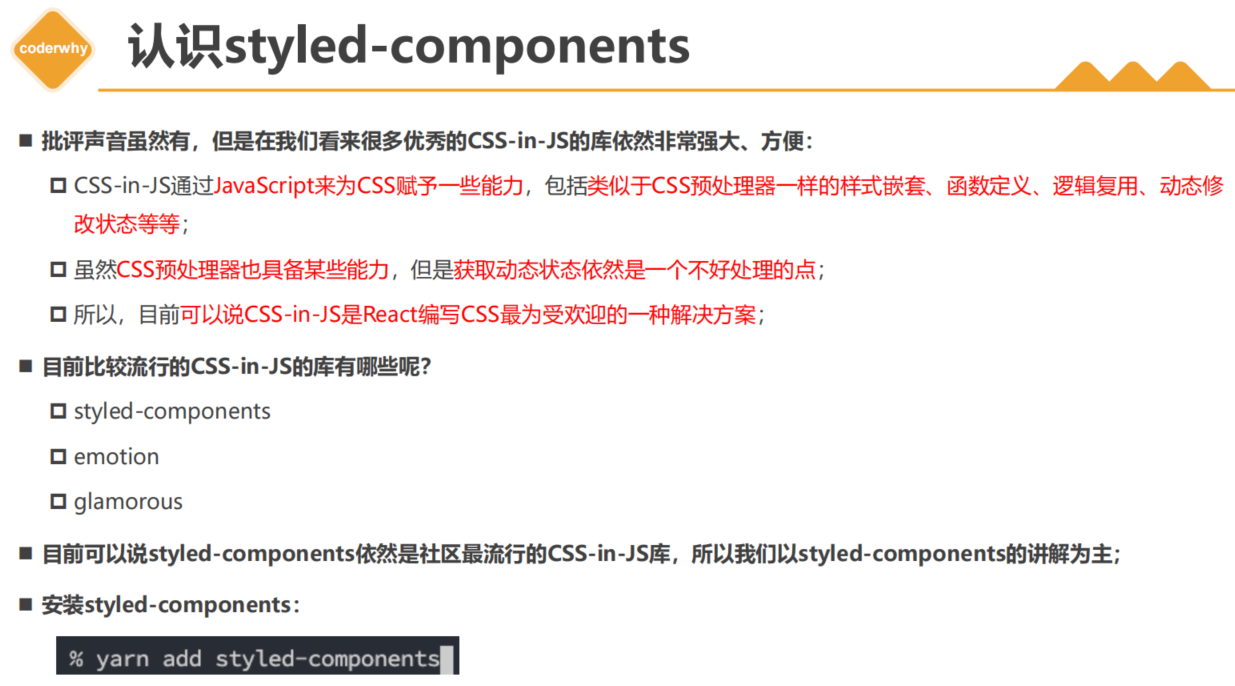
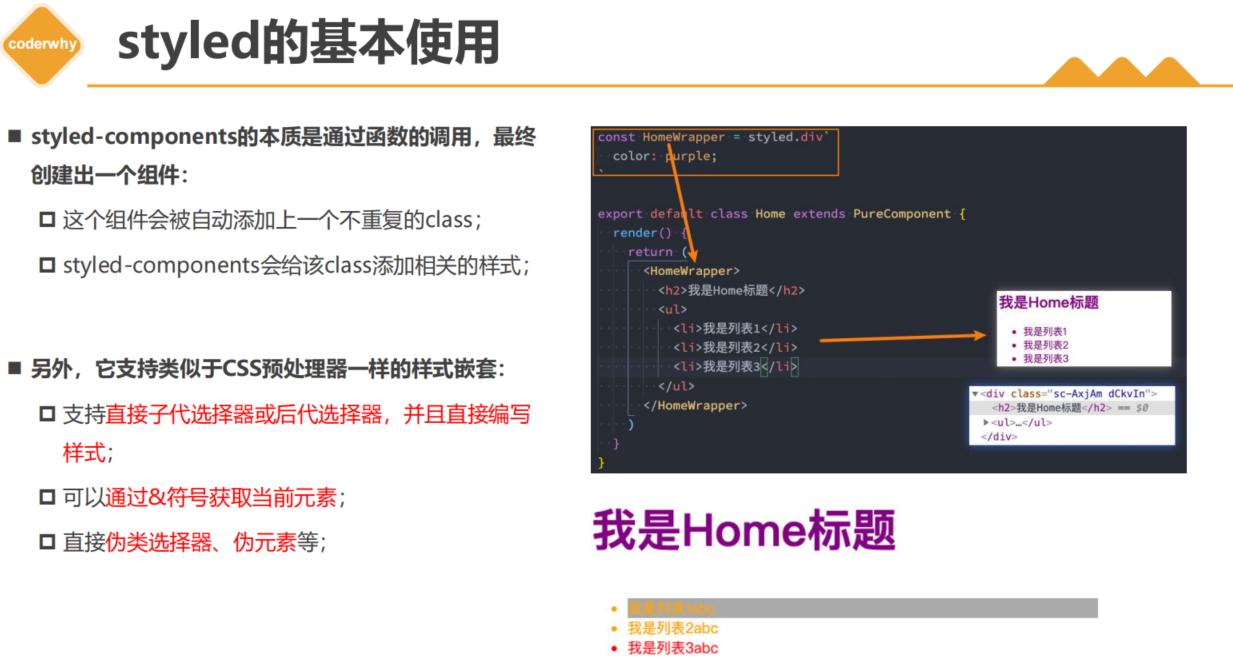
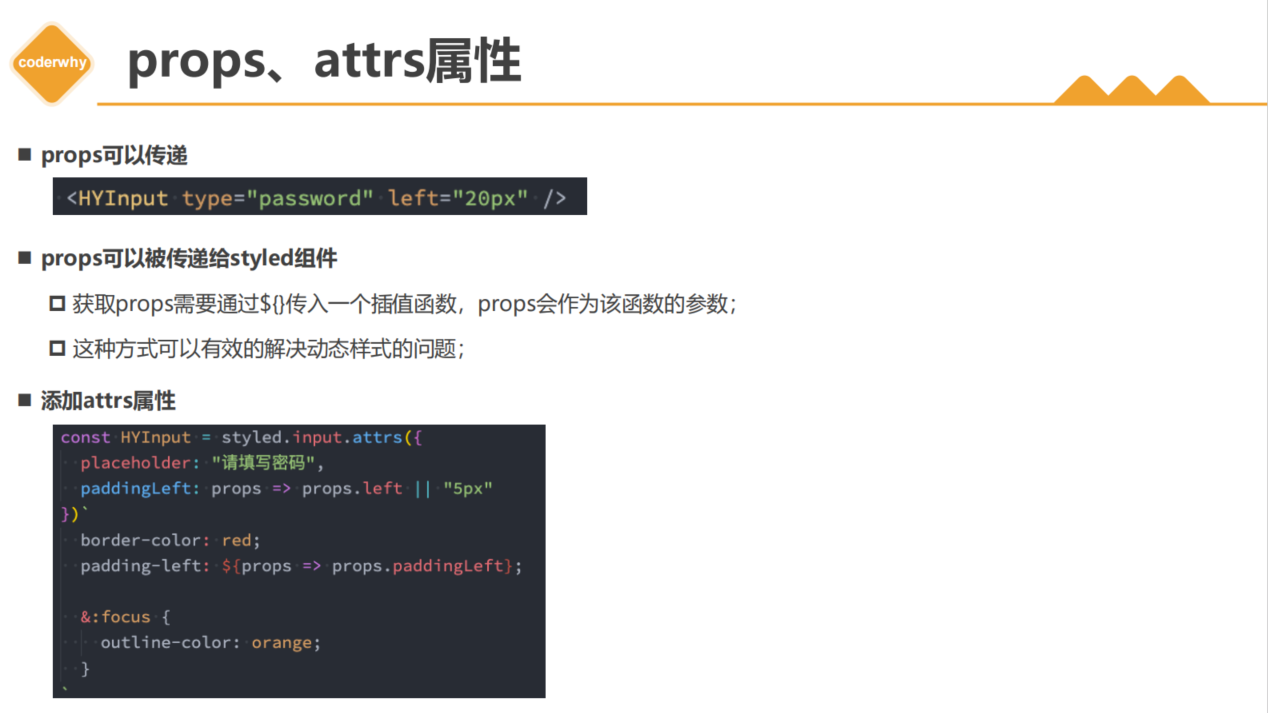
styled-components可以配合vscode插件vscode-styled-components使用
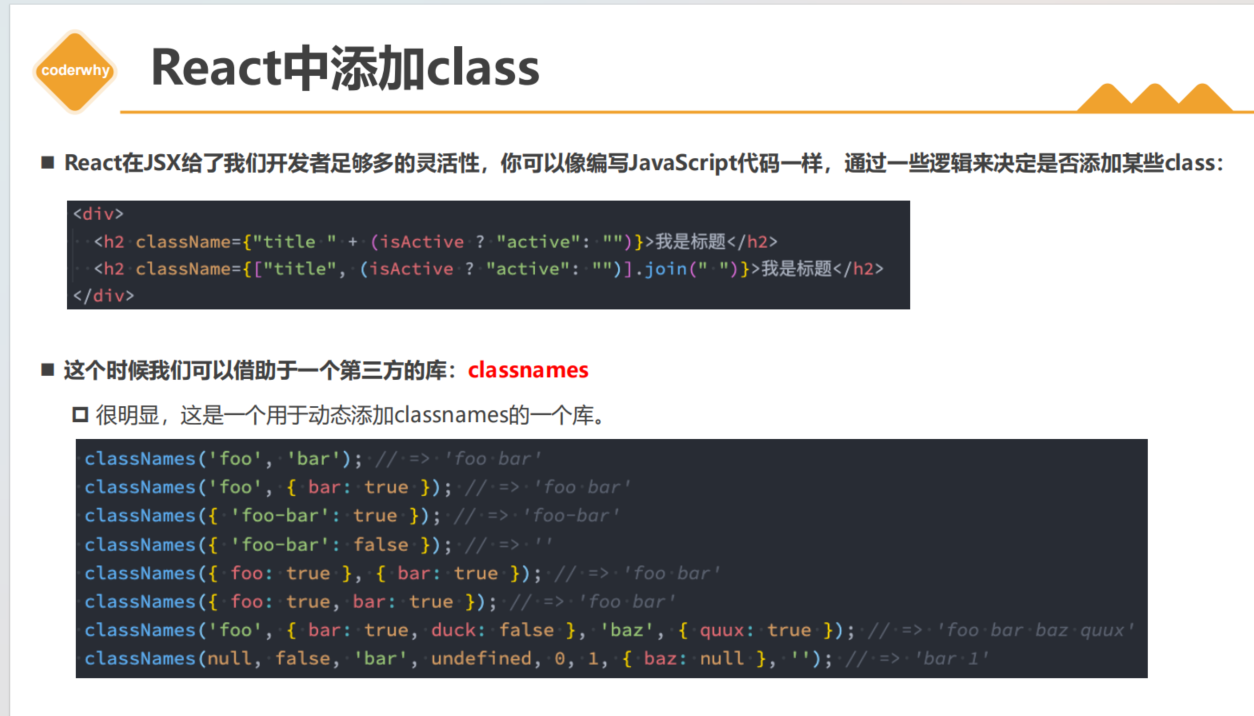
yarn add classnames