Search K
Appearance
Appearance
TIP
<!DOCTYPE html>
<html lang="en">

<head>
    <meta charset="UTF-8">
    <meta http-equiv="X-UA-Compatible" content="IE=edge">
    <meta name="viewport" content="width=device-width, initial-scale=1.0">
    <title>Document</title>
</head>

<body>
    <canvas id="c2d" class="c2d" width="2000" height="1000"></canvas>
    <script type="module">
        // 引入官网提供的地址
        import * as THREE from 'https://threejsfundamentals.org/threejs/resources/threejs/r132/build/three.module.js'

        let renderer = null;

        let camera = null;

        let scene = null;

        let sunMesh = null;

        // 初始化渲染器
        const initRenderer = () => {
            const canvas = document.querySelector("#c2d")

            renderer = new THREE.WebGLRenderer({ canvas })
        }

        // 初始化相机
        const initCamera = () => {
            // 视野范围
            const fov = 40

            // 相机的宽高比,画布的宽高比
            const aspect = 2

            // 近平面
            const near = 0.1

            // 远平面
            const far = 1000

            // 透视投影相机
            camera = new THREE.PerspectiveCamera(fov, aspect, near, far)

            // 相机位置
            camera.position.set(0, 50, 0)
            camera.up.set(0, 0, 1)
            camera.lookAt(0, 0, 0) // 相机朝向
        }

        // 初始化场景
        const initScene = () => {
            scene = new THREE.Scene()
        }

        // 初始化光源
        const initLight = () => {
            // 光源颜色
            const color = 0xffffff

            // 光的强度
            const intensity = 3

            // 创建光源
            const light = new THREE.PointLight(color, intensity)

            // 光源加入到场景
            scene.add(light)
        }

        // 初始化网格线和物体
        const initGrid = () => {
            const radius = 2 // 半径
            const widthSegments = 1 // 经度上的切片数
            const heightSegments = 1 // 纬度上的切片数

            // 创建球体
            const sphereGeometry = new THREE.SphereGeometry(radius, widthSegments, heightSegments)

            // 材质 emissive 不被光影响的颜色
            // MeshPhongMaterial 一种用于具有镜面高光的光泽表面的材质。
            const sunMaterial = new THREE.MeshPhongMaterial({ color: 0x44aa88, emissive: 0xffff00 })

            // 网格
            sunMesh = new THREE.Mesh(sphereGeometry, sunMaterial)
            sunMesh.position.x = 10
            scene.add(sunMesh)
        }

        // 场景和相机放入渲染器中
        const render = (time = 1) => {
            time *= 0.001

            sunMesh.rotation.y = time
            sunMesh.rotation.x = time

            // 加载渲染器
            renderer.render(scene, camera)

            // 开始动画
            requestAnimationFrame(render)

        }

        initRenderer()
        initCamera()
        initScene()
        initLight()
        initGrid()
        // 开始渲染
        requestAnimationFrame(render)

    </script>

</body>

</html>threejs中内置了许多的渲染器,其中最常用的渲染器是**WebGLRenderer**。
WebGLRenderer主要作用就是把相机视椎体中的三维场景渲染成一个二维图片显示在画布上 实例化new WebGLRenderer()接受一个对象参数作为渲染器的行为配置。不传参数都会执行其默认值。常用配置:
canvas 与渲染器绑定的画布节点。不传内部会自己创建一个新的画布节点,使用.domElement获取。context 渲染上下文(RenderingContext) 对象。就是将渲染器附加到已经创建的WebGL上下文中以便后期操作。默认为nullprecision 着色器精度。渲染成图片的颜色精度。值:highp/mediump/lowp默认为highp。alpha 是否可以设置背景色透明。默认为false。antialias 是否执行抗锯齿。默认为false。preserveDrawingBuffer 是否保留缓直到手动清除或被覆盖。 默认false。除了实例化的默认配置,我们也可以通过它的属性来控制渲染器。常用属性:
autoClear 定义渲染器是否在渲染每一帧之前自动清除其输出。autoClearColor 定义渲染器是否需要清除颜色缓存。默认为true。autoClearDepth 定义渲染器是否清除深度缓存。 默认是true。autoClearStencil 定义渲染器是否需要清除模板缓存。默认为true。domElement 返回画布节点。当配置参数没关联canvas,会自动创建一个新的画布节点,需要手动放入html中。shadowMap 是一个对象。当我们需要阴影时就需要开启它。shadowMap.enabled 是否允许在场景中使用阴影贴图,默认false。shadowMap.autoUpdate 是否启动场景中的阴影自动更新,默认是true。shadowMap.type 值是Integer类型,定义阴影贴图类型。可选值有THREE.BasicShadowMap, THREE.PCFShadowMap (默认), THREE.PCFSoftShadowMap 和 THREE.VSMShadowMap THREE全局常量值,代表不同的数字。有了参数和属性的控制就还有方法的控制。常用方法:
clear(color:Boolean, depth:Boolean, stencil:Boolean ) 渲染器清除颜色、深度或模板缓存。getContext() 返回WebGL上下。render()(scene,camera) 传入场景和相机,在画布上渲染图片。setClearColor(color,alpha) 设置背景颜色和透明度。setSize()( width,height) 修改canvas节点的宽高。上面只是列举了一些常用的属性和方法,想更觉灵活的使用WebGLRenderer还需要去熟悉其他属性和方法。
渲染器有两绑定节点的方式,两种创建方式是一样的
1、渲染器绑定已存在的canvas节点
<canvas id="c2d" class="c2d" width="2000" height="1000"></canvas> const canvas = document.querySelector('#c2d')
// 渲染器 实例化
const renderer = new THREE.WebGLRenderer({ canvas:canvas })2、渲染器绑定自定义创建的节点
// 渲染器 实例化
  const renderer = new THREE.WebGLRenderer()
  // 设置 画布宽高
  renderer.setSize(1000, 500)
  // 加入html
document.body.appendChild(renderer.domElement)console.log('getContext()', renderer.getContext())renderer.setClearColor(0xf5f5f5, 0.5)渲染器绘制图片。使用.render()绘制图片到画布上,每当场景发生变换都需要重新执行一次,绘制最新的图片。在绘制过程就它会根据配置信息去判断是否有缓存,来快速绘制。当然不是所有缓存都开启最好,缓存是需要内存空间的,当空间不足时程序就会出错。
  function render(time) {
    time *= 0.001

    sunMesh.rotation.y = time
    sunMesh.rotation.x = time

    // 加载渲染器
    renderer.render(scene, camera)

    // 开始动画
    requestAnimationFrame(render)
}<!DOCTYPE html>
<html lang="en">
<head>
<meta charset="UTF-8">
<meta http-equiv="X-UA-Compatible" content="IE=edge">
<meta name="viewport" content="width=device-width, initial-scale=1.0">
<title>Document</title>
</head>
<body>
<script type="module">
// 引入官网提供的地址
import * as THREE from "../libs/three.module.js"
let renderer = null;
let camera = null;
let scene = null;
let sunMesh = null;
// 初始化渲染器
const initRenderer = () => {
// 创建渲染器实例
renderer = new THREE.WebGLRenderer()
// 修改canvas节点的宽高
renderer.setSize(1000,500)
// 添加渲染canvas节点到指定dom
document.body.appendChild(renderer.domElement)
// 获取渲染器上下文
console.log('getContext()', renderer.getContext())
// 设置渲染器背景颜色
renderer.setClearColor(0xf5f5f5, 0.5)
}
// 初始化相机
const initCamera = () => {
// 视野范围
const fov = 40
// 相机的宽高比,画布的宽高比
const aspect = 2
// 近平面
const near = 0.1
// 远平面
const far = 1000
// 透视投影相机
camera = new THREE.PerspectiveCamera(fov, aspect, near, far)
// 相机位置
camera.position.set(0, 50, 0)
camera.up.set(0, 0, 1)
camera.lookAt(0, 0, 0) // 相机朝向
}
// 初始化场景
const initScene = () => {
scene = new THREE.Scene()
}
// 初始化光源
const initLight = () => {
// 光源颜色
const color = 0xffffff
// 光的强度
const intensity = 3
// 创建光源
const light = new THREE.PointLight(color, intensity)
// 光源加入到场景
scene.add(light)
}
// 初始化网格线和物体
const initGrid = () => {
const radius = 2 // 半径
const widthSegments = 1 // 经度上的切片数
const heightSegments = 1 // 纬度上的切片数
// 创建球体
const sphereGeometry = new THREE.SphereGeometry(radius, widthSegments, heightSegments)
// 材质 emissive 不被光影响的颜色
// MeshPhongMaterial 一种用于具有镜面高光的光泽表面的材质。
const sunMaterial = new THREE.MeshPhongMaterial({ color: 0x44aa88, emissive: 0xffff00 })
// 网格
sunMesh = new THREE.Mesh(sphereGeometry, sunMaterial)
sunMesh.position.x = 10
scene.add(sunMesh)
}
// 场景和相机放入渲染器中
const render = (time = 1) => {
time *= 0.001
// sunMesh.rotation.y = time
sunMesh.rotation.x = time
sunMesh.rotation.z = time
// 加载渲染器
renderer.render(scene, camera)
// 开始动画
requestAnimationFrame(render)
}
initRenderer()
initCamera()
initScene()
initLight()
initGrid()
// 开始渲染
requestAnimationFrame(render)
</script>
</body>
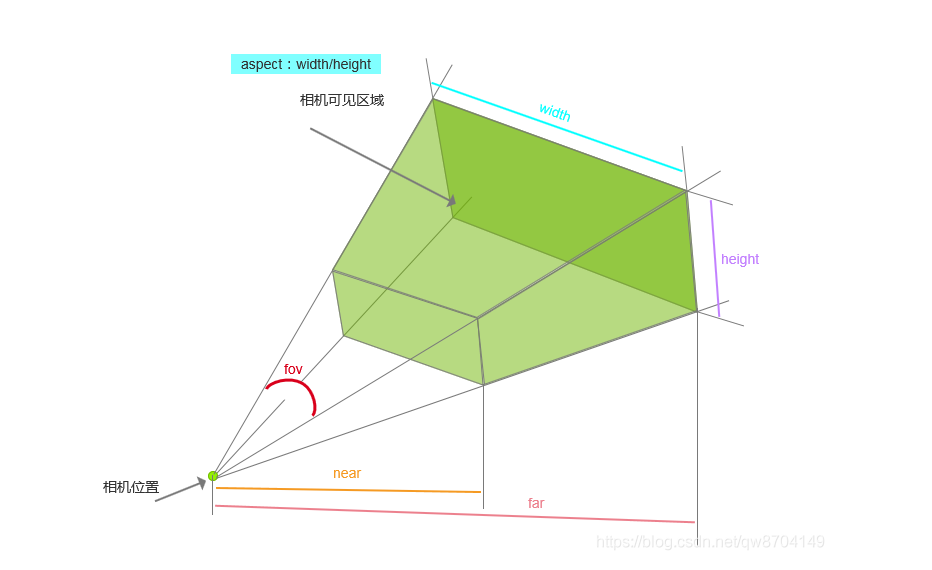
</html>在three.js中,摄像机的作用就是不断的拍摄我们创建好的场景,然后通过渲染器渲染到屏幕中。想通过不同的角度观看场景,就需要修改摄像机的位置来拍摄场景。本文详细介绍的是透视相机(PerspectiveCamera) 它是用来模拟人眼所看到的景象,它也是3D场景的渲染中使用得最普遍的投影模式。
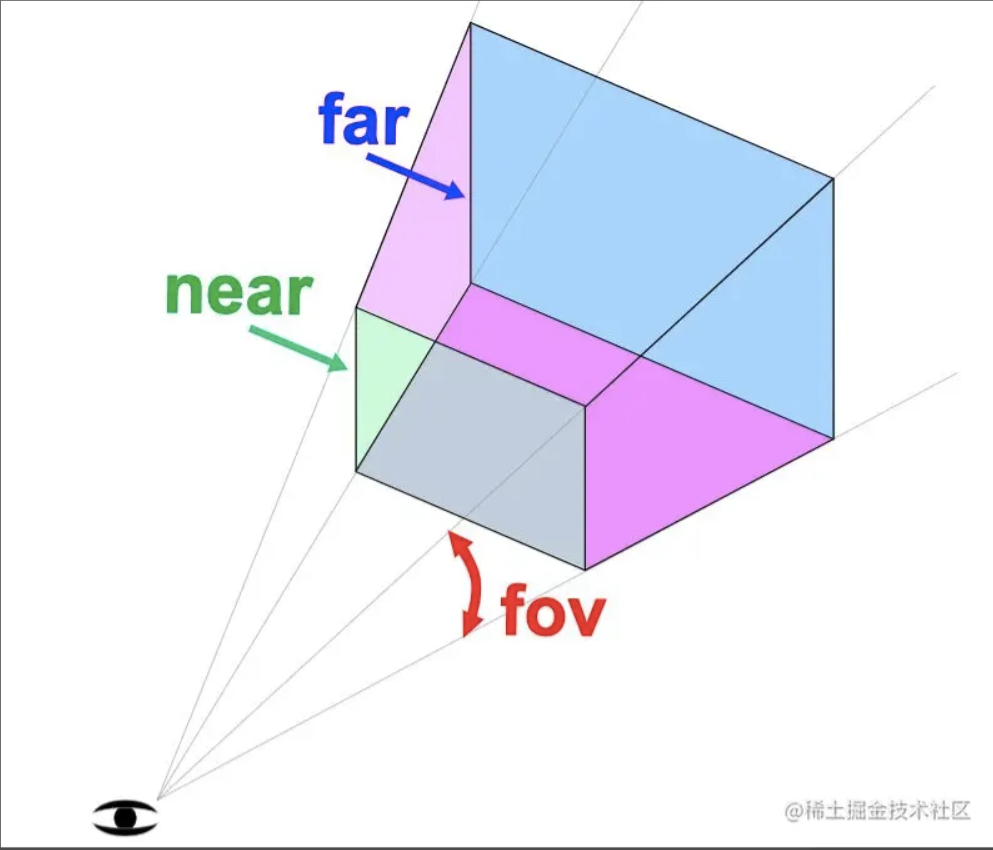
根据视锥的范围给渲染器提供需要渲染的场景范围。
实例化new THREE.PerspectiveCamera() 接受4个参数来确认视锥的范围。只要在视锥范围内的场景才会渲染。
fov 摄像机视锥体垂直视野角度。
aspect 摄像机视锥体长宽比。
near 摄像机视锥体近端面。
far 摄像机视锥体远端面。
大多数属性发生改变之后,都需要调用.updateProjectionMatrix()来使得这些改变生效。 常见属性:
.fov、.aspect、.near、.far 后期可修改这四个参数,来实现动画效果。
.zoom 获取或者设置摄像机的缩放倍数,默认值为1
setViewOffset() 设置偏移量,对于多窗口或者多显示器的设置是很有用的。clearViewOffset() 清除任何由.setViewOffset()设置的偏移量。getEffectiveFOV() 结合.zoom(缩放倍数),以角度返回当前垂直视野角度。updateProjectionMatrix() 更新摄像机投影矩阵。在任何参数被改变以后必须被调用。PerspectiveCamera对象的基类是Object3D,它具有:
.position 设置相机在三维坐标中的位置。
camera.position.set(0,0,0);.up 设置相机拍摄时相机头顶的方向。
camera.up.set(0,1,0);.lookAt 设置相机拍摄时指向的方向。
camera.lookAt(0, 0, 0);<input type="button" value="移动位置" id="onPosition">
<input type="button" value="修改视野范围" id="onView">const initEvent = () => {
document.querySelector('#onPosition').addEventListener('click',function(){
// 移动相机位置
camera.position.set(0,10,30)
})
document.querySelector('#onView').addEventListener('click',function(){
// 改变相机可视范围
camera.fov = 60
// 让改变生效
camera.updateProjectionMatrix()
})
}Three.js提供了许多控件OrbitControls是最常用的相机控件。
...
import { OrbitControls } from 'https://threejsfundamentals.org/threejs/resources/threejs/r132/examples/jsm/controls/OrbitControls.js'
...

// 透视投影相机
...

// 控制相机
const controls = new OrbitControls(camera, canvas)
...

// 渲染
function render() {
    controls.update()
    ...
}Three.js提供了一个函数(CameraHelper)用于模拟相机视锥体。要展示模拟相机视锥体,需要两个相机才能查看。
// 辅助相机
const camera1 = new THREE.PerspectiveCamera(20, aspect, 10, 50)
camera1.position.set(0, 5, 20)
camera1.lookAt(0, 0, 0)
const cameraHelper = new THREE.CameraHelper(camera1)
// 辅助线加入 场景
scene.add(cameraHelper)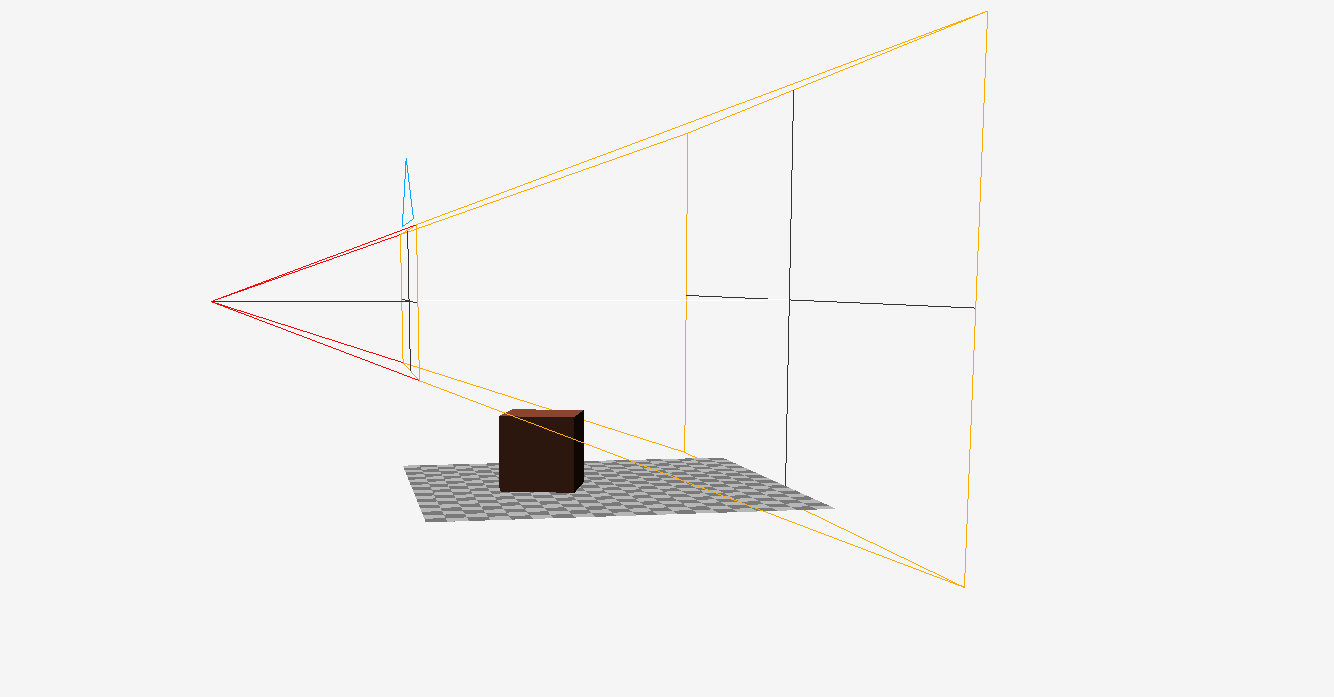
为了能够快速地搭建three.js的交互UI,社区就出现了各种UI 库,其中lil-gui 是 three.js社区中非常流行的 UI 库。选择它是因为语法简单,上手快。
主要作用,获取一个对象和该对象上的属性名,并根据属性的类型自动生成一个界面组件来操作该属性。
使用它后,我们可以通过界面组件来控制场景中的物体,提高调试效率。
使用非常简单,引入控件。实例化GUI后,通过.add()传入要修改的对象,和对象中要修改的属性名。
它能自动生成对应的界面组件,修改界面组件的值,实时同步到对象中。
import { GUI } from 'https://threejsfundamentals.org/threejs/../3rdparty/dat.gui.module.js'

const obj = {
    myBoolean: true,
    myString: 'lil-gui',
    myNumber: 1,
    myFunction: function () {
      alert('hi')
    }
}
const gui = new GUI()
gui.add(obj, 'myBoolean') // 单选
gui.add(obj, 'myString') // 文本
gui.add(obj, 'myNumber') // 数字
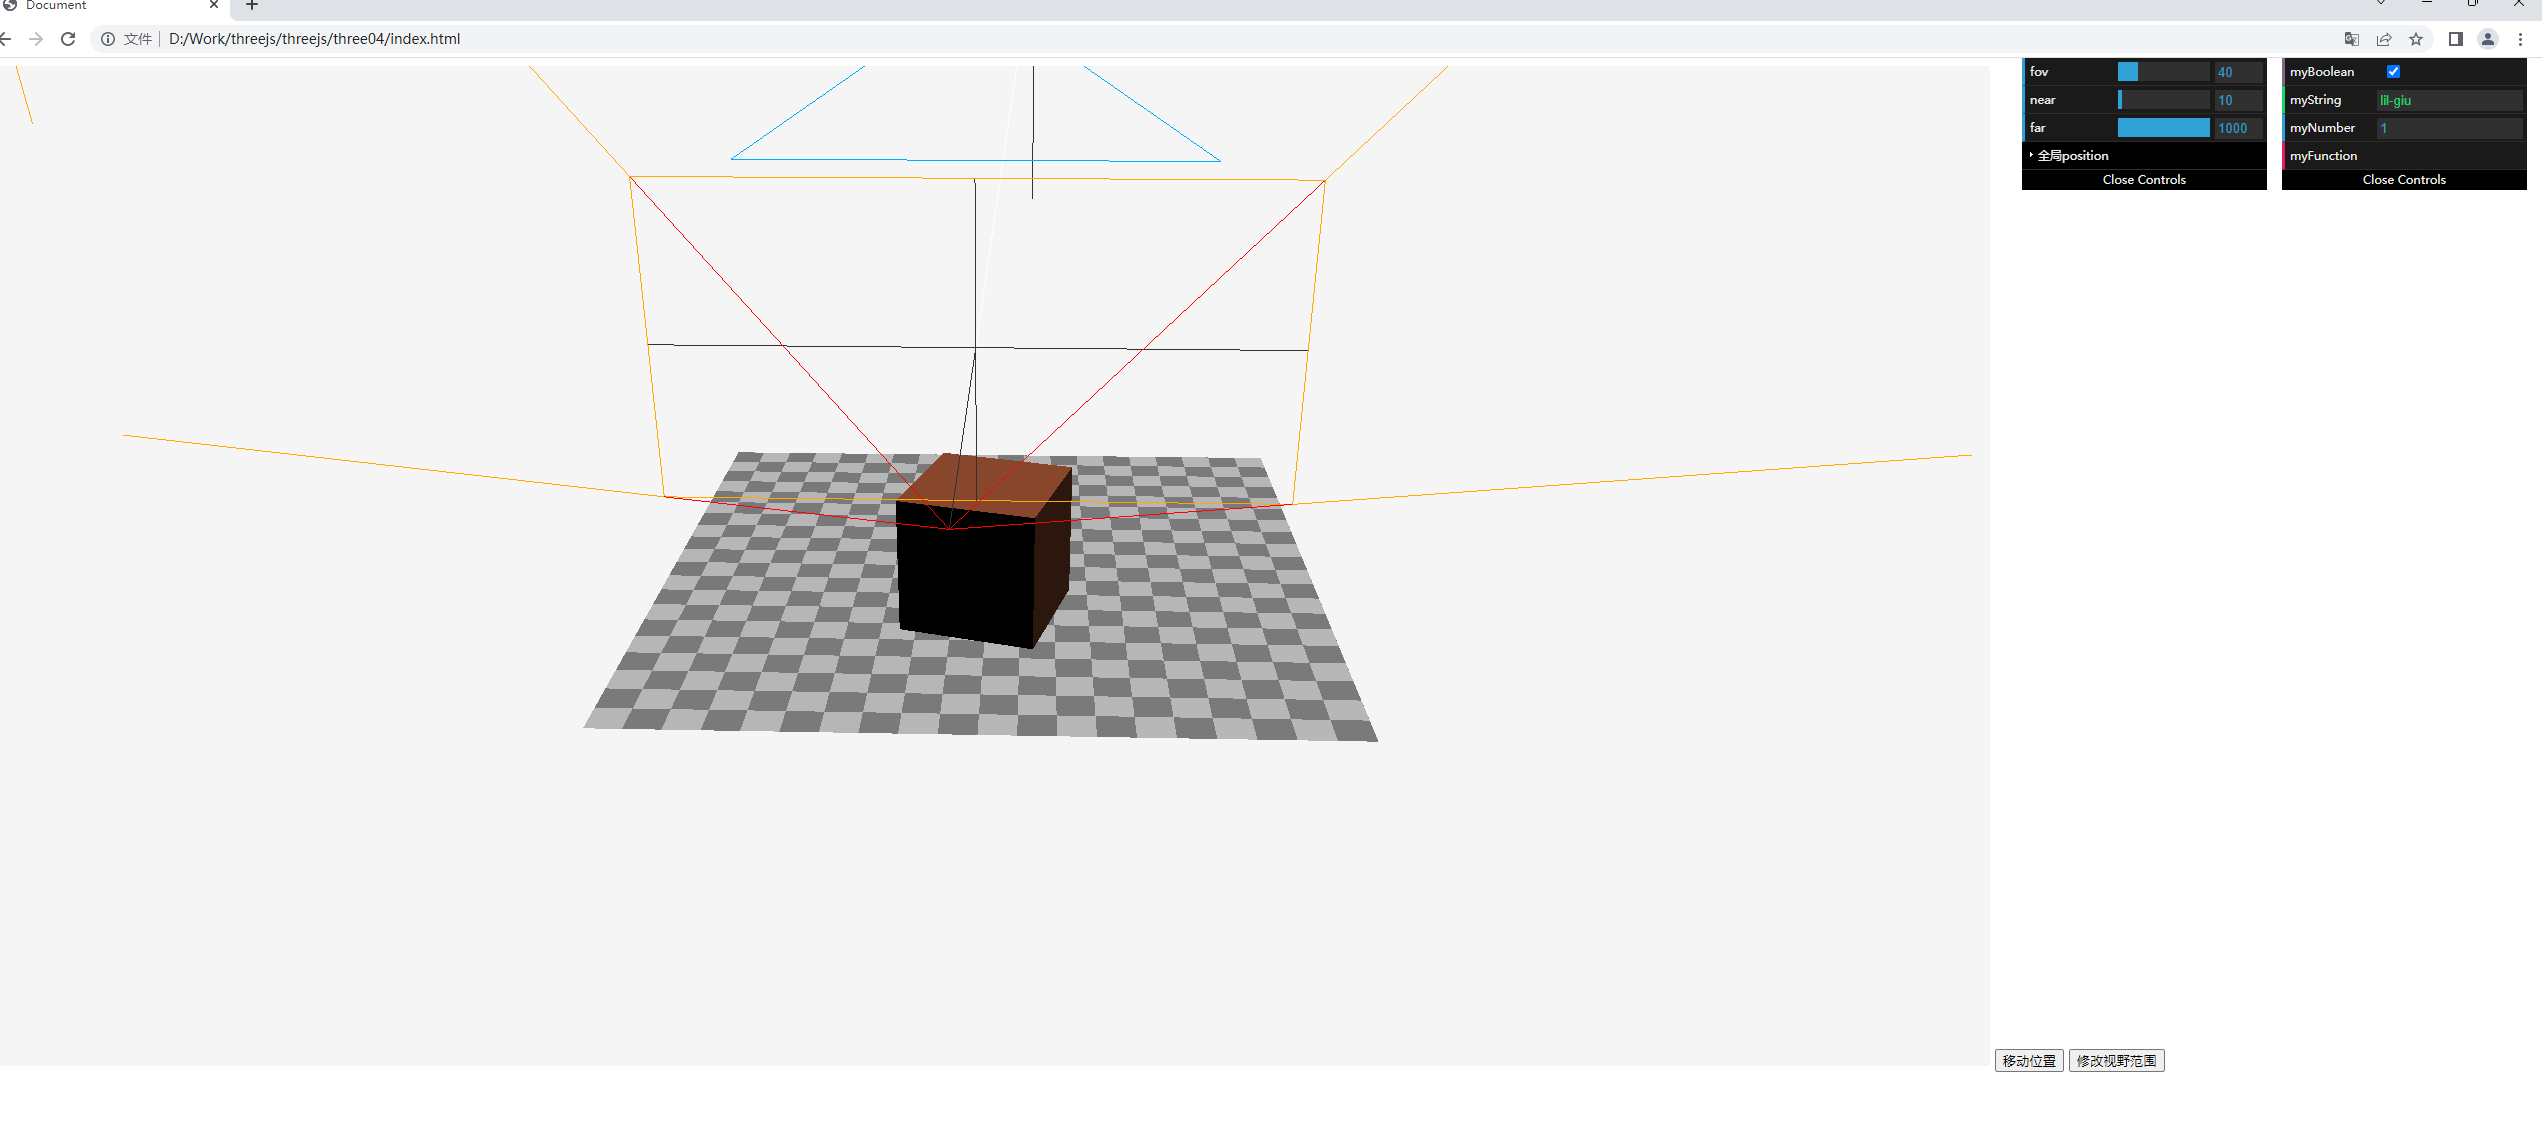
gui.add(obj, 'myFunction') // 按钮上一节中我们辅助相机是固定的,接下来还可以通过lil-gui界面组件来修改辅助相机,修改相机的矩阵属性以后需要使用onChange()在值修改后的回调函数中调用.updateProjectionMatrix()才会生效
通过gui示例来修改相机的矩阵属性
    const updateCamera = () => {
        camera1.updateProjectionMatrix()
    }

    const initGui = () => {
        const gui = new GUI()

        gui.add(camera1,'fov',1,180).onChange(updateCamera)
        gui.add(camera1,'near',1,200).onChange(updateCamera)
        gui.add(camera1,'far',1,200).onChange(updateCamera)
} // 通过GUI示例来动态修改相机属性
const updateCamera = () => {
camera1.updateProjectionMatrix()
}
class PositionGUI{
constructor(obj,name){
this.obj = obj
this.name = name
}
get modify(){
return this.obj[this.name]
}
set modify(v){
this.obj[this.name] = v
}
}
const initGui = () => {
const gui = new GUI()
gui.add(camera1,'fov',1,180).onChange(updateCamera)
gui.add(camera1,'near',1,200).onChange(updateCamera)
gui.add(camera1,'far',1,200).onChange(updateCamera)
// 修改相机的位置 .position是一个Vector3()不能直接传入,我们需要定义一个对象来操作他
// 创建一个新对象,修改属性的get、set方法。在方法中我们就可以修改其他对象来完成操作。
const folder = gui.addFolder("全局position")
folder.add(new PositionGUI(camera.position, 'x'), 'modify',0,30).name('x')
folder.add(new PositionGUI(camera.position, 'y') , 'modify',0 ,30).name('y')
folder.add(new PositionGUI(camera.position, 'z') , 'modify',0 ,30).name('z')
}修改相机的位置 .position是一个Vector3()不能直接传入,我们需要定义一个对象来操作他,创建一个新对象,修改属性的get、set方法。在方法中我们就可以修改其他对象来完成操作。
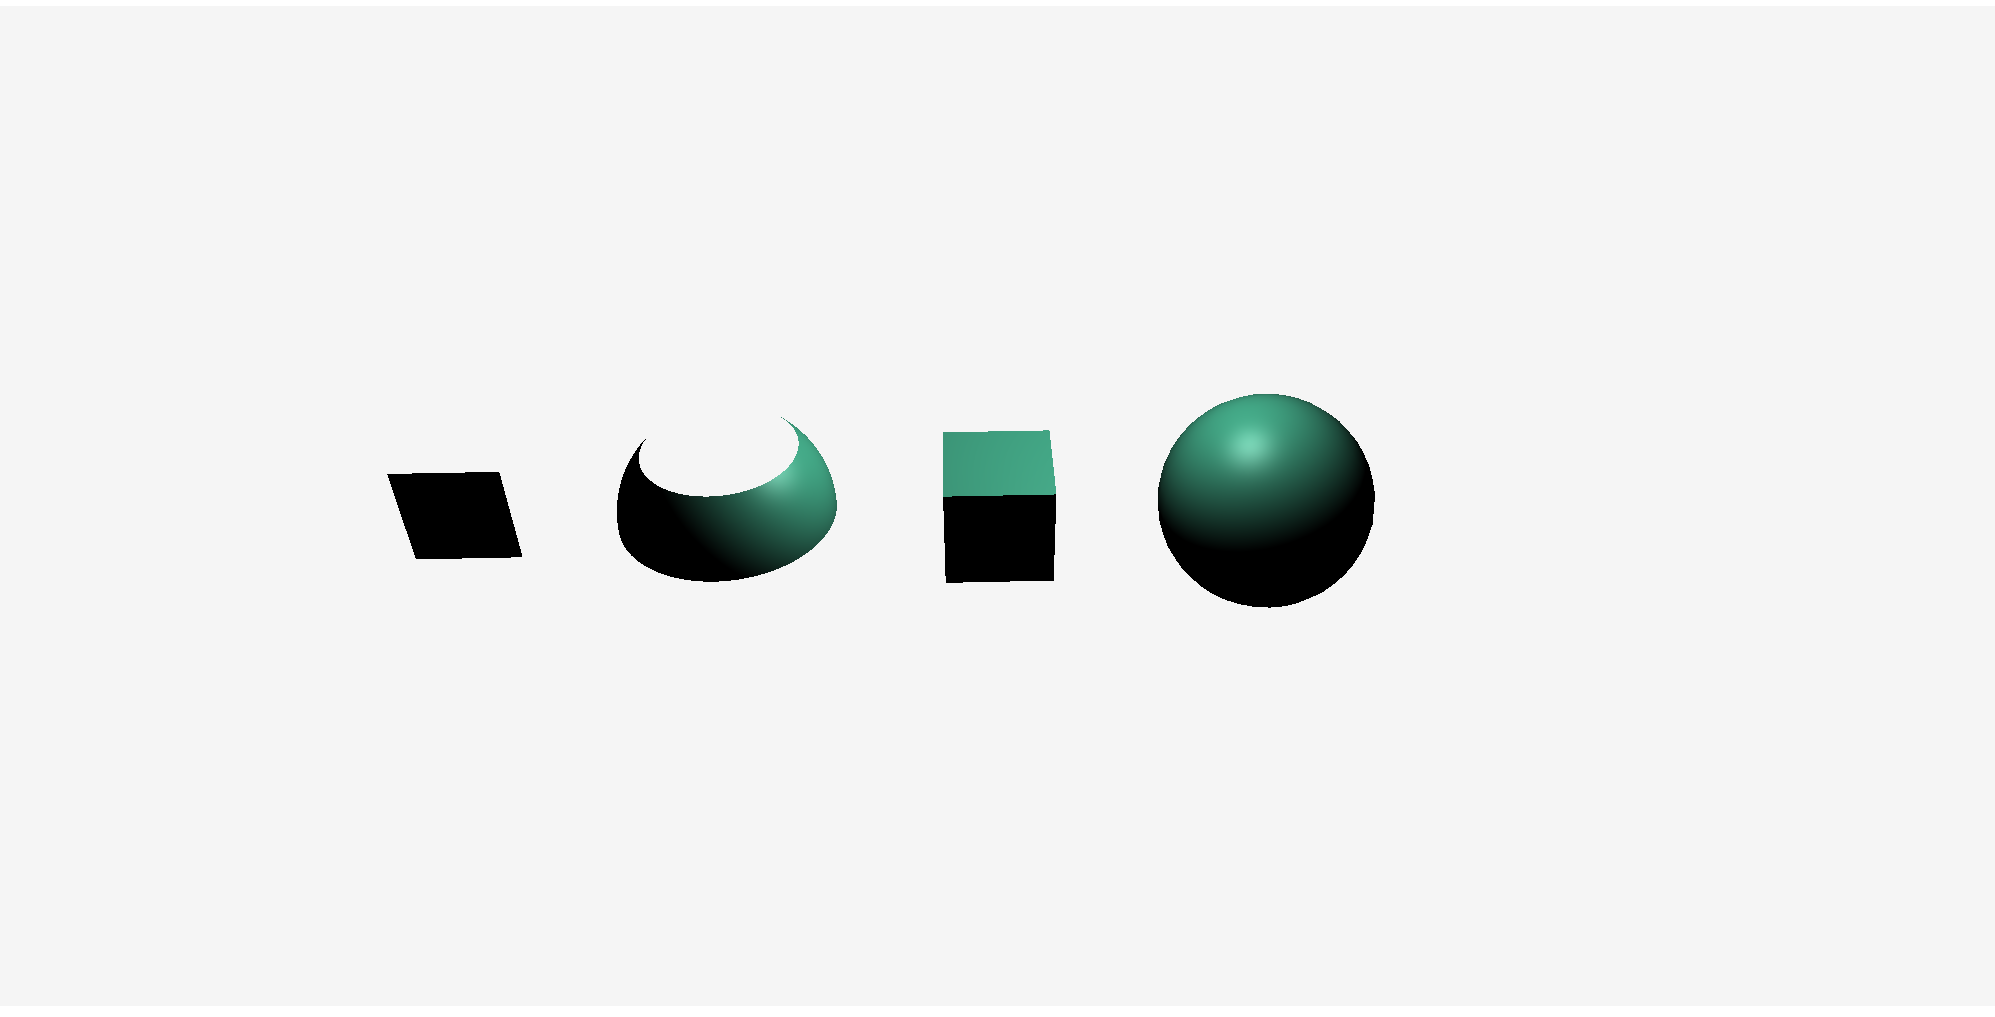
在three.js中如球体、立方体、平面、狗、猫、人、树、建筑等物体,都是几何体。它们都是根据大量顶点参数生成。
在three.js中内置了许多基本几何体,也提供了自定义几何体的方法。在开发中常见的做法是让美术在 3D 建模软件中创建 3D 模型,在由开发人员进行交互开发。
        // 初始化网格线和物体
        const initMesh = () => {
            // 材质 emissive 不被光影响的颜色
            // MeshPhongMaterial 一种用于具有镜面高光的光泽表面的材质。
            const material = new THREE.MeshPhongMaterial({ color: 0x44aa88 })
            const initBoxMesh = () => {
                const width = 8
                const height = 8
                // 盒子深度
                const depth = 8

                // 各个方向的分段数,分段数越多,面就
                const widthSegments = 4
                const heightSegments = 4
                const depthSegments = 4
                // 创建盒子模型
                const boxGeometry = new THREE.BoxGeometry(width, height, depth, widthSegments, heightSegments, depthSegments)
                // 创建盒子网格
                const boxMesh = new THREE.Mesh(boxGeometry, material)
                scene.add(boxMesh)
            }

            // 渲染正常球体
            const initGeometry = () => {
                // 球体半径
                const radius = 8
                // 水平分段数
                const widthSegments = 32
                // 垂直分段数
                const heightSegments = 16
                const geometry = new THREE.SphereGeometry(radius, widthSegments, heightSegments)

                const geometryMesh = new THREE.Mesh(geometry, material)
                geometryMesh.position.x = 20

                scene.add(geometryMesh)
            }

            // 渲染切片球体
            const initSphereGeometry = () => {
                const radius = 8 // 球体半径
                const widthSegments = 32 // 水平分段数
                const heightSegments = 16 // 垂直分段数
                const phiStart = Math.PI * 0.25 // 水平经线起始角度
                const phiLength = Math.PI * 2 // 水平扫描角度大小
                const thetaStart = Math.PI * 0.25 // 垂直经线起始角度
                const thetaLength = Math.PI * 0.25 // 垂直经线扫面角度大小

                const geometry = new THREE.SphereGeometry(radius,widthSegments,heightSegments,phiStart,phiLength,thetaStart,thetaLength)

                const mesh = new THREE.Mesh(geometry,material)

                mesh.position.x = -20
                scene.add(mesh)
            }

            // 初始化平面几何体
            const initPlaneGeometry = () => {
                const width = 8 // 宽度
                const height = 8 // 高度
                const widthSegments = 2 // 宽度的分段数
                const heightSegments = 2 // 高度的分段数

                const geometry = new THREE.PlaneGeometry(width,height,widthSegments,heightSegments)

                const mesh = new THREE.Mesh(geometry,material)

                mesh.position.x = -40
                scene.add(mesh)
            }

            initGeometry()
            initBoxMesh()
            initSphereGeometry()
            initPlaneGeometry()
        }
除了以上常用的几何体外,threjs还支持自定义几何体
BufferGeometry是面片、线或点几何体的有效表述。通过顶点位置、法相量、颜色值、UV 坐标等值来绘制几何体
使用BufferGeometry可以有效减少向 GPU 传输顶点数据所需的开销。
1、定义面的顶点位置,法线坐标(法线是面朝向的信息)。一个面是两个三角形组成,所以需要6个顶点,一个立方体就需要36个顶点信息。
      const vertices = [
        // front
        { pos: [-1, -1, 1], norm: [0, 0, 1] },
        { pos: [1, -1, 1], norm: [0, 0, 1] },
        { pos: [-1, 1, 1], norm: [0, 0, 1] },

        { pos: [-1, 1, 1], norm: [0, 0, 1] },
        { pos: [1, -1, 1], norm: [0, 0, 1] },
        { pos: [1, 1, 1], norm: [0, 0, 1] },
        // right
        { pos: [1, -1, 1], norm: [1, 0, 0] },
        { pos: [1, -1, -1], norm: [1, 0, 0] },
        { pos: [1, 1, 1], norm: [1, 0, 0] },

        { pos: [1, 1, 1], norm: [1, 0, 0] },
        { pos: [1, -1, -1], norm: [1, 0, 0] },
        { pos: [1, 1, -1], norm: [1, 0, 0] },
        // back
        { pos: [1, -1, -1], norm: [0, 0, -1] },
        { pos: [-1, -1, -1], norm: [0, 0, -1] },
        { pos: [1, 1, -1], norm: [0, 0, -1] },

        { pos: [1, 1, -1], norm: [0, 0, -1] },
        { pos: [-1, -1, -1], norm: [0, 0, -1] },
        { pos: [-1, 1, -1], norm: [0, 0, -1] },
        // left
        { pos: [-1, -1, -1], norm: [-1, 0, 0] },
        { pos: [-1, -1, 1], norm: [-1, 0, 0] },
        { pos: [-1, 1, -1], norm: [-1, 0, 0] },

        { pos: [-1, 1, -1], norm: [-1, 0, 0] },
        { pos: [-1, -1, 1], norm: [-1, 0, 0] },
        { pos: [-1, 1, 1], norm: [-1, 0, 0] },
        // top
        { pos: [1, 1, -1], norm: [0, 1, 0] },
        { pos: [-1, 1, -1], norm: [0, 1, 0] },
        { pos: [1, 1, 1], norm: [0, 1, 0] },

        { pos: [1, 1, 1], norm: [0, 1, 0] },
        { pos: [-1, 1, -1], norm: [0, 1, 0] },
        { pos: [-1, 1, 1], norm: [0, 1, 0] },
        // bottom
        { pos: [1, -1, 1], norm: [0, -1, 0] },
        { pos: [-1, -1, 1], norm: [0, -1, 0] },
        { pos: [1, -1, -1], norm: [0, -1, 0] },

        { pos: [1, -1, -1], norm: [0, -1, 0] },
        { pos: [-1, -1, 1], norm: [0, -1, 0] },
        { pos: [-1, -1, -1], norm: [0, -1, 0] }
      ]
      const positions = []
      const normals = []
      // 以数组形式获取 数据
      for (const vertex of vertices) {
        positions.push(...vertex.pos)
        normals.push(...vertex.norm)
      }
2、通过.setAttribute()设置定义好的顶点信息。这里需要注意的是.BufferAttribute()第二个参数是确认,数组中连续的几个值组合为一组信息。
 const geometry = new THREE.BufferGeometry()
 const positionNumComponents = 3 // 3个一组 为一个顶点
 const normalNumComponents = 3 // 3个一组 为一个顶点
 geometry.setAttribute('position', new THREE.BufferAttribute(new Float32Array(positions), positionNumComponents))
 geometry.setAttribute('normal', new THREE.BufferAttribute(new Float32Array(normals), normalNumComponents))
在three.js中内置的几何体非常的多,需要深入了解的需要到官网上查看。本节简单的介绍了几何体是什么。在创建几何体时需要注意,分段数的大小要控制好。细分的越少,运行的越流畅,使用的内存也会更少。细分的越多,动画越精细,运行的越不流畅。
材质简单理解就是设置几何体各个面的颜色。但它不是单纯的颜色,它能模拟在不同光照下颜色的表现。比如太阳光照射光滑的物体,表面会出现白色的反光,都能模拟。
材质和渲染器无关,在开发中定义一份材质就可以重复使用。
定义材质的常用的方式有两种:
1、实例化时传入配置参数
const material = new THREE.MeshPhongMaterial({
    color: 0xFF0000, // 也可以使用CSS的颜色字符串
});
2、通过材质的方法设置属性
const material = new THREE.MeshPhongMaterial();
material.color.setHSL(0, 1, 0.5);
material.color.set(0x00FFFF); // 同 CSS的 #RRGGBB 风格threejs中有许多的材质,常用的材质有以下几种:
以简单着色的方式实现。
不受灯光的影响。
const color = 0xeeeeee
const intensity = 1
// 创建光源
const light = new THREE.DirectionalLight(color, intensity)
// 光源 加入场景
scene.add(light)
// 基础材质
const material = new THREE.MeshBasicMaterial({ color: 0x44aa88 })
// 网格
const mesh = new THREE.Mesh(sphereGeometry, material)
mesh.position.x = 10
scene.add(mesh)
// 基础材质
const material2 = new THREE.MeshBasicMaterial({ color: 0x44aa88, wireframe: true })
// 网格
const mesh2 = new THREE.Mesh(sphereGeometry, material2)
mesh2.position.x = 0
scene.add(mesh2)
当在实例中开启了wireframe以后则只渲染线框
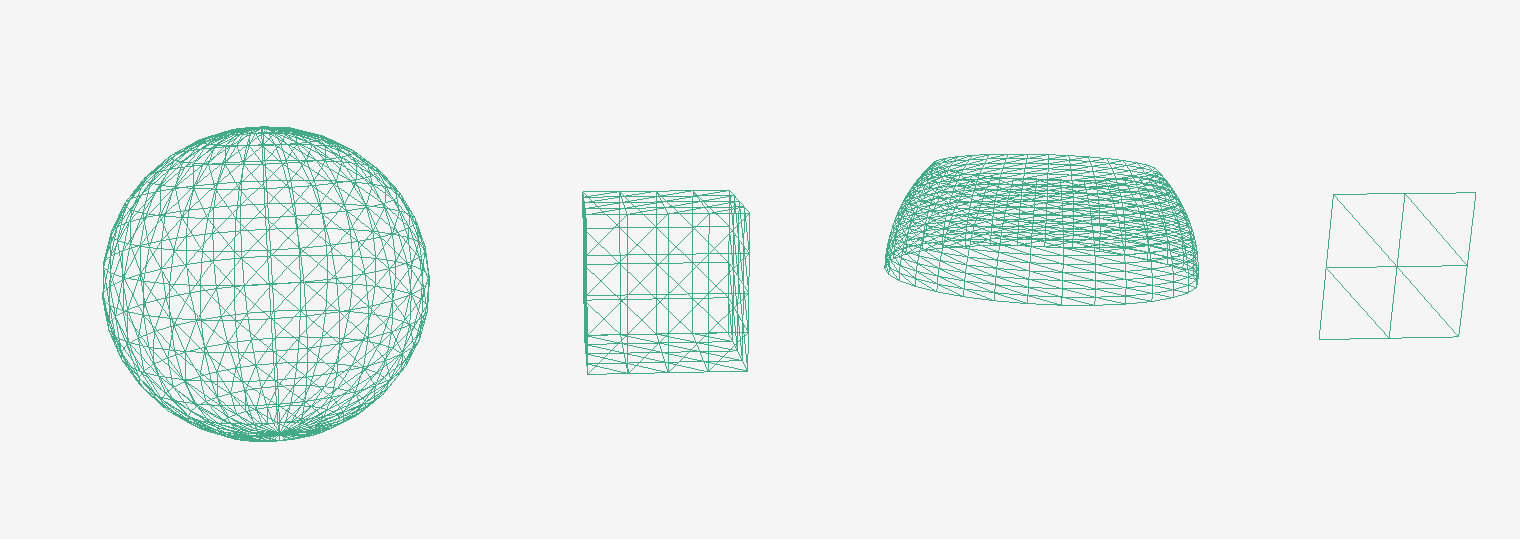
wireframe 基础材质的属性,设置true,只渲染线框。其它属性大家可以到官网查看
创建球几何体使用基础材质,和平面没撒区别。
通常用于显示几何体线框时使用。
表面光滑的材质。
受灯光的影响,不过只在顶点计算光照。
能很好的模拟一些表面(例如未经处理的木材或石材)。因为只在顶点计算光照,不能模拟具有镜面高光的表面(如地板砖这些)。
使用方式:
// 基础材质
const material = new THREE.MeshLambertMaterial({ color: 0x44aa88 })
// 网格
const mesh = new THREE.Mesh(sphereGeometry, material)
mesh.position.x = 5
scene.add(mesh)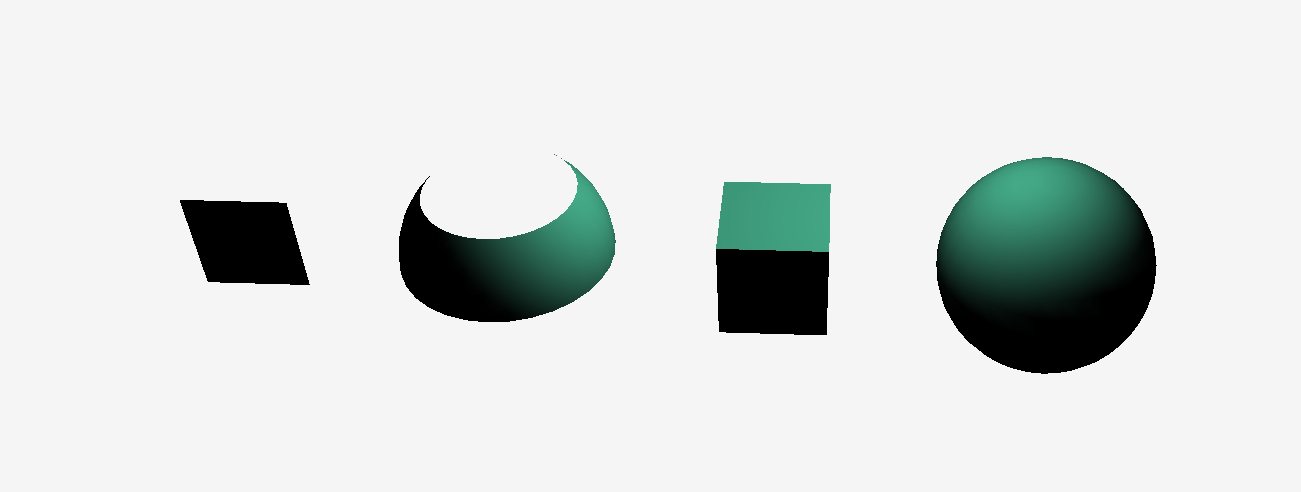
这里灯光用的方向光黑色,不设置灯光几何体就会展示为全黑。几何体最后展示的颜色是,灯光颜色乘以材质的颜色来展示的。灯光会在后面讲解。
emissive是材质的属性,用于设置材质发出的颜色,这种颜色不受光照影响。
具有镜面高光的材质。
每个像素都会计算光照。
模拟具有镜面高光的表面(如地板砖)。
// 基础材质
const material = new THREE.MeshPhongMaterial({ color: 0x44aa88 })
// 网格
const mesh = new THREE.Mesh(sphereGeometry, material)
mesh.position.x = 5
scene.add(mesh)
shininess属性,决定高光的光泽,值越大光泽越亮。默认是30。

简单理解纹理就是一张图片,它是由像素点组成。
在three.js一般都是使用在材质上,和配置颜色一样。颜色是材质表面所有的像素都是同一个颜色,纹理是根据配置信息在材质表面显示纹理(贴图)不同位置的像素点。
// 渲染方块
const initCube = (callback) => {
    const cubeSize = 4
    // 创建几何体
    const cubeGeo = new THREE.BoxGeometry(cubeSize, cubeSize, cubeSize)
    // 通过TextureLoader可加载图片为贴图
    const loader = new THREE.TextureLoader()
    loader.load("../imgs/checker.png", texture => {
        // 创建材质和贴图
        const cubeMat = new THREE.MeshPhongMaterial({
            map: texture
        })
        // 创建网格
        mesh = new THREE.Mesh(cubeGeo, cubeMat)
        mesh.position.y = 2
        mesh.position.x = 0
        mesh.position.z = 3
        scene.add(mesh)
        callback()
    })
}
贴图
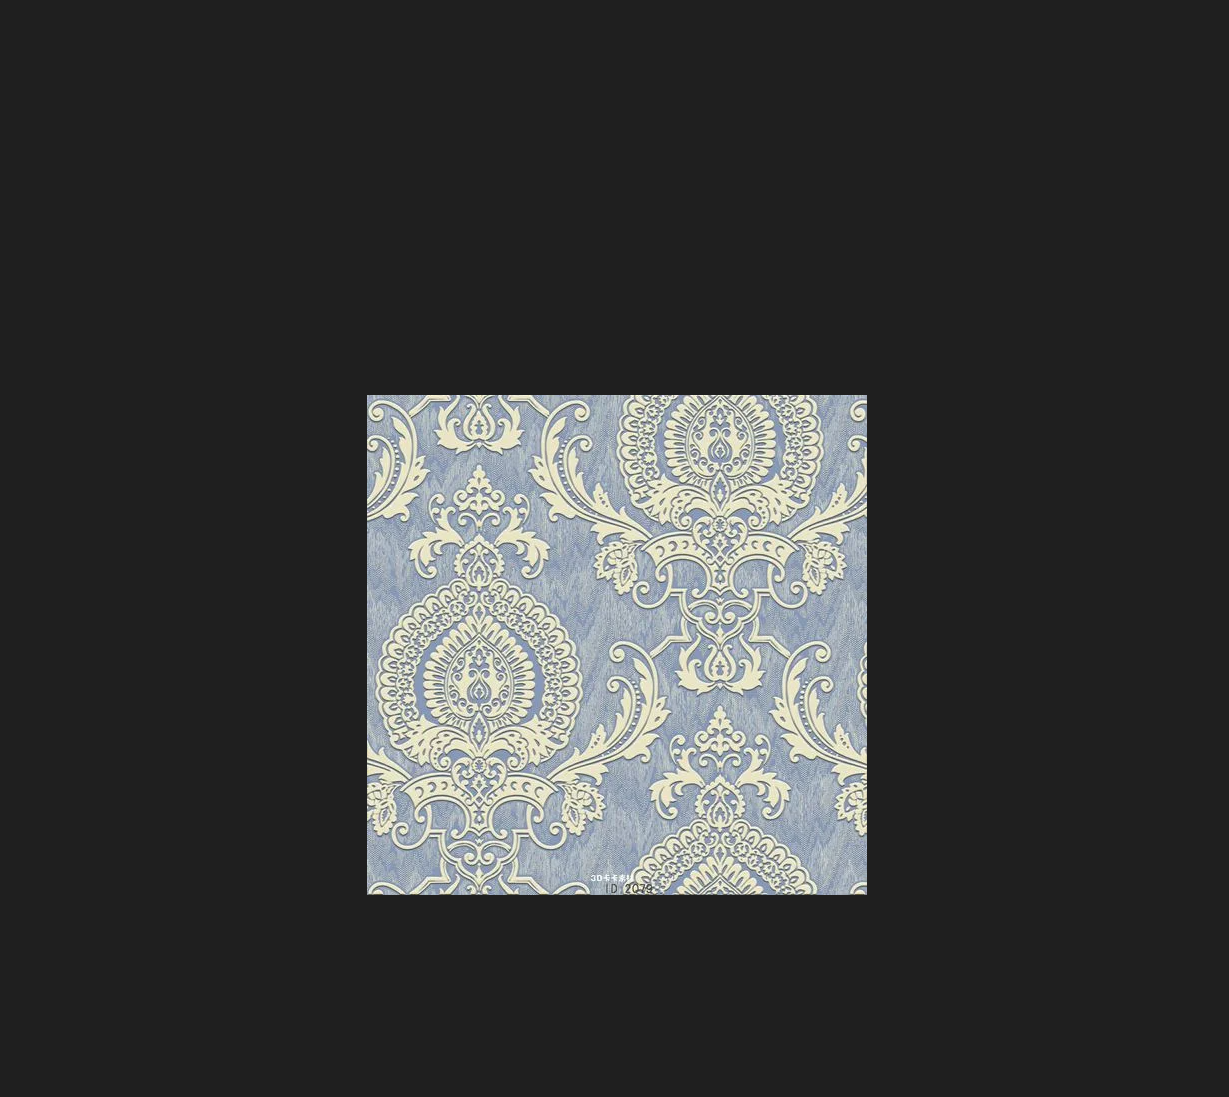
效果
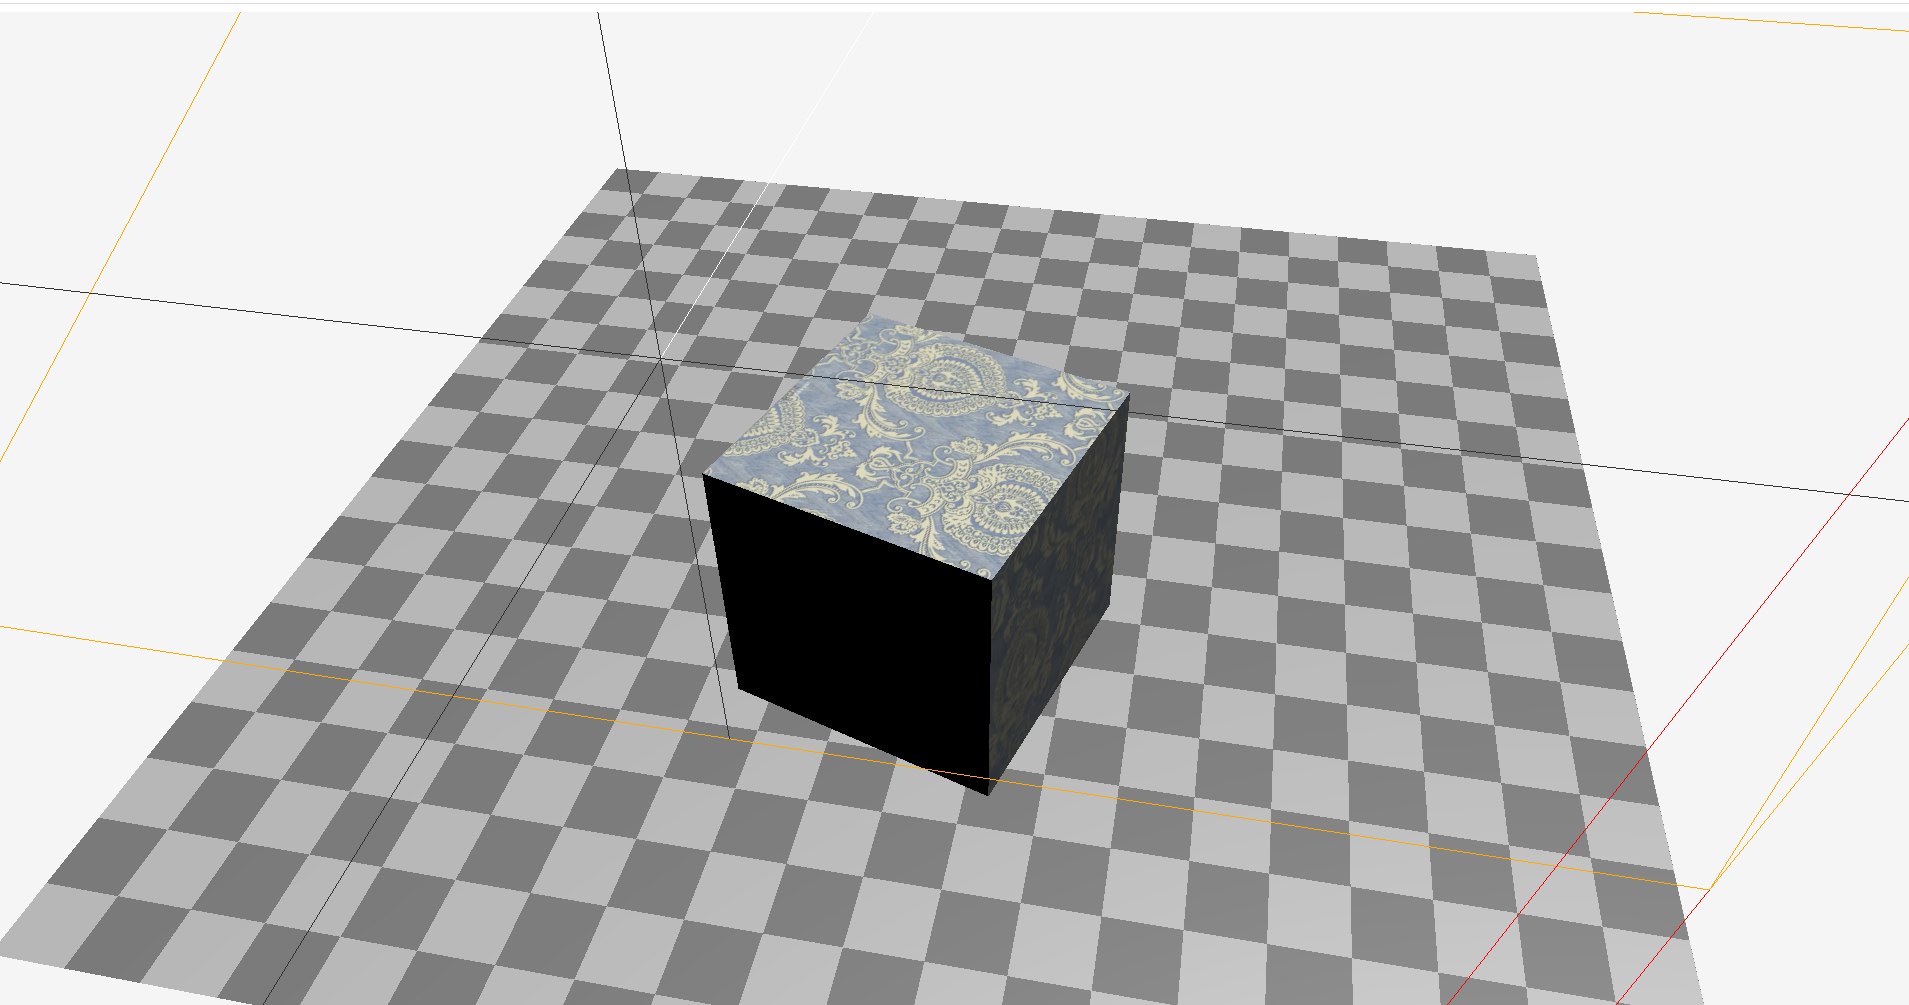
使用.TextureLoader()加载图片,转化为纹理,通过属性map设置材质纹理。就实现了简单的纹理加载。
需要注意.TextureLoader()是异步的,当几何绘制先执行完,几何体是不会有纹理的。
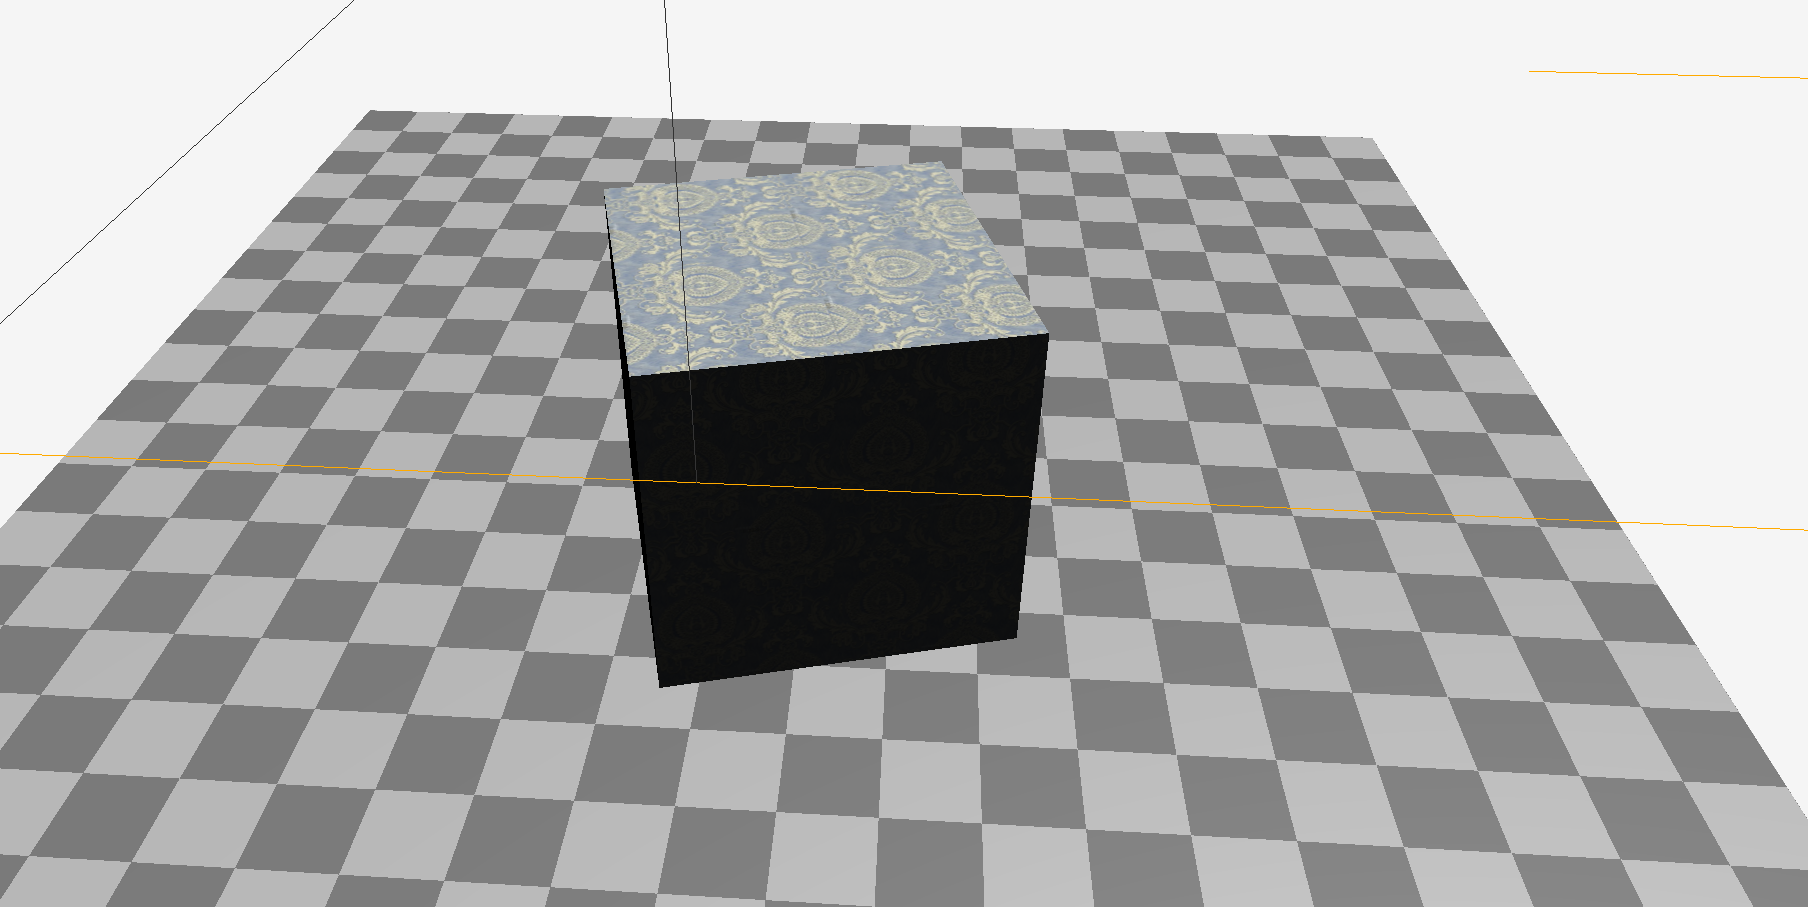
纹理可设置重复、偏移和旋转
重复
设置重复的方式需要属性.wrapS水平包裹、.wrapT垂直包裹。对应纹理UV映射中UV。
设置水平和垂直重复的次数是用.repeat。
// 渲染方块
const initCube = (callback) => {
    const cubeSize = 4
    // 创建几何体
    const cubeGeo = new THREE.BoxGeometry(cubeSize, cubeSize, cubeSize)
    // 通过TextureLoader可加载图片为贴图
    const loader = new THREE.TextureLoader()
    loader.load("../imgs/texture02.jpg", texture => {
        // THREE.js 中的常量
        // THREE.ClampToEdgeWrapping 每条边上的最后一个像素无限重复
        // THREE.RepeatWrapping      纹理重复
        // THREE.MirroredRepeatWrapping 在每次重复时将进行镜像
        // 设置纹理重复
        texture.wrapS = THREE.RepeatWrapping
        texture.wrapT = THREE.RepeatWrapping
        // 设置水平和垂直重复的次数
        texture.repeat.x = 2
        texture.repeat.y = 2
        // 创建材质和贴图
        const cubeMat = new THREE.MeshPhongMaterial({
            map: texture
        })
        // 创建网格
        mesh = new THREE.Mesh(cubeGeo, cubeMat)
        mesh.position.y = 2
        mesh.position.x = 0
        mesh.position.z = 3
        scene.add(mesh)
        callback()
    })
 }
偏移
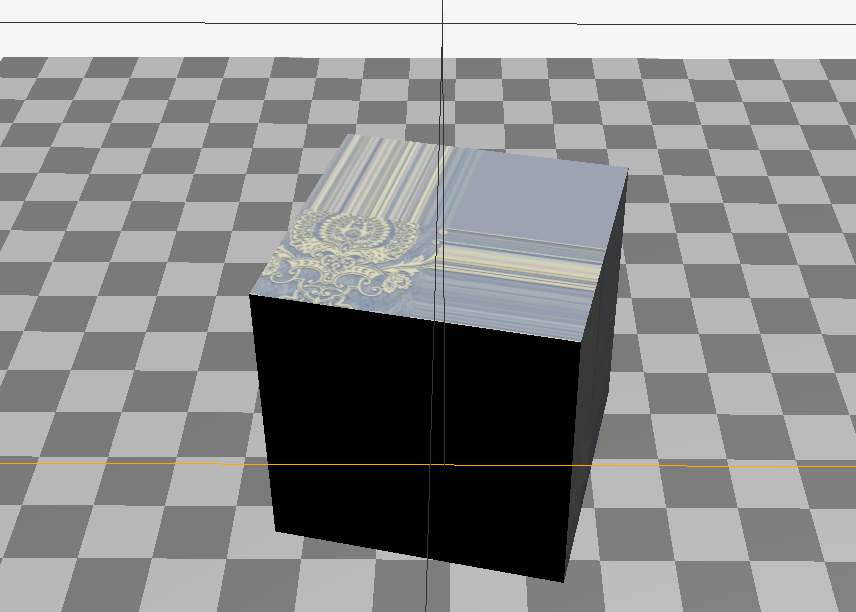
设置水平和垂直的偏移需要使用.offset。
需要注意这里的1个单位=1个纹理大小,换句话说,0 = 没有偏移,1 = 偏移一个完整的纹理数量。
// 渲染方块
const initCube = (callback) => {
    const cubeSize = 4
     // 创建几何体
    const cubeGeo = new THREE.BoxGeometry(cubeSize, cubeSize, cubeSize)
    // 通过TextureLoader可加载图片为贴图
    const loader = new THREE.TextureLoader()
    loader.load("../imgs/texture02.jpg", texture => {
         // ===offset===
        texture.offset.x = 0.5
        texture.offset.y = 0.5
        // ===offset===
         // 创建材质和贴图
        const cubeMat = new THREE.MeshPhongMaterial({
            map: texture
        })
         // 创建网格
        mesh = new THREE.Mesh(cubeGeo, cubeMat)
        mesh.position.y = 2
        mesh.position.x = 0
        mesh.position.z = 3
        scene.add(mesh)
        callback()
    })
 }
旋转
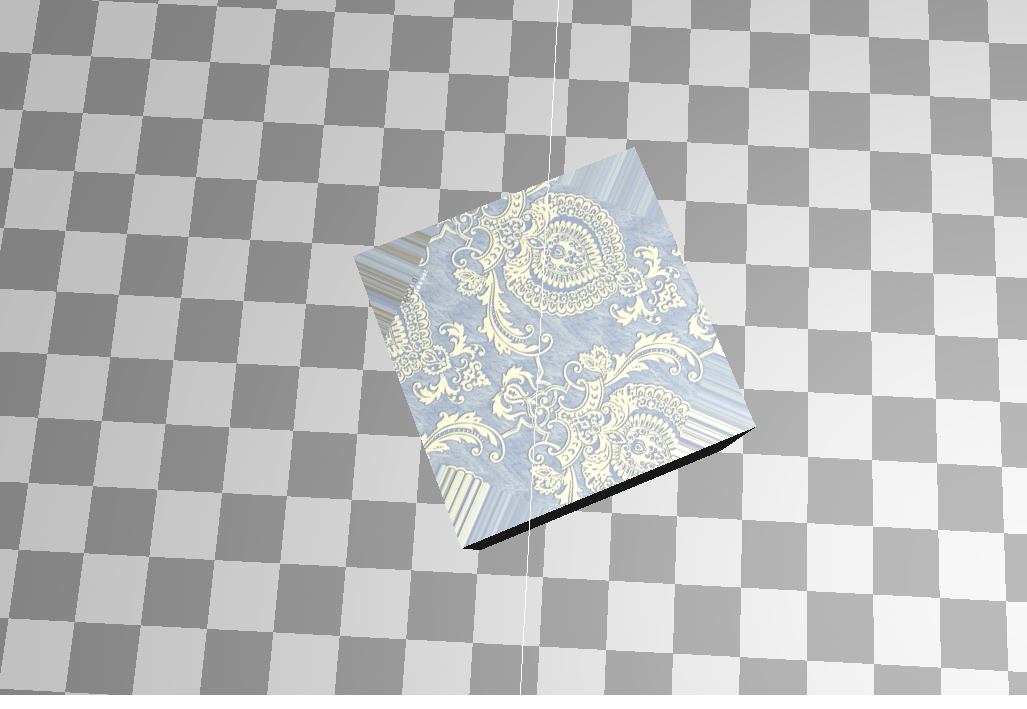
设置纹理的旋转需要两个属性,以弧度为单位的 .rotation 以及设置旋转中心点的.center。
.center单位也是1个单位=1个纹理大小。
// 渲染方块
const initCube = (callback) => {
    const cubeSize = 4
     // 创建几何体
    const cubeGeo = new THREE.BoxGeometry(cubeSize, cubeSize, cubeSize)
    // 通过TextureLoader可加载图片为贴图
    const loader = new THREE.TextureLoader()
    loader.load("../imgs/texture02.jpg", texture => {
         // ===rotation===
         // center是旋转中心点
         // 水平
         texture.center.x = 0.5;
         // 垂直
         texture.center.y = 0.5;
         // 旋转弧度
         texture.rotation = THREE.MathUtils.degToRad(45);
         // ===rotation===
         // 创建材质和贴图
        const cubeMat = new THREE.MeshPhongMaterial({
            map: texture
        })
         // 创建网格
        mesh = new THREE.Mesh(cubeGeo, cubeMat)
        mesh.position.y = 2
        mesh.position.x = 0
        mesh.position.z = 3
        scene.add(mesh)
        callback()
    })
 }
表示基于以三角形组合成的几何体的类。
three.js中几何体是不能直接渲染的。在three.js有一种类型物体,这种类型放入场景中才能直接渲染图形。网格(Mesh)是这种类型中的一种。
构造参数new THREE.Mesh( geometry, material )
geometry 几何体实例。
material 一个材质(material)或多个材质(material),多个材质对应几何体的各个面。
// 立体几何
const boxWidth = 6
const boxHeight = 6
const boxDepth = 6
const geometry = new THREE.BoxGeometry(boxWidth, boxHeight, boxDepth)
const loader = new THREE.TextureLoader()
const texture = loader.load(
  'https://gimg2.baidu.com/image_search/src=http%3A%2F%2Fpic.16pic.com%2F00%2F07%2F46%2F16pic_746871_b.jpg'
)
// 基础材质
const material = new THREE.MeshBasicMaterial({
  map: texture
})
// 网格
const mesh = new THREE.Mesh(geometry, material)
mesh.position.x = 5
scene.add(mesh)因为网格(Mesh)的基类是.Object3D。因此包含scale、rotation、position三个属性,设置网站在场景中的位置。
.position网格相对于父级坐标的位置。
mesh.position.x = x
mesh.position.y = y
mesh.position.z = z
.rotation 围绕x、y、z轴旋转的弧度,需注意是弧度值。
mesh.rotation.x = x
mesh.rotation.y = y
mesh.rotation.z = z
.scale 在x、y、z轴缩放的大小。
mesh.scale.x = x
mesh.scale.y = y
mesh.scale.z = z // 渲染方块
const initCube = (callback) => {
const cubeSize = 4
// 创建几何体
const cubeGeo = new THREE.BoxGeometry(cubeSize, cubeSize, cubeSize)
// 通过TextureLoader可加载图片为贴图
const loader = new THREE.TextureLoader()
loader.load("../imgs/texture02.jpg", texture1 => {
loader.load("../imgs/checker.png", texture2 => {
// 加载多个材质
// 创建材质和贴图
const cubeMat1 = new THREE.MeshPhongMaterial({
map: texture1
})
const cubeMat2 = new THREE.MeshPhongMaterial({
map: texture2
})
// 创建网格
mesh = new THREE.Mesh(cubeGeo, [cubeMat1,cubeMat2,cubeMat1,cubeMat2,cubeMat1,cubeMat2])
mesh.position.y = 2
mesh.position.x = 0
mesh.position.z = 3
scene.add(mesh)
callback()
})
})
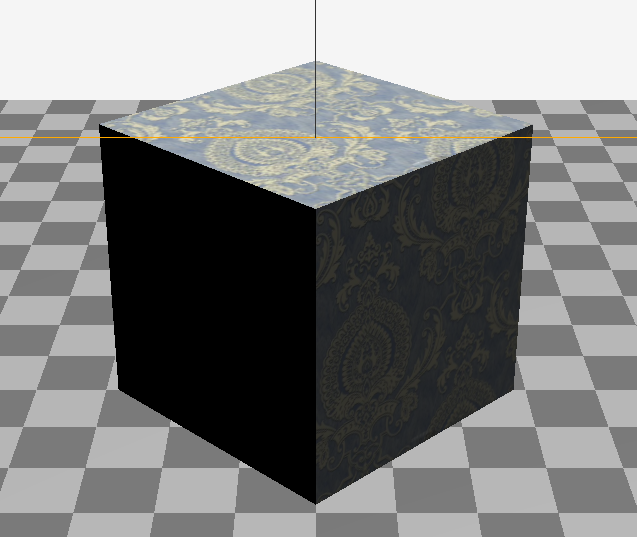
}通过网格的第二个参数,传入多个材质就能实现。
并不是所有的几何体类型都支持多种材质,立方体可以使用6种材料,每个面一个。圆锥体可以使用2种材料,一种用于底部,一种用于侧面。
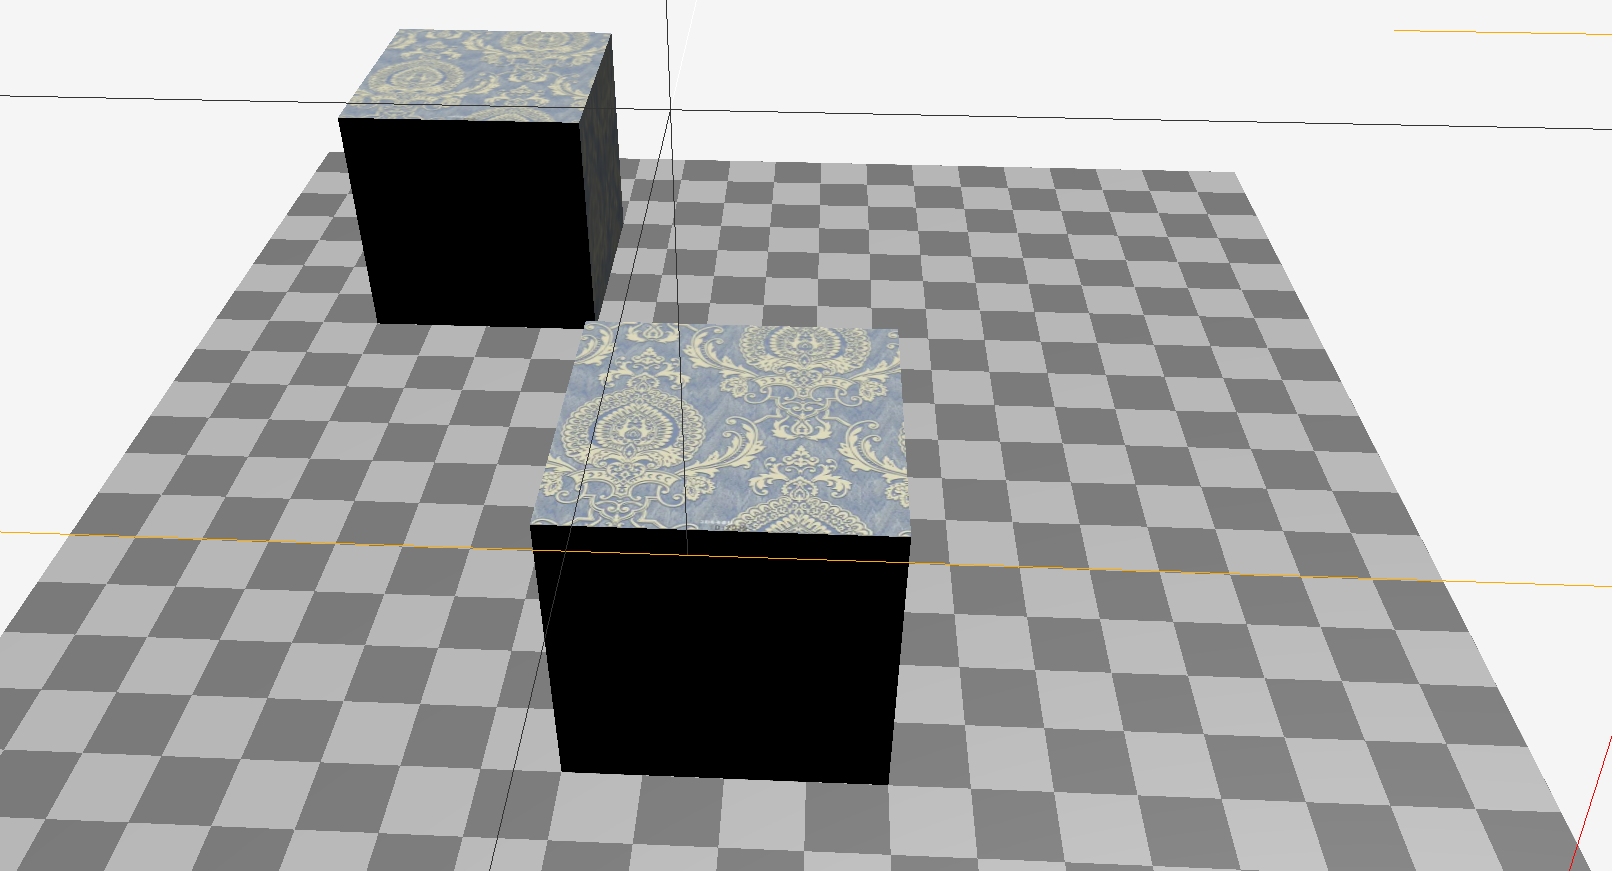
在使用了组后。我们修改组的位置、缩放、旋转,是会同步到子对象的,他们被视为一个整体。当我们单独修改网格对象时,它的位置、缩放、旋转,都是相对于其父对象所在位置上进行变化。
我们通常说的,全局坐标就是场景的坐标,相对坐标是其父对象的坐标。
const initCube = (callback) => {
    const cubeSize = 4
    // 创建几何体
    const cubeGeo = new THREE.BoxGeometry(cubeSize, cubeSize, cubeSize)
    // 通过TextureLoader可加载图片为贴图
    const loader = new THREE.TextureLoader()
    loader.load("../imgs/texture02.jpg", texture => {
            // 使用group网格组来向scene中添加网格
            // 创建材质和贴图
            const cubeMat = new THREE.MeshPhongMaterial({
                map: texture
            })
            // 创建网格
            const mesh1 = new THREE.Mesh(cubeGeo, cubeMat)
            mesh1.position.x = 5
            const mesh2 = new THREE.Mesh(cubeGeo, cubeMat)
            mesh2.position.z = -10
            // 创建一个网格组
            group = new THREE.Group()
            group.add(mesh1)
            group.add(mesh2)
            // 设置网格组位置
            group.position.x = -5
            group.position.y = 2
            group.position.z = 5
            scene.add(group)
            callback()
    })
}
先创建好基本场景
<!DOCTYPE html>
<html lang="en">

<head>
    <meta charset="UTF-8">
    <meta http-equiv="X-UA-Compatible" content="IE=edge">
    <meta name="viewport" content="width=device-width, initial-scale=1.0">
    <title>Document</title>
</head>

<body>
    <canvas id="c2d" class="c2d" width="2000" height="1000"></canvas>

    <script type="module">
        /**
       * 本章节内容
       * 学习lil-giu控件用法,如何通过gui控件去更改相机的矩阵、位置等信息
       **/
        // 引入官网提供的地址
        import * as THREE from "../libs/three.module.js"
        // import { OrbitControls } from '../libs/OrbitControls.js'
        import { OrbitControls } from 'https://threejsfundamentals.org/threejs/resources/threejs/r132/examples/jsm/controls/OrbitControls.js'
        import { GUI } from 'https://threejsfundamentals.org/threejs/../3rdparty/dat.gui.module.js'

        let renderer = null;

        let camera = null;

        let scene = null;

        let canvas = null;

        let controls = null;

        let mesh = null;

        let camera1 = null

        let cameraHelper = null


        // 地板网格
        let flowerMesh = null;

        // 初始化渲染器
        const initRenderer = () => {
            canvas = document.querySelector("#c2d")

            // 渲染器
            renderer = new THREE.WebGLRenderer({ canvas })

        }

        // 初始化OrbitControls相机控件
        const initOrbitControls = () => {
            controls = new OrbitControls(camera, canvas)
        }

        // 初始化相机
        const initCamera = () => {
            // 视野范围,角度, 这个值越大,相当于物体越远
            const fov = 40
            // 画布的宽高比
            const aspect = 2

            // 近平面
            const near = 0.1

            // 远平面
            const far = 1000

            camera = new THREE.PerspectiveCamera(fov, aspect, near, far)

            camera.position.set(0, 10, 20)

            camera.lookAt(0, 0, 0)
        }

        // 初始化场景
        const initScene = () => {
            scene = new THREE.Scene()

            scene.background = new THREE.Color('white')
        }

        // 初始化光源
        const initLight = () => {


        }

        // 渲染方块
        const initCube = () => {
            const cubeSize = 4

            // 创建几何体
            const cubeGeo = new THREE.BoxGeometry(cubeSize, cubeSize, cubeSize)

            // 创建材质
            const cubeMat = new THREE.MeshPhongMaterial({ color: '#8f4b2e' })

            // 创建网格
            mesh = new THREE.Mesh(cubeGeo, cubeMat)

            mesh.position.y = 2

            scene.add(mesh)

        }

        // 初始化地板
        const initFlower = () => {
            // 地面 平铺
            const planeSize = 20
            const loader = new THREE.TextureLoader()
            const texture = loader.load('../imgs/checker.png')
            // const texture = loader.load('https://threejs.org/manual/examples/resources/images/checker.png')
            texture.wrapS = THREE.RepeatWrapping
            texture.wrapT = THREE.RepeatWrapping
            texture.magFilter = THREE.NearestFilter
            const repeats = planeSize / 2
            texture.repeat.set(repeats, repeats)
            const planeGeo = new THREE.PlaneGeometry(planeSize, planeSize)
            const planeMat = new THREE.MeshPhongMaterial({
                map: texture,
                side: THREE.DoubleSide
            })
            flowerMesh = new THREE.Mesh(planeGeo, planeMat)
            flowerMesh.rotation.x = Math.PI * -0.5
            scene.add(flowerMesh)
        }


        // 通过GUI示例来动态修改相机属性
        const updateCamera = () => {
            camera1.updateProjectionMatrix()
        }


        // 场景和相机放入渲染器中
        const render = (time = 1) => {
            controls.update()

            // 旋转正方体

            // time *= 0.001

            // mesh.rotation.y = time
            // mesh.rotation.x = time

            renderer.render(scene, camera)

            requestAnimationFrame(render)
        }


        initScene()
        initRenderer()
        initLight()
        initFlower()
        initCamera()
        initCube()
        initOrbitControls()

        render()

    </script>

</body>

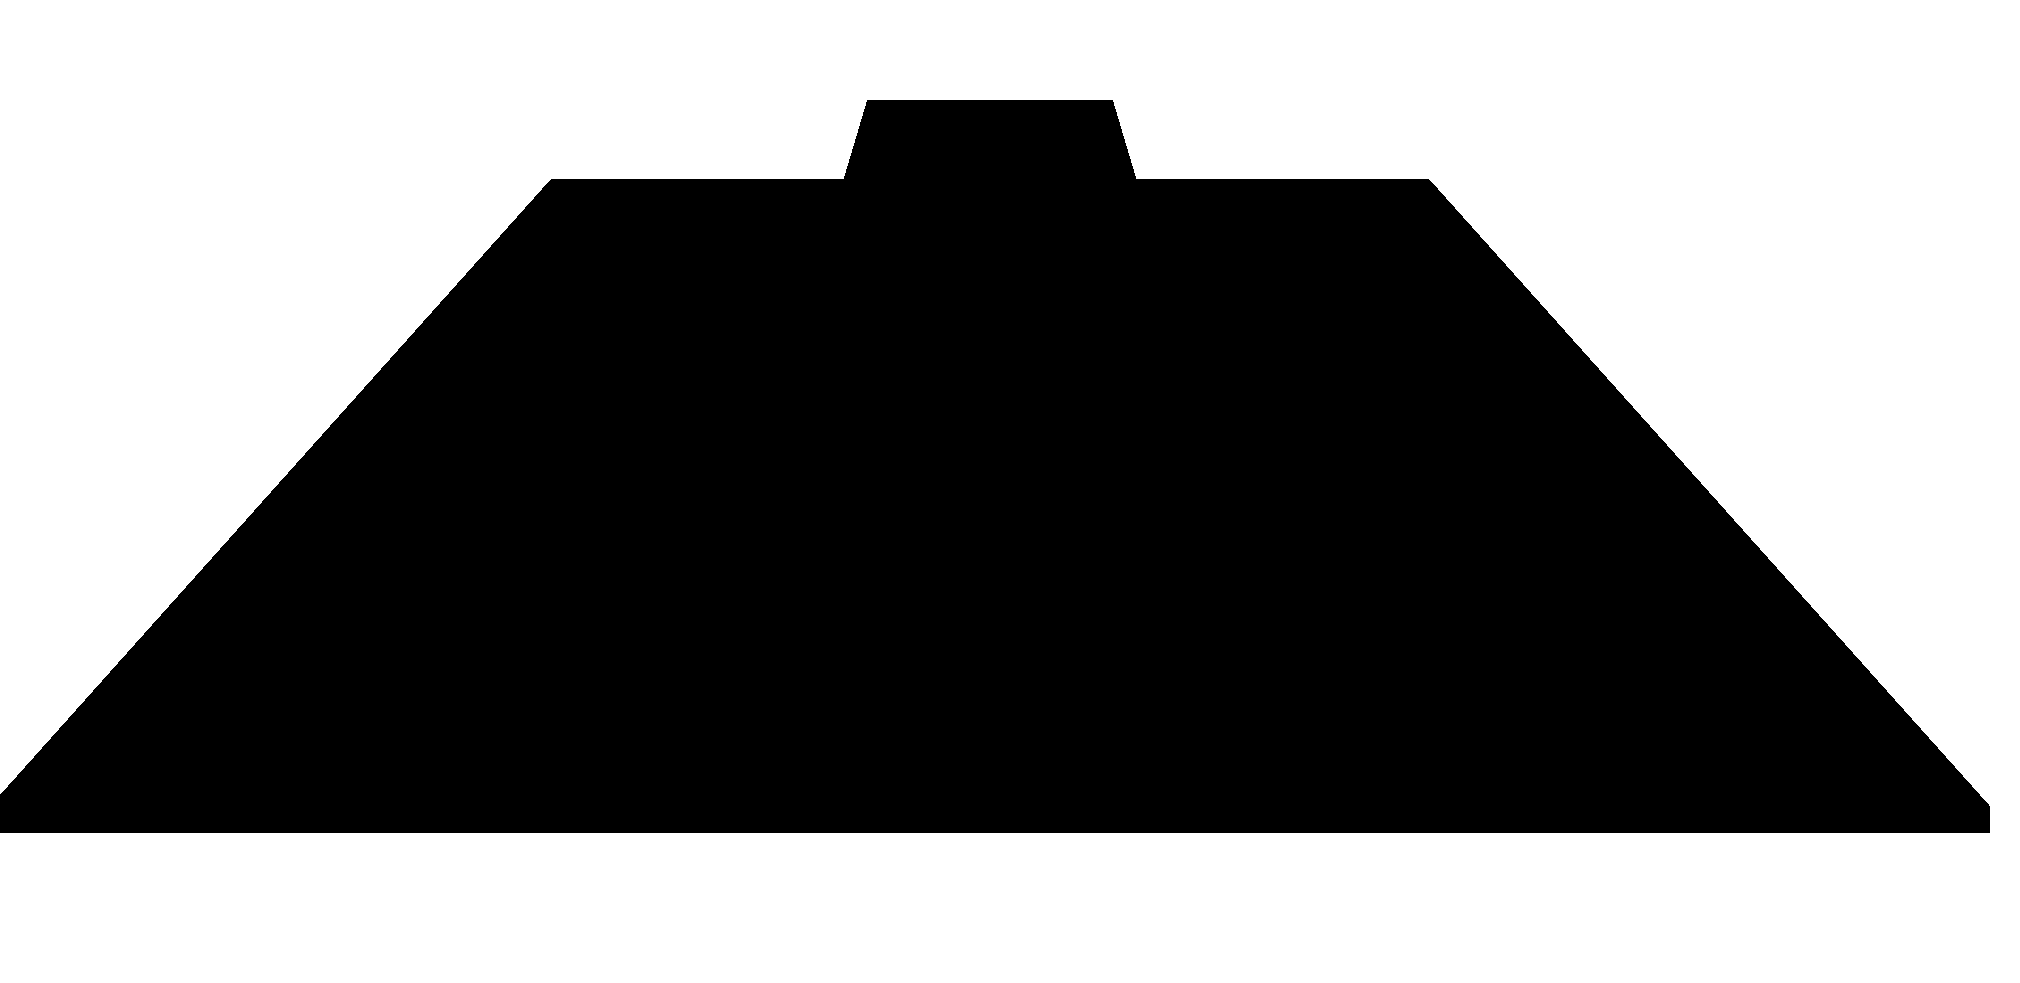
</html>此时并没有添加灯光、场景是一片黑暗。。
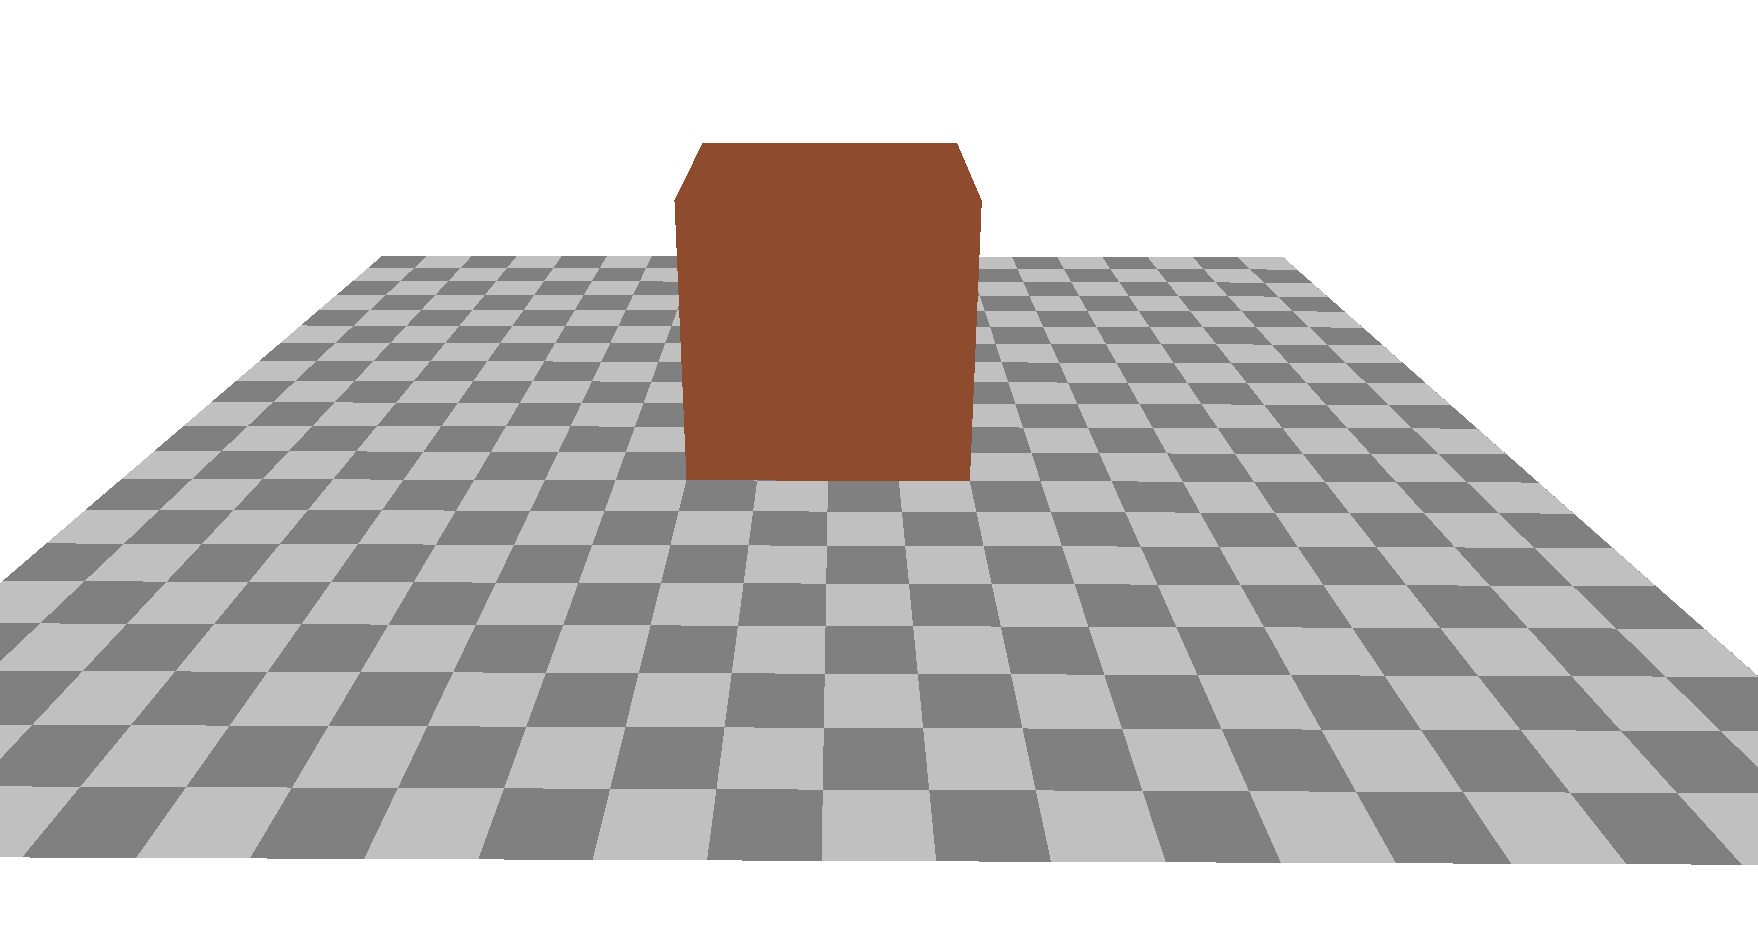
只是简单地将材质的颜色与光源颜色进行相乘,再乘以光照强度。所以只使用环境光,场景内的物体看起来没有立体感。
        // 初始化光源
        const initLight = () => {

            const initAmbientLight = () => {
                // 灯光颜色
                const color = 0xffffff

                // 灯光强度
                const intensity = 1
                // 环境光,它没有方向,无法产生阴影,场景内任何一点受到的光照强度都是相同的,无法产生立体感
                const light = new THREE.AmbientLight(color,intensity)

                scene.add(light)
            }

            initAmbientLight()

        }
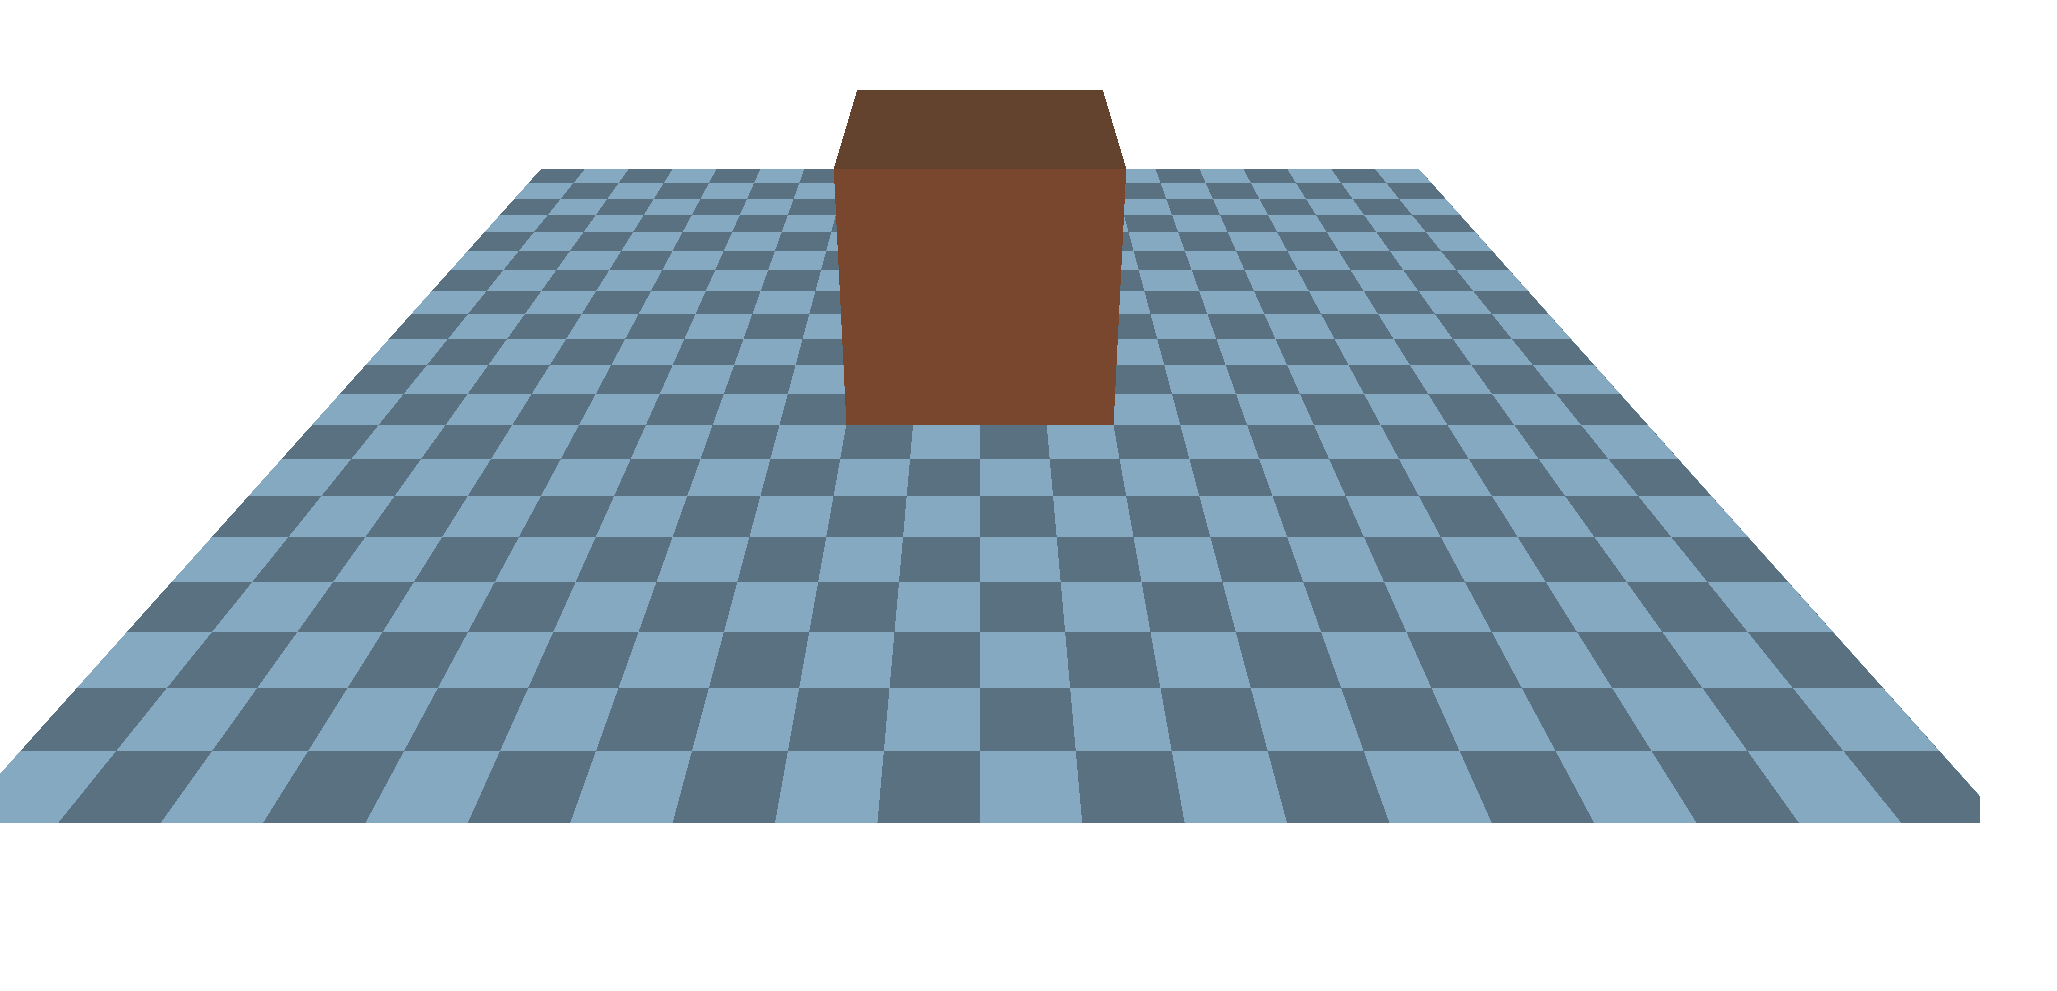
添加环境光以后的效果如下:
颜色是从天空到地面两个颜色之间的渐变,与物体材质的颜色相乘后得到最终的颜色效果。
一般都是与其他光源一起使用。
            // 初始化半球光
            const initHemisphereLight = () => {
                const skyColor = 0xb1e1ff // 天空蓝色
                const groundColor = 0xffffff // 地面白色
                const intensity = 1
                // 颜色是从天空到地面两个颜色之间的渐变,与物体材质的颜色相乘后得到最终的颜色效果。
                const light = new THREE.HemisphereLight(skyColor,groundColor,intensity)

                scene.add(light)
            }
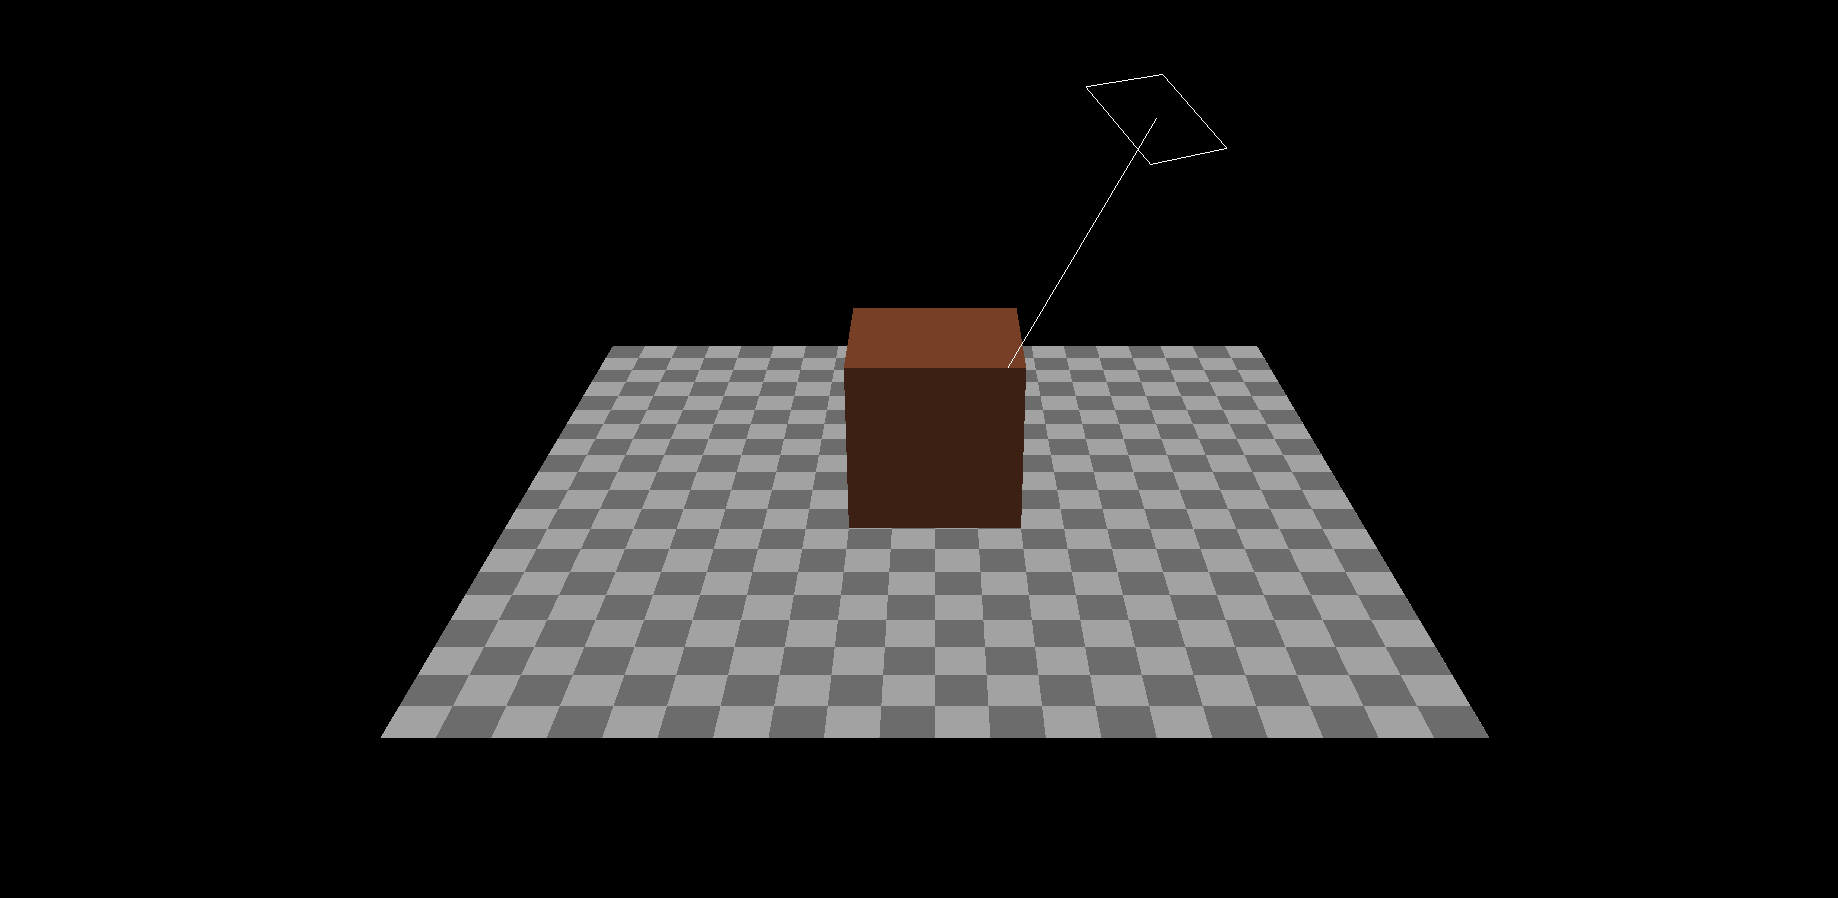
方向光表示的是来自一个方向上的光,并不是从某个点发射出来的,而是从一个无限大的平面内,发射出全部相互平行的光线。
一般用于模仿太阳光。
            const initDirectionalLight = () => {
                const color = 0xffffff

                const intensity = 1

                const light = new THREE.DirectionalLight(color,intensity)

                light.position.set(4,10,5)

                scene.add(light)

                const helper = new THREE.DirectionalLightHelper(light)
                scene.add(helper)
            }
为了能更好的观看光源,这里修该背景为黑色,使用.DirectionalLightHelper()生成方向光辅助线。
表示的是从一个点朝各个方向发射出光线的一种光照效果。
一般用于模拟电灯。
            // 初始化点光源
            const initPointLight = () => {
                const color = 0xffffff

                const intensity = 1

                const light = new THREE.PointLight(color,intensity)

                light.position.set(8,2,0)

                scene.add(light)
                // 一般用于模拟电灯。
                const helper = new THREE.PointLightHelper(light)
                scene.add(helper)
            }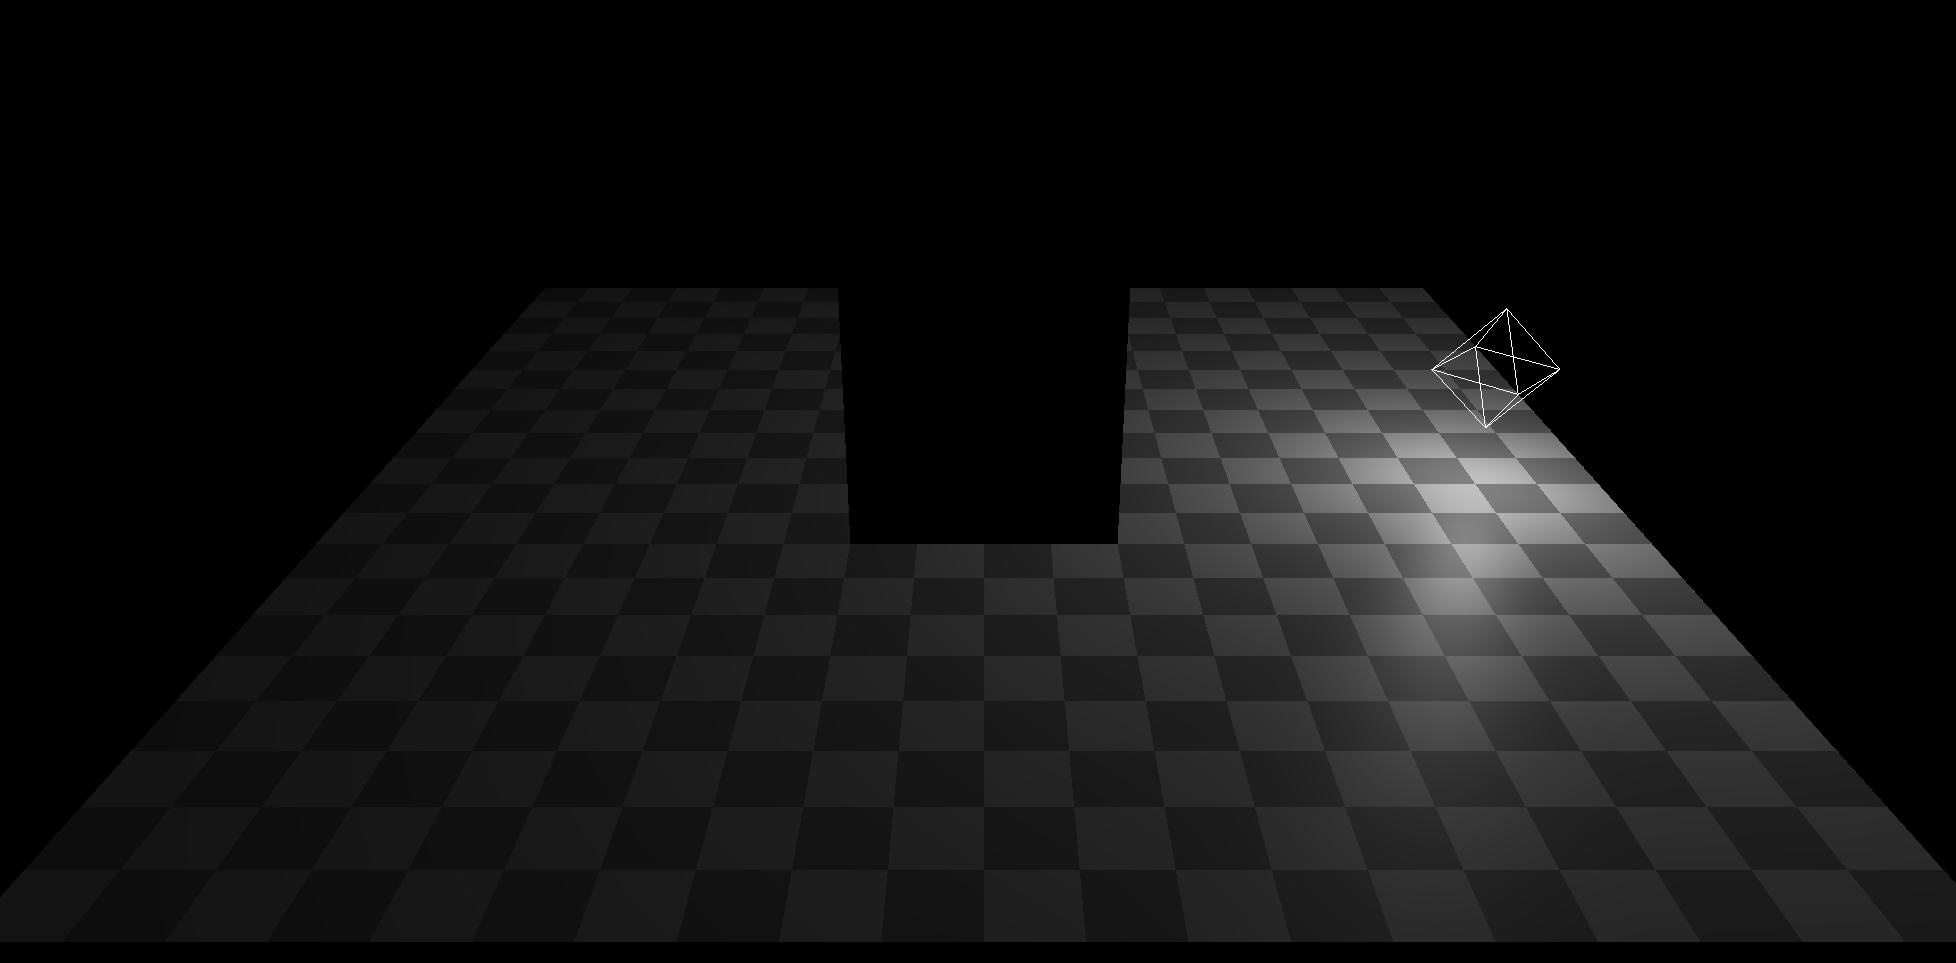
使用.PointLightHelper()生成点光源辅助线。
在WebGLRenderer中有一个设置项 .physicallyCorrectLights。开启后可设置随着离光源的距离增加光照如何减弱。点光源和聚光灯等灯光受其影响。
在光源上有两个属性。.power以"流明(光通量单位)"为单位的光功率,.decay沿着光照距离的衰退量,默认值1。
renderer.physicallyCorrectLights = true

// 点光源修改
light.power = 800
light.decay = 2
本节介绍了一些常用的光源,在开发中光源是配合使用的。不过需要注意每添加一个光源到场景中,都会降低 three.js渲染的速度,所以要根据需求来判断添加多少光源实现最好的效率。
场景(Scene)
相当于一个大容器,我们需要展示的所有物体都要放入场景。
它又被称为场景图,因为它是一个树形结构数据。
能放入场景中的对象都继承了Object3D对象,所以每一个子节点都有自己的局部空间。简单理解就是场景中有一个空间可以添加组、Object3D、网格等物体类型,子节点也是一个小容器,同样可以添加组、Object3D、网格等物体类型。区别就是,子节点设置的坐标位置是相对于父节点的局部空间坐标来改变的。
.background 设置场景的背景。
.fog 控制场景中的每个物体的雾的类型。
.environment 设置场景中没有纹理物体的默认纹理,如物体有纹理不会修改其纹理。
.children 返回场景的所有子对象。
.add() 添加对象。
.remove() 删除已添加对象。
.getObjectByName(name,recursive) 在创建对象时可以指定唯一的标识name,使用该方法可以查找特定名字的对象。recursive布尔对象,false:子元素上查找。true:所有后代对象上查找。
<!DOCTYPE html>
<html lang="en">
  <head>
    <meta charset="UTF-8" />
    <title>学习</title>
  </head>
  <body>
    <canvas id="c2d" class="c2d" width="1000" height="500"></canvas>
    <script type="module">
      import * as THREE from 'https://threejs.org/build/three.module.js'
      import { OrbitControls } from 'https://threejsfundamentals.org/threejs/resources/threejs/r132/examples/jsm/controls/OrbitControls.js'

      const canvas = document.querySelector('#c2d')
      // 渲染器
      const renderer = new THREE.WebGLRenderer({ canvas })

      const fov = 40 // 视野范围
      const aspect = 2 // 相机默认值 画布的宽高比
      const near = 0.1 // 近平面
      const far = 1000 // 远平面
      // 透视投影相机
      const camera = new THREE.PerspectiveCamera(fov, aspect, near, far)
      camera.position.set(0, 10, 20)
      camera.lookAt(0, 0, 0)

      // 控制相机
      const controls = new OrbitControls(camera, canvas)
      controls.update()

      // 场景
      const scene = new THREE.Scene()
      scene.background = new THREE.Color('white')

      {
        // 光源
        const color = 0xffffff
        const intensity = 1
        const light = new THREE.DirectionalLight(color, intensity)
        scene.add(light)
      }

      {
        // 几何体
      }

      // 渲染
      function render() {
        renderer.render(scene, camera)
        requestAnimationFrame(render)
      }

      requestAnimationFrame(render)
    </script>
  </body>
</html><!DOCTYPE html>
<html lang="en">
<head>
<meta charset="UTF-8">
<meta http-equiv="X-UA-Compatible" content="IE=edge">
<meta name="viewport" content="width=device-width, initial-scale=1.0">
<title>Document</title>
</head>
<body>
<canvas id="c2d" class="c2d" width="2000" height="1000"></canvas>
<script type="module">
/**
* 本章节内容
* 本章主要学习了场景的常用属性,以及区分了局部坐标和全局坐标的区别
* 如果一个网格添加进网格组后,网格的坐标系是相对网格组的坐标系来设置的
* AxesHelper可为指定场景、网格组添加坐标系
**/
// 引入官网提供的地址
import * as THREE from "../libs/three.module.js"
// import { OrbitControls } from '../libs/OrbitControls.js'
import { OrbitControls } from 'https://threejsfundamentals.org/threejs/resources/threejs/r132/examples/jsm/controls/OrbitControls.js'
import { GUI } from 'https://threejsfundamentals.org/threejs/../3rdparty/dat.gui.module.js'
let renderer = null;
let camera = null;
let scene = null;
let canvas = null;
let controls = null;
let mesh = null;
let camera1 = null
let cameraHelper = null
// 地板网格
let flowerMesh = null;
// 初始化渲染器
const initRenderer = () => {
canvas = document.querySelector("#c2d")
// 渲染器
renderer = new THREE.WebGLRenderer({ canvas })
}
// 初始化OrbitControls相机控件
const initOrbitControls = () => {
controls = new OrbitControls(camera, canvas)
}
// 初始化相机
const initCamera = () => {
// 视野范围,角度, 这个值越大,相当于物体越远
const fov = 40
// 画布的宽高比
const aspect = 2
// 近平面
const near = 0.1
// 远平面
const far = 1000
camera = new THREE.PerspectiveCamera(fov, aspect, near, far)
camera.position.set(0, 10, 20)
camera.lookAt(0, 0, 0)
}
// 初始化场景
const initScene = () => {
scene = new THREE.Scene()
scene.background = new THREE.Color('black')
}
// 初始化光源
const initLight = () => {
// 初始化环境光
const initAmbientLight = () => {
// 灯光颜色
const color = 0xffffff
// 灯光强度
const intensity = 1
// 环境光,它没有方向,无法产生阴影,场景内任何一点受到的光照强度都是相同的,无法产生立体感
const light = new THREE.AmbientLight(color, intensity)
scene.add(light)
}
initAmbientLight()
}
// 渲染几何体
const initGeometry = () => {
// 球
const radius = 1
const widthSegments = 36
const heightSegments = 36
const sphereGeometry = new THREE.SphereGeometry(radius, widthSegments, heightSegments)
// 立体体
const boxWidth = 6
const boxHeight = 6
const boxDepth = 6
const boxGeometry = new THREE.BoxGeometry(boxWidth, boxHeight, boxDepth)
const material = new THREE.MeshPhongMaterial({ color: 0x00ff00 })
const axes1 = new THREE.AxesHelper()
// 添加全局坐标系
scene.add(axes1)
// 网格1
const mesh1 = new THREE.Mesh(sphereGeometry, material)
// 相对坐标 x 移动5
mesh1.position.x = 5
// 全局坐标 移动
scene.add(mesh1)
// 创建组
const group = new THREE.Group()
group.position.x = -5
// 旋转
// group.rotation.x = 1
// 全局坐标 移动
scene.add(group)
// 添加局部坐标系位置
const axes2 = new THREE.AxesHelper()
group.add(axes2)
// 网格2
const mesh2 = new THREE.Mesh(sphereGeometry, material)
// 相对坐标 x 移动5
mesh2.position.y = 5
// 网格3
const mesh3 = new THREE.Mesh(boxGeometry, material)
// 相对坐标 x 移动5
mesh3.position.y = -5
// 组 局部坐标移动
group.add(mesh2)
group.add(mesh3)
}
// 通过GUI示例来动态修改相机属性
const updateCamera = () => {
camera1.updateProjectionMatrix()
}
// 场景和相机放入渲染器中
const render = (time = 1) => {
controls.update()
// 旋转正方体
// time *= 0.001
// mesh.rotation.y = time
// mesh.rotation.x = time
renderer.render(scene, camera)
requestAnimationFrame(render)
}
initScene()
initRenderer()
initLight()
initCamera()
initGeometry()
initOrbitControls()
render()
</script>
</body>
</html>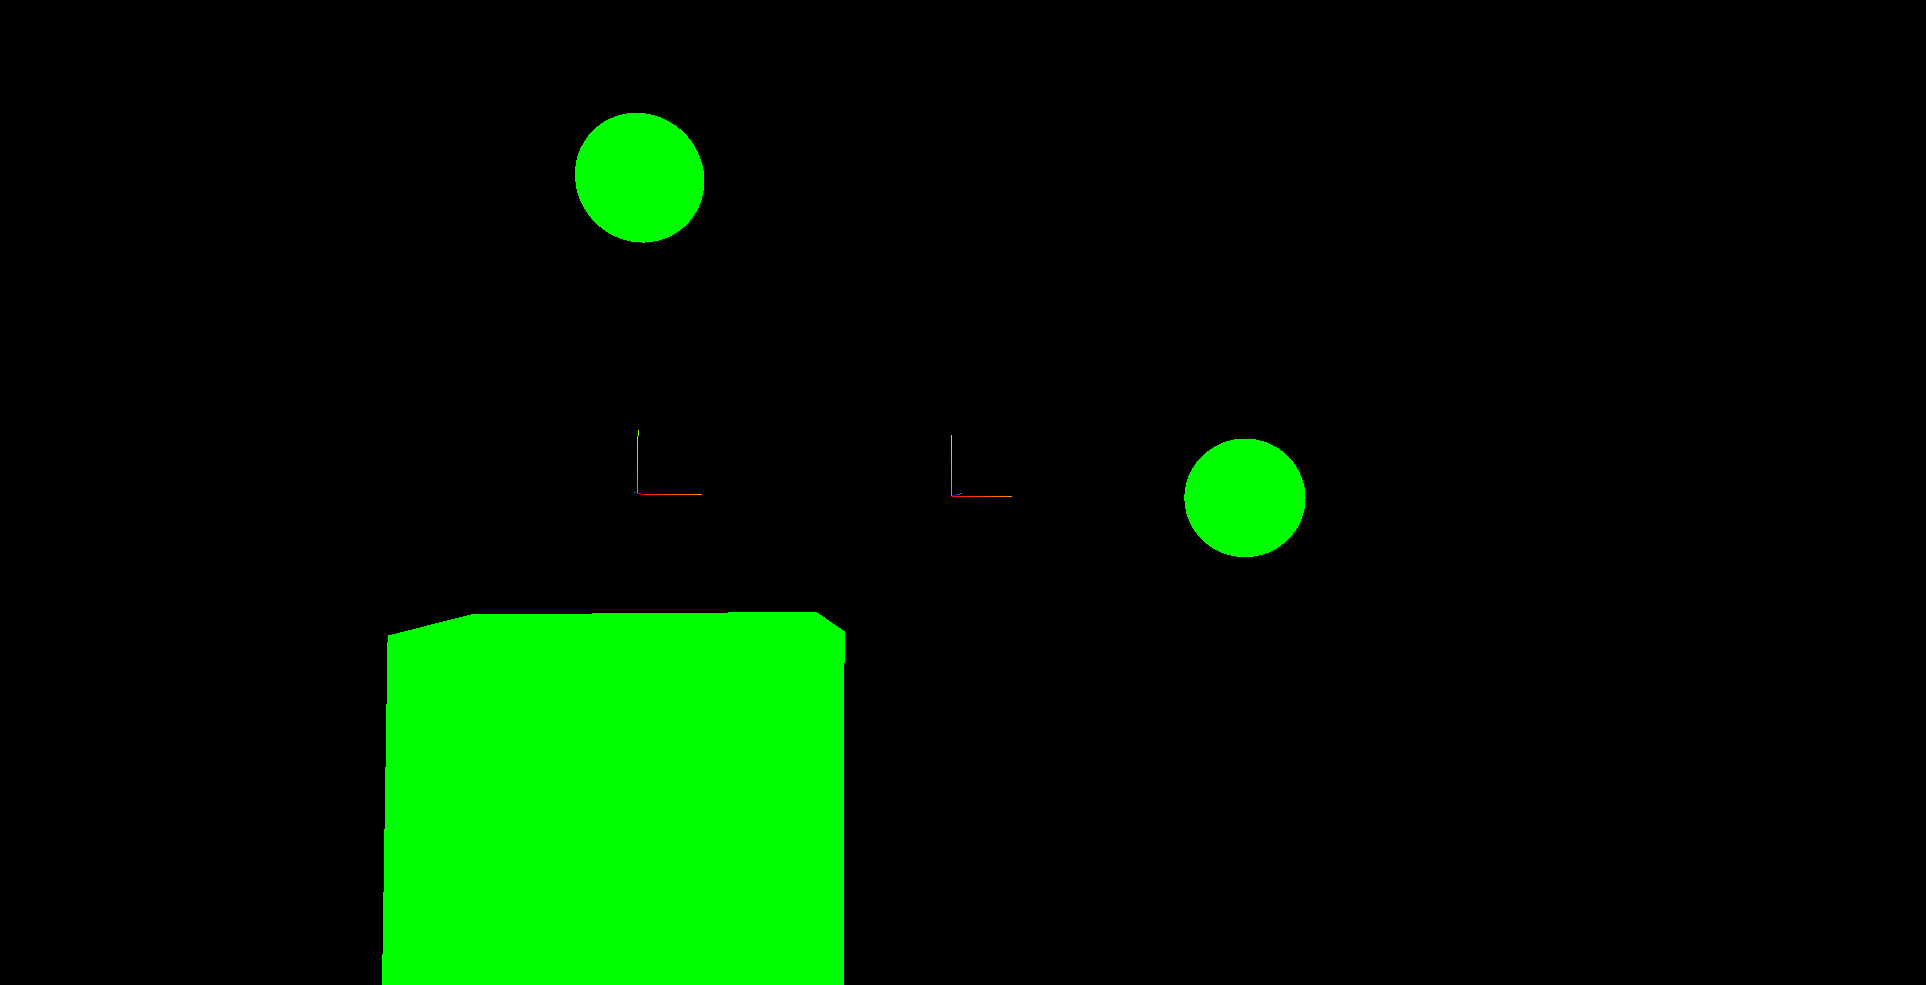
右边的坐标系是全局的坐标系,左边的坐标系网格组group的坐标系,可以发现添加到网格组中的mesh2和mesh3设置的坐标系是相对网格组group的坐标系来定位的
threejs基础篇学习是跟着掘金大佬那些年丶ny的文章编码总结的
作者:那些年丶ny
链接:https://juejin.cn/post/7054524640651116574
来源:稀土掘金
著作权归作者所有。商业转载请联系作者获得授权,非商业转载请注明出处。